tutorial

How to Turn Off PowerPoint 2016 Auto Layout Designer

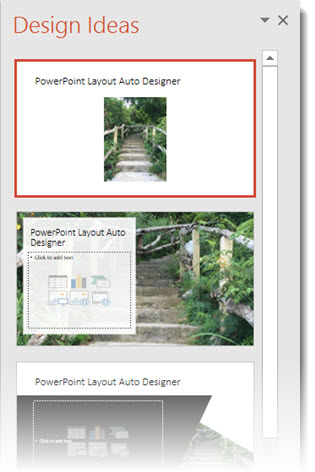
PowerPoint 2016 Auto Layout Designer is a new feature in this version. I wrote a post earlier this month with a review and example. It really is a great feature.

PowerPoint 2016 Auto Layout Designer 1

But, if you do not use Microsoft templates (or themes) for your presentations, the Designer tool is not helpful. Using a custom template does not stop Designer from popping open its action pane and offering to help design slides (even though it currently cannot). I have opted to turn off the Designer feature – at least until it has expanded use to work with custom templates.

Here’s how to turn Designer on/off

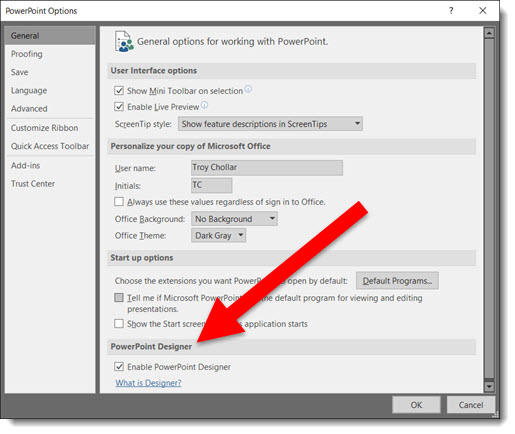
1. Go to FILE > Options > General Tab > PowerPoint Designer

2. Check or Uncheck to turn on or off

3. Click OK

PowerPoint 2016 Auto Layout Designer 2

-Troy @ TLC
By |2016-08-10T08:38:00-07:00February 19th, 2016|PowerPoint|

New Chart Types in Powerpoint 2016

How to insert New Chart Types in Powerpoint 2016

New Chart Types in Powerpoint 2016 for subscription users of Office 365 are being automatically added to your app (Note: This is only in subscription users of Office 365, PowerPoint 2016, and I have only looked at the Windows version).

There is bigger news than just some new styles. Microsoft is moving all charting to a new charting engine, and these new charts are coded with this new engine. Eventually, all legacy charts will be ported to the new charting engine, and, fortunately, this is still an in-process engine development (I am certain everyone will encounter a chart limitation depending on their chart data and the way they create charts) – so my take on things is “Yay new charts! But the new charting engine is not fully functional, so some options in the new charts are not fully functional yet.”

The good news is even though only subscription users can create these charts, all versions of Powerpoint (dating back to 2010 and Mac versions) can display chart types – editing and animation is somewhat limited when using previous versions…

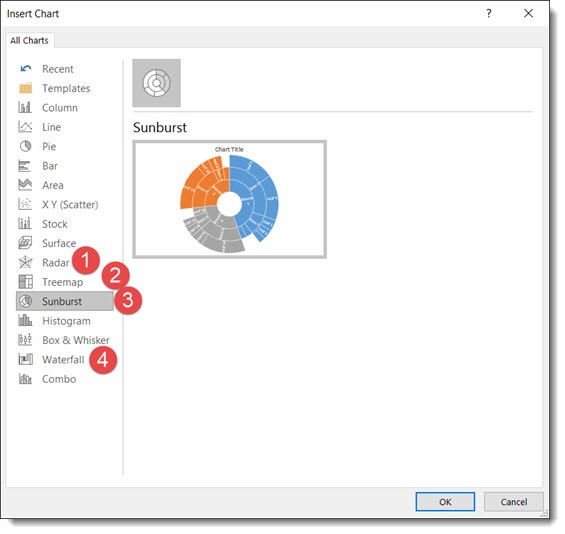
Here are 4 of the new chart types currently available (we will continue to see more chart variations added over time, look for another new chart type in the February updates).

Follow these Steps:

Go to INSERT > CHART

New Chart Types in Powerpoint 2016


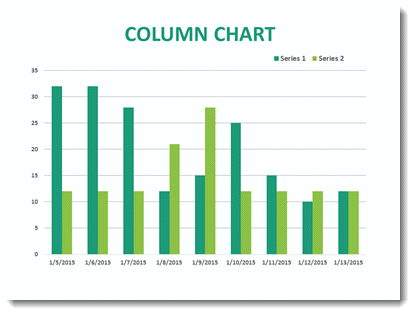
The Column Bar Chart

A standard Chart.

New Chart Types in Powerpoint 2016

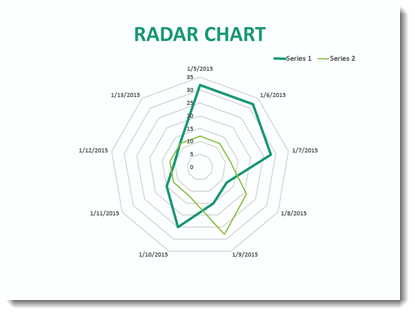
1. Radar Chart

That same data in the Bar Chart can instantly be updated.


New Chart Types in Powerpoint 2016

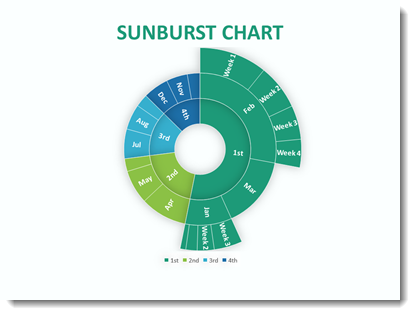
2. Sunburst Chart

This a great addition to the native PowerPoint chart options vs. going to external charting apps to develop.


New Chart Types in Powerpoint 2016

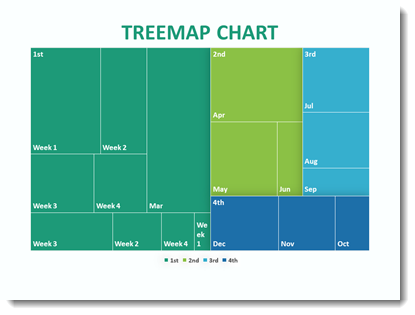
3. Treemap Chart

This Chart is new to PowerPoint 2016 native chart options.

New Chart Types in Powerpoint 2016

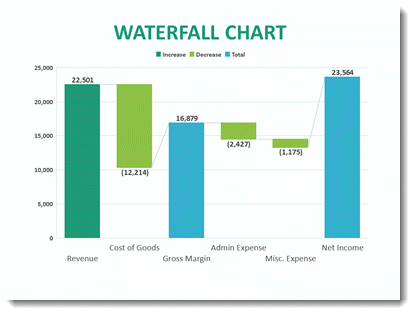
4. Waterfall Chart

This standard Column chart with negative data.

New Chart Types in Powerpoint 2016


-Troy @ TLC

By |2016-08-10T08:38:26-07:00February 17th, 2016|PowerPoint|

PowerPoint 2016 User Interface Color Options

How to change your User Interface Colors in Powerpoint

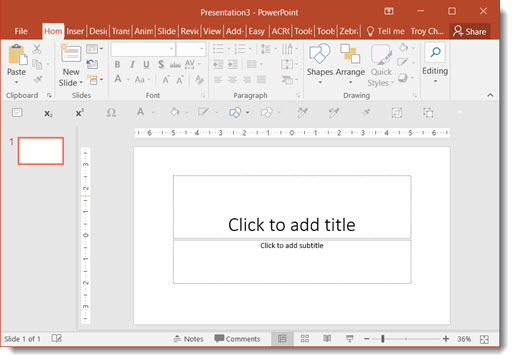
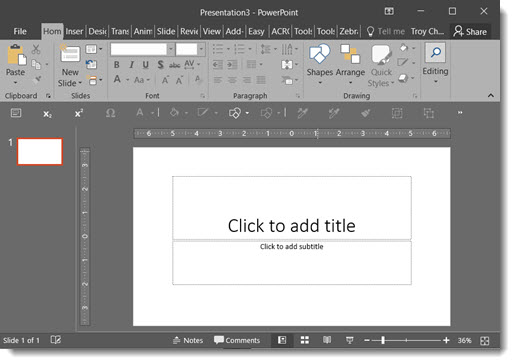
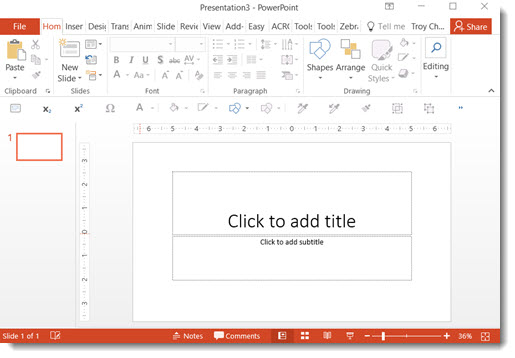
PowerPoint 2016 User Interface Color Options allow you to modify your interface by choosing up to 3 preset color schemes: Colorful (Orange), Dark Grey, White. You can change the ribbon, border and canvas area outside the slide.

Ideally, we, the users, could modify the color scheme to meet our needs – but that’s not something available. All three options are available and can be changed at any time. (Note: This is an Office wide update, so all other Office apps such as Outlook, Word, Excel, etc. will also get the same User Interface color scheme.)

Here’s how to Personalize your PowerPoint 2016 User Interface Color Options

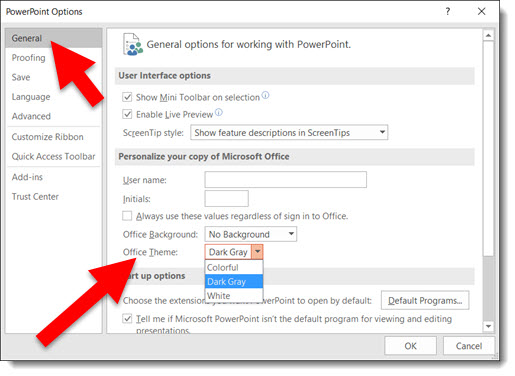
To adjust, go to FILE > OPTIONS > GENERAL tab. Then, go to OFFICE THEME drop down menu.

PowerPoint 2016 User Interface Color Options 1

Colorful (Orange on light grey):

PowerPoint 2016 User Interface Color Options 2

Dark Grey (Only option with no orange):

PowerPoint 2016 User Interface Color Options 3

White (Less Orange on White):

PowerPoint 2016 User Interface Color Options 4


-Troy@TLC

By |2016-08-10T08:38:46-07:00February 15th, 2016|PowerPoint|

Powerpoint 2016 Image Export Improvements

Two ways to export images from PowerPoint 2016

Image Export Improvements in Powerpoint 2016 have made things more interesting. Depending on previous version used, this may have been an okay result to a not-so-good result. But that has changed for the better with PowerPoint 2016.

Image Export Improvements Option 1

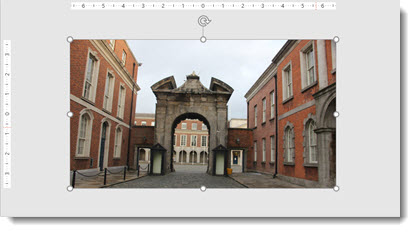
Here is my sample slide to demo the PowerPoint 2016 image export. Single widescreen slide  (13.33″x7.5″) with a full frame image.
 Powerpoint 2016 with Image Export Improvements 1

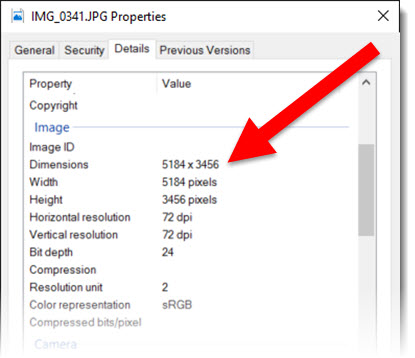
The original image inserted was very large (for PowerPoint needs) at 5184x3456px.
 Powerpoint 2016 with Image Export Improvements 2

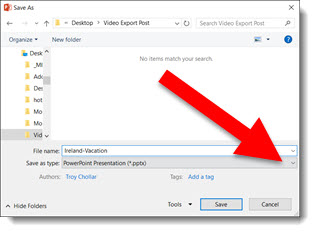
A great way to export a number of slides as images is through the SAVE AS option. This export option can be used for a single slide, a selection of slides, or an entire presentation.

Go to FILE > SAVE AS > and click the SAVE TO TYPE drop down.
 Powerpoint 2016 with Image Export Improvements 3

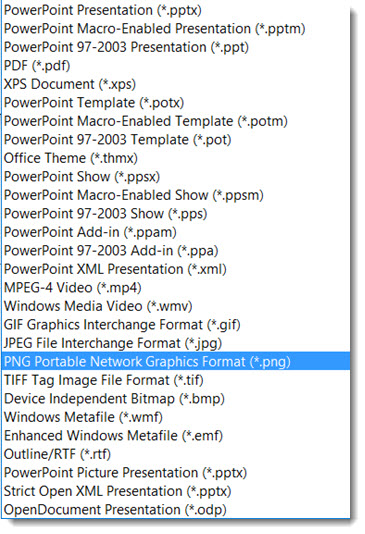
From the available list, select .PNG or .JPG format (personal preference).
 Powerpoint 2016 with Image Export Improvements 4

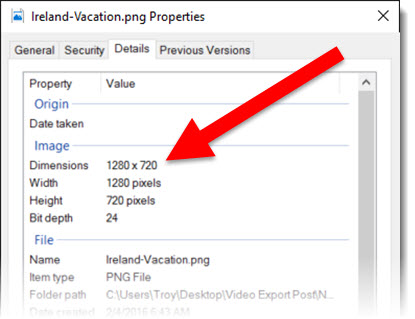
Exporting this way creates good image at 1280×720 – the low end of HD resolution.
 Powerpoint 2016 with Image Export Improvements 5


Image Export Improvements Option 2

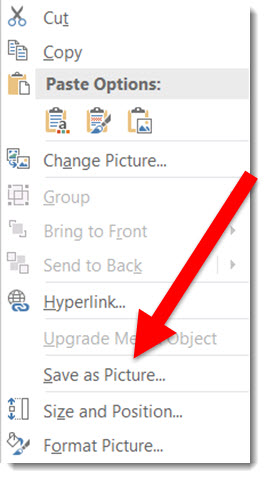
To export a single image, not a full slide, multiple images or slides. The advantage is a much higher resolution image.

Select the image, right click and select SAVE AS PICTURE.
 Powerpoint 2016 with Image Export Improvements 6

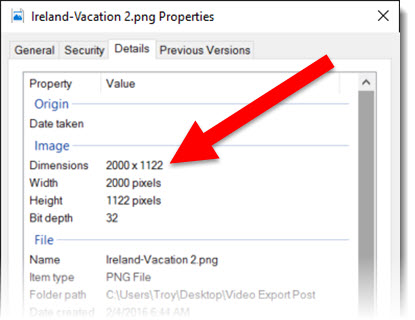
Exporting this way creates a much higher resolution image (depending on the original image size). This image exported to 2000x1122px.
 Powerpoint 2016 with Image Export Improvements 7


Conclusion

The 2 options are available and use based on what is needed. I will also say that when working with very unique page sizes (e.g. 50″x 9″), slide export as images do a much better job than previous versions.  Note: there are several 3rd party add-ins that export slides as images in a variety of formats and to any pixel size needed (Here at TLC Creative, all computers have PPTools Image Export installed).


-Troy@TLC


By |2016-08-10T08:39:10-07:00February 12th, 2016|PowerPoint|

Video Export Size (HD!)

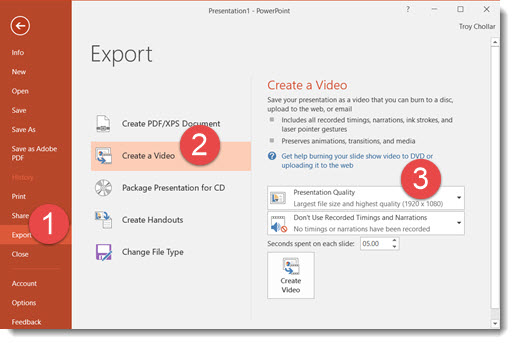
Another behind the scenes upgrade in PowerPoint 2016 is the video export size options. Now true, 1920×1080 HD video can be exported from PowerPoint.

Go to FILE > EXPORT > CREATE A VIDEO
Video Export Size 1

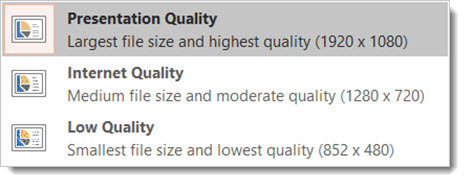
The export size options have been revised to 1920×1080, 1280×720 (the PPT 2013 highest res option), and 852×480.

Video Export Size 2


-Troy @ TLC

By |2016-08-10T08:39:43-07:00February 10th, 2016|PowerPoint, Software/Add-Ins|

iPhone Hotspot Fix for Windows 10

With continuous travel, I use my iPhone Hotspot option to get my laptop online quite often – it is often faster than the hotel or airport WiFi and keeps me from paying ridiculous $20/day internet fees. Recently, something went awry and the connection would not connect – very frustrating. I tested with 3 different Windows 10 computers, all 3 did not connect. Then, I tested with an iPad, which connected fine. So I identified that the phone Hotspot works and it was not one specific computer, so it had to be with the iPhone setup.

iphone hotspot 3

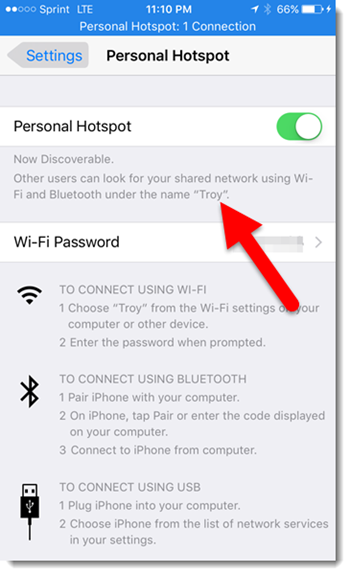
After doing some online research and more testing, I solved the issue. Windows 10 does not allow any special characters in the phone name. In my case, the phone name was “Troy’s iPhone.” As soon as I removed the apostrophe (special character), every computer was able connect to the iPhone Hotspot. My phone is now simply named “Troy.”

iphone hotspot 4

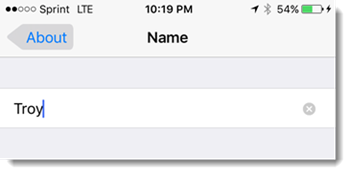
To change an iPhone name, go to SETTINGS > GENERAL > ABOUT > NAME (this does not affect iTunes account in recognizing iPhone).

iphone hotspot 5

– Troy @ TLC

By |2016-08-10T08:43:51-07:00January 25th, 2016|Resource/Misc|

Awesome Screenshot.com – online screen capture app

[text]All of the designers at TLC use Snagit for screen shot needs; it is installed on every computer we have. Windows and Mac OS both have built in screen capture options that are cute and nice, but not robust. We recently found Awesome Screenshot.com which is a great online screen share, and edit app, something we can use when working on a guest computer.[/text]

Awesome screenshot 12

[text]Awesome Screenshot is free for 30 images and 1 project folder. The premium option (currently $8.99 promo, regularly $11.99 year) has unlimited image captures and project folders. The Chrome browser is the only one that supports the add-in, but the annotation and editing features can be used on any browser. The Chrome add-in makes Awesome Screenshot a more full featured option (eg. Use Chrome for this app).
[/text]
Awesome_1

[text]Possibly one of the coolest features of Awesome Screenshot is adding comments to screenshots (much of what we use SnagIt for) and sharing directly from the site. In addition, other users are able to comment on the screenshot image as well, so this can make collaborative feedback simpler than ever! Some other cool tools are highlighting or blurring text. But the editing tools are more limited than other apps with fewer less colors, shapes, etc. Still, the ability to organize the screenshots by project is unique and pretty awesome (pun intended)![/text]
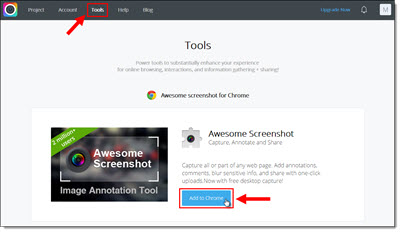
[text]Use Chrome and create an account. Under the Tools tab, select Add to Chrome, and follow the steps to install.[/text]

[text]After installed, Chrome has this app icon.[/text]

Awesome_2

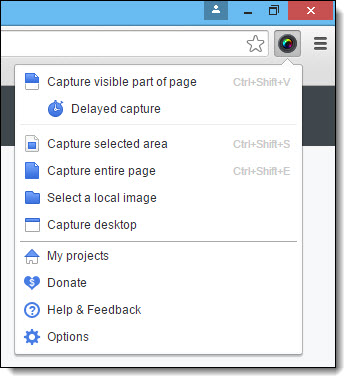
[text]Click the Awesome Screenshot icon to view capture options.[/text]
Awesome_3

  • Capture visible part of page: Captures only the visible area of the current browser page
  • Delayed capture: Captures only the visible area of the current browser page three (or five) seconds after clicking
  • Capture selected area: Allows you to select the area of the current browser page to capture using a marquee selector
  • Capture entire page: Captures the entire area of the current browser page (include non-visible areas that require scrolling to see)
  • Select a local image: Allows you to choose an image that is saved locally to your computer or drive[/list_item]
  • Capture desktop: Allows you to select from any open windows or computer screen(s) to capture
  • My projects: Takes you to the Projects library
  • Options: Allows you to update the settings, such as image format, shortcut, and delay time specifications

[text]In addition, you can drag and drop existing images into the open project folder of your choice or select “Add images” from the project folder page on the website.[/text]

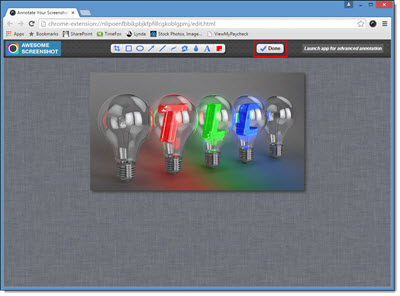
[text]Capture a screenshot (all or part of the screen) and it shows up in the simplified Annotation (or edit) screen. Save the image to a project folder to get to the full editing options.[/text]
Awesome_4

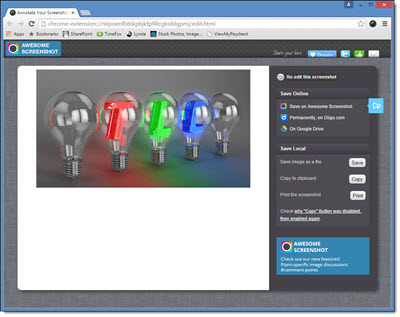
[text]There are several save options – save online for best collaboration.[/text]
Awesome_5

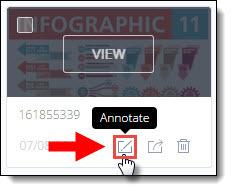
[text]To edit, click the Annotation icon while hovering over the image.[/text]
Awesome_8

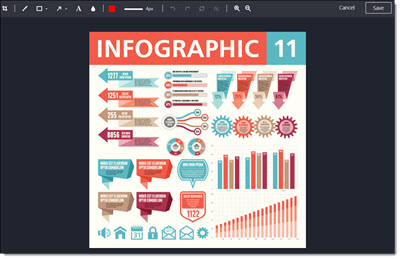
[text]The top bar is the editing tools: Crop, draw, shapes (rectangle or oval), arrows/lines, text, blur, color, line weight, undo, redo, reset, delete shape, and zoom.[/text]
Awesome_9

[text]Save edits and add comments. By default, it goes to the comments page. You can also select other images in the project folder, share the image, return to the Annotation page, or view the comments list.[/text]
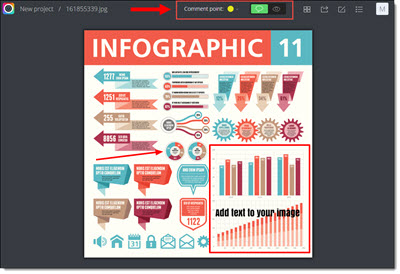
Awesome_10

[text]Click the “eye” icon to exit the page, or right-click select Save image as to get a local version of the image on your computer – which can be added to a presentation.[/text]
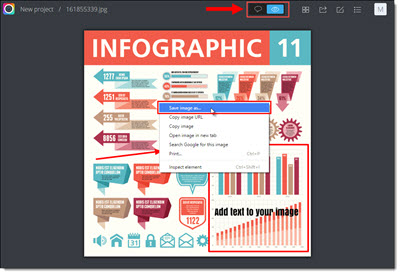
Awesome_11

[text]Thanks to staff designer Michelle for this review.
– Troy @ TLC[/text]
By |2016-08-10T09:03:57-07:00July 17th, 2015|Software/Add-Ins|

Set An Angle In PowerPoint

As everyone that has worked in PowerPoint knows, matching rotated items to the same angle can be a challenge. This is especially true when using the rotation handle (the click and drag method). To take the frustration out of this task, let us walk you through manually setting the angle and easily getting multiple items exactly aligned with the same rotation!

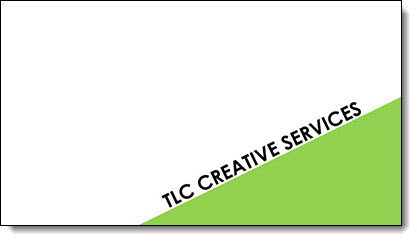
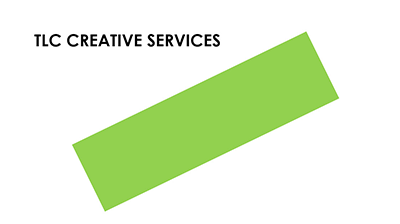
Here is our sample slide being created. It has a green rectangle (not a triangle, so we can know the exact angle), and a text box matched to the same rotation as the green rectangle.

Set Angle 5

1. First add a rectangle.

Set Angle 1

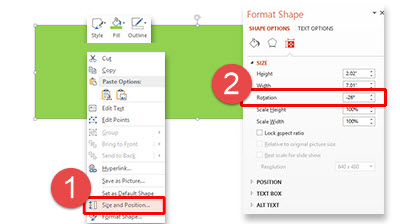
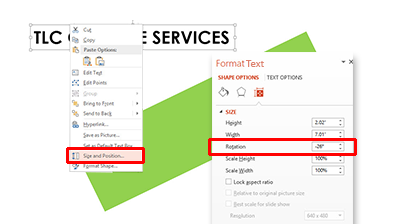
2. Next, bring up the Format Options Dialogue Box either by going to Format tab on the tool bar or by right clicking the shape.

– Select SIZE AND POSITION from the right-click pop up menu.

– The Format Shape pane opens to Size and Properties tab.

Set Angle 1a


3. In the SIZE section is the ROTATION box.
4. Enter any angle needed (this has a live update, so you can see the angle applied to selected item). For this sample, we used -26 degrees.

Set Angle 2
5. Add a text box and type (we added TLC CREATIVE SERVICES).

Set Angle 3

6. With the text selected, we followed the same steps above to rotate the text. Using the Format tab on the tool bar, or by right clicking the text, bring up the Format Options Dialogue Box.

– Select SIZE AND POSITION from the right-click pop up menu.

– In the ROTATION box, enter the angle as the rectangle (-26 degrees in our sample).

Set Angle 3a

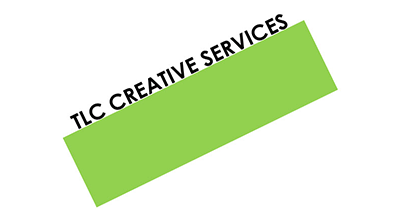
7. Position the angled text box above the rectangle.

Set Angle 4

8. Select both the rectangle and text box and move to the lower right of the slide for a great visual layout using perfectly aligned and angled elements for your design!

Set Angle 5

– Troy @ TLC

By |2016-08-10T09:08:31-07:00February 27th, 2015|Tutorial|

Design Idea – Image Fill Text (Part 2)

As a continuation of the previous post, we are looking at some of the advanced image sizing and placement options for Image Fill Text. Thanks to TLC staff designer, Christie, for this step-by-step tutorial and examples.


We are working from the same sample text.

Image Fill Text 1

1. Select the text to add an image fill too.

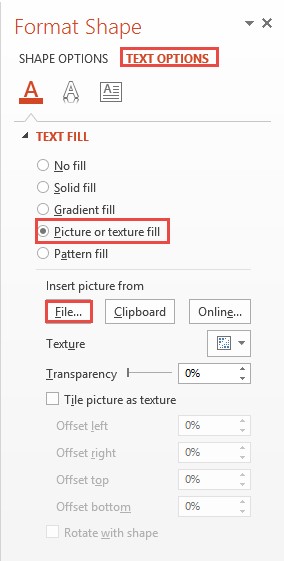
2. Open the FORMAT SHAPE pane to the text options.

– How to…

3. Select TEXTURE OR PICTURE FILL.

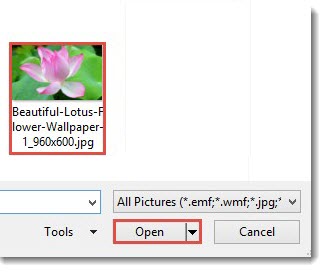
4. Click FILE.

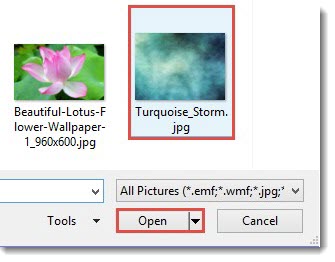
5. Select an image. For this example, I am using a nice flower image that has lots of vibrant colors.

Image Fill Text 0

6. The auto fill position and size do not really do much for the overall visual.

Image Fill Text 13

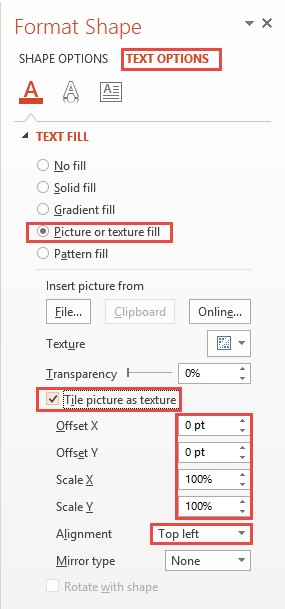
7. Select TILE PICTURE AS TEXTURE. This will allow access to additional formatting options.

Image Fill Text 9

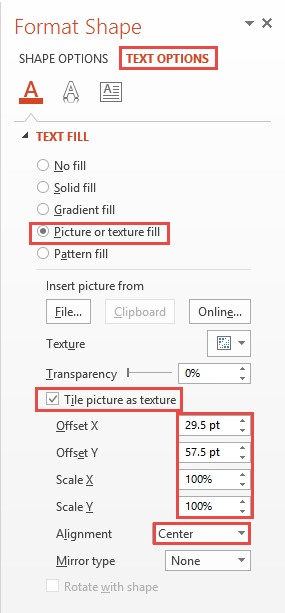
8. Adjust the OFFSET (X and Y), SCALE (X and Y) and ALIGNMENT options to size and position the image for the best visual.

Image Fill Text 11

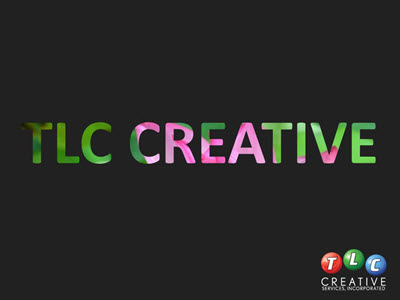
8. Now the image fill adds a lot of the pink tones and a bit of the green on the edges.

Image Fill Text 5


By |2016-08-10T09:09:17-07:00February 20th, 2015|Resource/Misc, Tutorial|

Design Idea – Image Fill Text (Part 1)

The previous post walked through how to “knock out” text from a shape. One negative to that technique is the text is no longer editable. In this post, we are adding a visual styling to text AND keeping it editable. All text can have a color fill, gradient fill, texture fill or PHOTO/IMAGE fill.

Here is my sample text slide, one a black background to help the fill options display.

Image Fill Text 1

1. Select the text to fill (*Tip: It does not have to be all of the text in a text box, select just the text you want – this can be a great solution for adding accent focus on specific text).

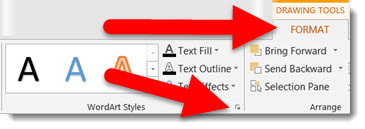
2. Go to FORMAT >> WORDART STYLES section >> FORMAT TEXT EFFECTS to open the FORMAT SHAPE pane to the text formatting tab.

Image Fill Text6

3a. Select PICTURE OR TEXTURE FILL.

Image Fill Text 8

3b. This defaults to filling text with the first texture in the Microsoft library.

Image Fill Text 2

4. Click FILE.

5. Select an image to use as the fill – I am using an abstract image.

Image Fill Text 12

And here is the stylized text, which is editable (change the font, size, text, etc.) and can have any PowerPoint styling options applied (drop shadow, bevel, glow, etc.).

Image Fill Text 3


– Troy @ TLC


By |2016-08-10T09:09:38-07:00February 18th, 2015|Resource/Misc, Tutorial|
Go to Top