tutorial

Make Your Own Custom Bullet Collection

Perhaps you have some custom picture bullets that you use ongoing. Never fear, there is a fairly easy way to organize your own collection.

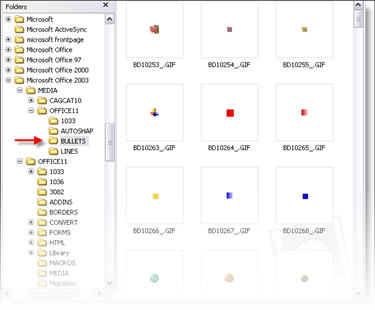
(1) Either create your own folder to contain the bullet images or use the Office default folder (see item #1 on 5-8-06 post).

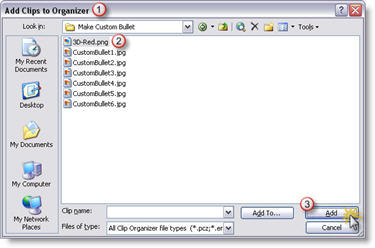
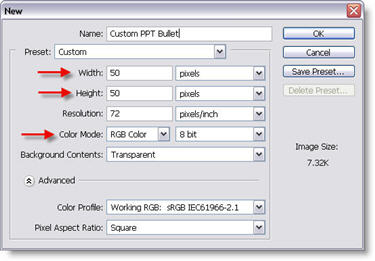
(2) Copy picture bullet images into folder

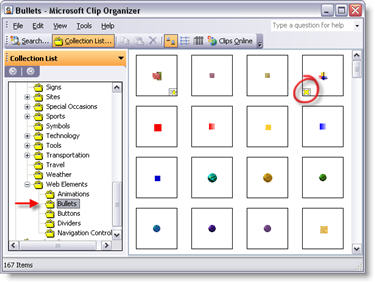
(3) Open the Clip Organizer (see item 3 on the 5-6-06 post) and go to FILE >> NEW COLLECTION.

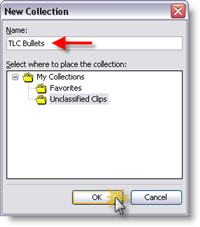
(4) Name the collection and click okay.

(5) Select the new collection in the COLLECTION LIST column. Go to FILE >> CLIPS TO ORGANIZER >> ON MY OWN.

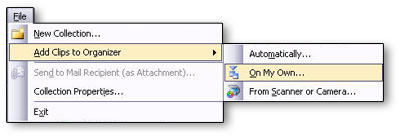
(6) Repeat for all images in your personalized collection. Note: You can use the >> CLIPS TO ORGANIZER >> AUTOMATICALLY to search the computer, then select the specific folder to add all new images at one time.

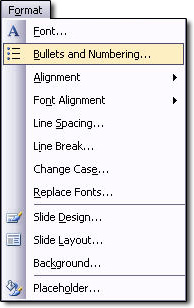
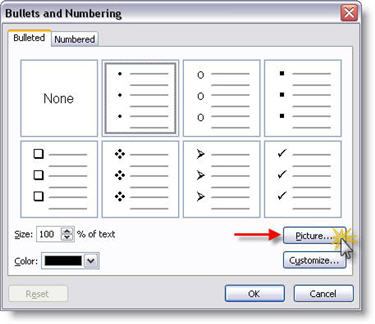
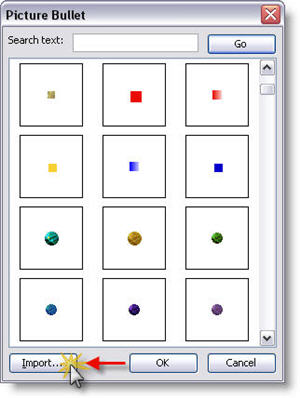
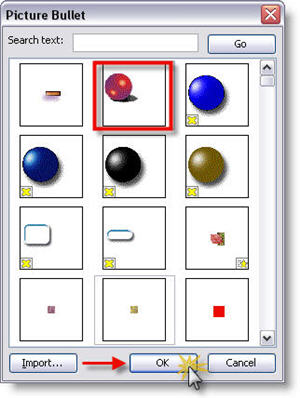
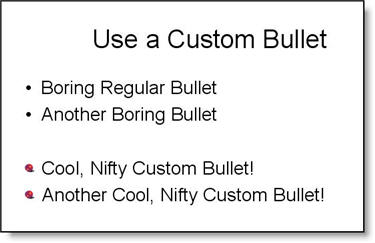
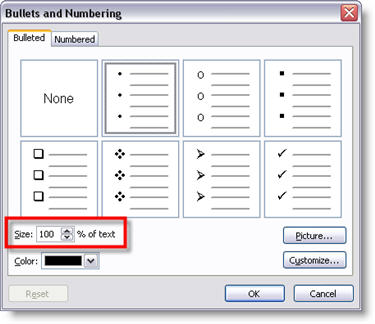
(7) Now when you add Custom Picture Bullets to any presentation, your collection of bullets is available!

-Troy @ TLC

By |2016-11-17T13:57:15-07:00May 10th, 2006|Tutorial|

Remove Default Picture Bullets

So, maybe like me you find some of the default picture bullets one you will not use… So here is where to go and find the hidden files to remove them.

(1) The first step is to open Windows Explorer and navigate to the folder that contains the images. Go to C: >> PROGRAM FILES >> MICROSOFT 2003 (or current installed version) >> MEDIA >> OFFICE 11 >> BULLETS (I said the files were hidden).

(2) Now we need to go to the Clip Art Organizer (see May 6 post). In the Clip Organizer go to OFFICE COLLECTIONS >> WEB ELEMENTS >> BULLETS. You will note that any of the default bullets you deleted in step #1 has the yellow, no link, “x”.

(3) You can remove the non-linked icons as described in the May 6 post.

– Troy @ TLC

By |2016-11-17T13:57:53-07:00May 8th, 2006|Tutorial|

Removing Unused Custom Bullet Icons

For virtually every PowerPoint template I design, it includes a custom set of picture bullets. Up until recently I was frustrated with having the old icons still sitting in the Custom Picture Bullets dialog when they no longer existed on my computer. But there is a solution – although it is a bit hidden. Here is how to clean up your PICTURE BULLETS dialog and remove the old and unused!!!

(1) Let’s review how we insert a custom picture bullet. With bulleted text selected, go to FORMAT >> BULLETS AND NUMBERING. On the BULLETED tab click the PICTURE button.

(2) Here you can see a small portion of the custom bullets that were used for previous presentations. The problem is, the source files for these are in the archives, not on the computer. They are completely useless here. Of course the little yellow X seems to be a way to delete them… but it is not. The yellow X tells you there is no item linked to this icon (which is why we want to delete it 🙂 )

(3) To remove these icons go to the Clip Art task pane; INSERT >> PICTURE >> CLIP ART. Click the ORGANIZE CLIPS link at the bottom.

(4) Inside the Microsoft Clip Organizer you need to:
1. Click COLLECTION LIST to view the pane
2. Open MY COLLECTIONS and UNCLASSIFIED CLIPS
3. Click on the unwanted icon
4. Select DELETE from the menu
5. Done! (repeat for as many as needed)

– Troy @ TLC

By |2016-11-17T13:58:24-07:00May 6th, 2006|Tutorial|

Add Custom Bullets to a Presentation

Now that we have developed our custom picture bullet in PhotoShop, we can insert them into a PowerPoint presentation. The process is fairly simple (Note: I am using PowerPoint 2003 for this tutorial).

(1) Select the bulleted text. Go to FORMAT >> BULLETS AND NUMBERING.

(2) From the BULLETS AND NUMBERING dialog click PICTURE.

(3) From the PICTURE BULLET dialog click IMPORT.

(4) Note the next dialog box is the ADD CLIPS TO ORGANIZOR dialog (import later in this series). From here find the .png image created and click ADD.

(5) Find the newly added picture bullet in the PICTURE BULLET dialog and click OK.

(6) Your selected bulleted text now has a COOL and NIFTY custom bullet!

(7) If the bullet is to large or small, select the bulleted text, go to FORMAT >> BULLETS AND NUMBERING, and use the SIZE % OF TEXT to adjust.

– Troy @ TLC

By |2016-09-16T11:51:43-07:00May 4th, 2006|Tutorial|

Create a Custom PowerPoint Bullet

This is the first in at least a 4 part mini-series. Custom picture bullets were introduced with PowerPoint XP and they make a great addition to any presentation! I use custom picture bullets in many ways, always with the idea of how can they coordinate with the overall presentation. My custom bullets have ranged from simple color coordinated stylized shapes, to miniatures of the company logo, to small object icons that relate to the subject.

The first step is developing the artwork for the custom bullet. Note: I am using PhotoShop CS for this tutorial, but the process can be applied to virtually any image editing application.

(1) Create a new document. Note the file size is very small and we ALWAYS use RGB for PowerPoint images.
New PhotoShop File

(2) Create your bullet artwork, sized to stay within the 50x50px area. I am creating a simple 3D sphere with a drop shadow.
Artwork for custom bullet

(3) Go to IMAGE >> CANVAS SIZE. Here we are going to increase the canvas size so the final image will have our bullet artwork horizontally on the far left and centered vertically.
Adjust Canvas Size
1. This is our original file size
2. Use this setting to force the new canvas area to keep the artwork on the far left, but allow it to be vertically centered.
3. Increase the width to 90px, this will provide a space between our bullet and the PowerPoint text.
4. Increase the height to 70px, this will vertically center our bullet on the PowerPoint text.

(4) The final step is to save the image as a .png with transparency (see “The Power of Ping” tutorial here for details).

– Troy @ TLC

By |2016-09-16T11:50:53-07:00May 2nd, 2006|Tutorial|

Create Shadow Boxes

A simple shadow element can add depth and eliminate some of the flat look and feel of a slide. In the last post I added a simple shadow box to a list box and a chart, here is how to create the shadow box – using PowerPoint autoshapes.

First create a rectangle. Set the fill to black and no outline/stroke.
PowerPoint rectangle autoshape

With the rectangle selected go to the Fill Effects.
Fill Effects

(1) In the Fill Effects window
(2) Go to the Gradient tab
(3) Move the slider all the way to the right/lighter
(4) Adjust the From opacity to 40%
(5) The To opacity should be at 100% (set when we moved the slider in #3)
(6) In the Shading Styles select From Center
Fill Effects Settings

Your rectangle will now look like this:
Smooth Gradient Filled Rectangle

The best thing about this rectangle is that it is a native PowerPoint autoshape. It can be adjusted as large or small as needed without any distortion or loss of quality. In addition you can go back into the Fill Effects and change the color and the inner opacity to best suite your slide!

Troy @ TLC

By |2016-09-16T11:44:50-07:00April 20th, 2006|Tutorial|

Where’s the Music?

I hear about this problem lots and lots: “I created my presentation, sent it (via CD, email, intranet, etc) and the other person sees the presentation but does not hear the music – what happened?”

PowerPoint is limited in its ability to embed any multimedia, instead it links to an external file and plays it. So when you add an .mp3 music track to a presentation – it is not inside (embedded) with the presentation – and it MUST be distributed with the presentation for it to work. Here is the best practice:
– Copy the selected audio file to the same folder as the presentation
– Insert the audio file into the presentation
– Always send a copy of the presentation AND the audio file


Next, the exception to the rule.

Troy @ TLC

By |2016-09-16T11:36:21-07:00March 29th, 2006|Tutorial|

Turn Off PopUp Toolbar If Not Used

During church service I noted a very distracting onscreen prescence. Perhaps you have seen it too. During a slide show do you see this in the lower left corner:
Onscreen Navigation PopUp Toolbar

If you do not know what it is or how to use it, I recommend turning it off. The PopUp Toolbar is designed for onscreen interactivity (advance, go back, notate, end, etc.) and is especially useful for tablet PC operation. But the vast majority of people (myself included) have no use for this tool. It is easy to turn off (more…)

By |2016-09-16T11:16:59-07:00January 16th, 2006|Tutorial|
Go to Top