tutorial

Pick the Exact Color – Fast and Easy

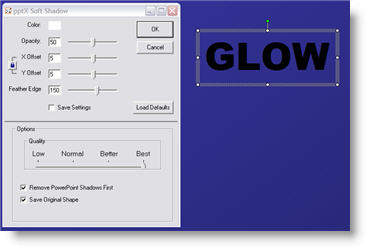
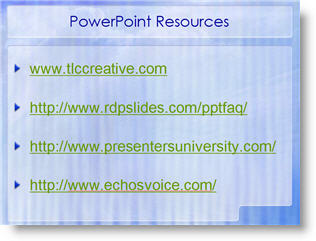
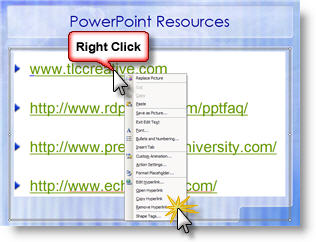
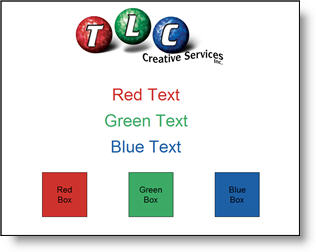
A perfect compliment to any version of PowerPoint is PPTXtreme’s Color Picker. The great thing about this sample slide is the text and box fills are the exact same color and colors pulled from the logo. No guessing, just point and click to select the exact color!

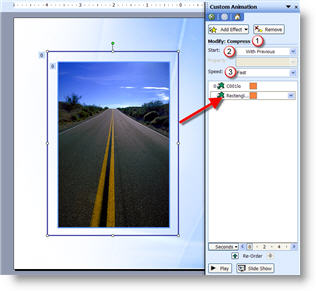
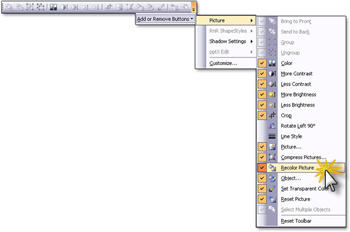
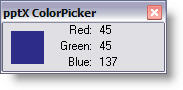
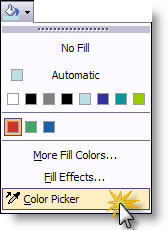
When one of the Color Picker tools is selected a small information window opens and wherever your cursor is, the color is displayed. Click on anything on your monitor and that color is selected.

Color Picker can select the color for Text:

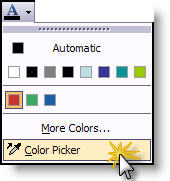
For Autoshape Fills:

For Lines:

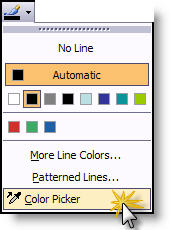
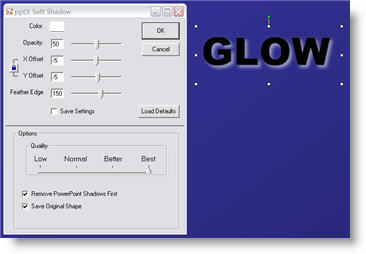
It also works with selecting dropshadows. At $20 this is an invaluable tool to add to PowerPoint.

– Troy @ TLC

By |2016-11-17T14:57:33-07:00November 15th, 2006|Software/Add-Ins|

Create a Glow with PPTXtreme SoftShadow

With creative use of PPTXtreme’s SoftShadow add-in instanst “Soft-Glows” can be created. If you have not checked out this very useful add-in go here.

(1) Select text, autoshape or image. Here are my setting for adding a white drop-shadow.

(2) Select the object again and apply a second softshadow. Note the negative (-5 and -5) X and Y positions, so the 2nd softshadow is positioned in the upper left. Here are my settings for this second softshadow.

(3) The result is a photoshop quality glow.

– Troy @ TLC

By |2016-11-17T14:47:06-07:00November 7th, 2006|Software/Add-Ins, Tutorial|

Fix Links Pro Fixes A Hidden Problem

Sometimes you don’t want to give away to much information. And when an Excel chart or movie is inserted you are giving away information about your network/file structure.

As example, right click on a movie that is inserted into PowerPoint and choose EDIT.

The movie information includes the path where it came from.

To eliminate this information I use the Fix Links Pro add-in (website is here).

(1) Open Fix Links Pro and choose REPAIR

(2) It generates a report about all multimedia and embedded files in the presentation. The key is where the report says “now path-free”.

(3) Now right click the movie, choose EDIT and see that the path information has been removed

– Troy @ TLC

By |2016-11-17T14:32:26-07:00October 25th, 2006|Software/Add-Ins|

Send Presentation to Second Monitor/Projector

With the computer set for Extended Desktop mode (see October 1 post), next is to setup PowerPoint to make use of the second monitor.

In PowerPoint go to: SLIDE SHOW >> SETUP SHOW

In the Multiple Monitors section click the drop down menu and select “Monitor 2 Default Monitor.”

Now the slide show will be on the second monitor (usually a projector) and your monitor will remain in Slide Design Mode.

– Troy @ TLC

By |2016-11-17T14:25:04-07:00October 3rd, 2006|Tutorial|

Check For, and Turn on, Extended Desktop

If you want to use PowerPoint’s Presenter View, or display the presentation through a projector while having slide design view or slide sorter view on your monitor, the computer must support Extended Desktop.

To see if your computer supports extended desktop go to: START >> CONTROL PANEL >> DISPLAYS >> SETTINGS tab. If you have two monitor icons, you should be good to go.

Click on monitor 2 and then activate the “extend my windows desktop onto this monitor.”

– Troy @ TLC

By |2016-11-17T14:24:43-07:00October 1st, 2006|Tutorial|

Animated Frame Entrance

Using native PowerPoint elements and animations, add a dynamic entrance to photos.

1. Insert a photo, or other graphic, to a slide.

2. Add a Line Color (aka stroke) to the photo. Use a color that coordinates with the image or background and is thick enough to be visible (sample here is 2 1/4pt.).

3. Now add a rectangle autoshape. Size it to be slightly larger than the photo and set the Fill to none. Add the same Line Color and weight as applied to the photo.

4. Animate the photo: EXPAND, FAST, WITH PREVIOUS

5. Animate the frame: COMPRESS, FAST, WITH PREVIOUS

Done! I have also uploaded a sample presentation of this animated slide. Click here to download.

Troy @ TLC

By |2016-11-17T14:23:58-07:00September 27th, 2006|Tutorial|

Make the “Hidden” Marker Disappear

So you designed a presentation using a ‘hidden’ graphic to identify the hidden slides during review. Then during the show you manually enter the slide number to show the hidden slide. Now the audience sees the slide AND the full slide ‘hidden’ graphic – oops.

In this case all can work out with a little custom animation. Here is our example slide:

The animation for this slide has both lines of text with animated entrances:

The solution is first to apply an Exit animation to the hidden image. I use EXIT >> DISAPPEAR >> WITH PREVIOUS.
The second step is to make this the first animation in the sequence.

Now you have added a custom graphic that makes it easy to identify which slides are hidden – in slide sorter and printouts. The slide can also be used during a presentation, because the hidden graphic is never shown in slide show mode!

– Troy @ TLC

By |2016-11-17T14:22:27-07:00September 19th, 2006|Tutorial|

Find the RECOLOR button

I like to setup PowerPoint so I can get edit accomplished in the fewest clicks. If you find a need to use the RECOLOR function (see Saturday’s post), you can add the RECOLOR button to your PICTURE toolbar.

Click the far right edge of the picture toolbar, choose ADD OR REMOVE BUTTONS >> PICTURE >> RECOLOR PICTURE. Now select the Excel table (that does not have data with it), click the recolor button, adjust colors, done.

– Troy @ TLC

By |2016-11-17T14:14:47-07:00August 30th, 2006|Tutorial|

How Long Was Each Slide Displayed?

Turning PowerPoint presentations into webcasts has become a fairly routine request. One of the more difficult aspects of recreating a presentation is knowing when the presenter advances the slide. This is critical in syncing video of the presenter with the slides. Here is one method I have used – and best of all it is built into PowerPoint!

A few points about this process:
1 – This is at larger conferences where I am backstage running the presentations.
2 – I am running a backup computer and I run this timer on it.
3 – I use a remote system so both computers advance simulataneously.

(1) With the presentation open go to SLIDESHOW >> REHEARSE TIMINGS

(2) The slide show begins and a pop-up timer is visible.

TIP 1: As soon as the Timer window is visible click the PAUSE button. When the meeting begins click the PLAY button (the last thing I want is to have to many things distract me at the beginning of a meeting!).

TIP 2: Even though the timer is running on the backup computer, drag the timer to the very bottom so it is virtually invisible – just in case you have to switch to it!

(3) When the presentation is done click YES to the save the timings.

(4) Each slides time onscreen is seen next to the slide thumbnail. Be sure to do a SAVE AS to keep these timings for reference when building the webcast.

– Troy @ TLC

By |2016-11-17T14:11:56-07:00August 16th, 2006|Tutorial|

Ugly Hyperlinks in Your Presentation?

For reference you add a URL to a slide. But the text changes color, an underline is added, and in general is ugly!

You have options to bring back the aesthetics of your slide – here is the easiest. Select the text box and right click on the hyperlink and choose REMOVE HYPERLINK.

This strips out the active link programming and changes the URL into plain text. It will not be able to be clicked as an active link after this. The result is happy, beautiful, text once again!

– Troy @ TLC

By |2016-11-17T14:09:45-07:00August 6th, 2006|Tutorial|
Go to Top