text

Automatically Insert ‘Real’ Lorem Ipsum Text

And there is more!!

In the previous posts we used the secret coding that has been in PowerPoint since at least PPT 2003. With Office 2007, Word got an update to the coding – but not PowerPoint. But in PPT 2010 the update is included! That is to change the typed code to “=lorem()” and get a real “Lorem ipsum dolor sit amet…” text.

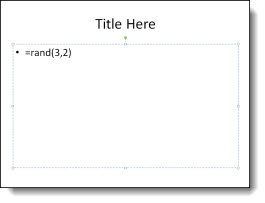
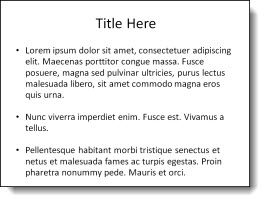
Here is my sample slide again, but now the “rand” is replaced with “lorem”.

Click the enter key and I get 3 paragraphs of real lorem ipsum text (note each paragraph is unique text):

But the ability to customize the number of paragraphs and lines per paragraph detailed in the previous post is not available using the ‘lorem’ option… Maybe in the next version.

– Troy @ TLC

By |2016-08-16T11:04:52-07:00September 20th, 2010|Tutorial|

Customize The PPT Auto Lorem Ipsum Text

But wait, there’s more!

In addition to the secret code shown in the previous post, you can add parameters to control how many paragraphs of sample text – and how many lines per paragraph.

Here is my sample slide, I have have added the parameters to insert 3 paragraphs of 2 lines each with “=rand(3,2)“.

Just click the enter key and it turns into this (3 paragraphs of 2 lines each):

– Troy @ TLC

By |2016-08-16T11:05:27-07:00September 18th, 2010|Tutorial|

Auto Lorem Ipsum Text

This is a cool and useful trick that has been in PowerPoint for a few versions. It is good for creating quick sample slides. Basically there is a bit of hidden code in PowerPoint that you can activate by typing “=rand()“.

Here is my sample slide (default PPT template) and I have typed the ‘secret’ coding.

Then press enter and it fills the text box (and beyond) with “The quick brown fox…” text.

– Troy @ TLC

By |2016-08-16T11:05:42-07:00September 16th, 2010|Tutorial|

Clear Formatting Fast (With Keyboard Command!)

Q – What is the fastest way to clear the formatting to text, shape or picture?
A – Select and use keyboard

Here is my example. I have formatted the company name with a gradient fill and reflection. Now I want to go back to just the original text (bottom). To get there I just select the text and click the CTRL + SPACEBAR. Done.

– Troy @ TLC

By |2016-08-16T11:07:13-07:00September 3rd, 2010|Tutorial|

3D Metallic Text Style

For a recent presentation I decided to develop this text in PPT using the text style options (vs. creating in Photoshop using preset filters). The result was liked by client and being able to edit text quickly within the presentation vs. adjusting in Photoshop and updating image was great.

Download sample slide here.

– Troy @ TLC

By |2016-08-16T11:47:08-07:00April 19th, 2010|Portfolio|

How To Fix The Gap in Text Reflections

Selective use of the reflection tool for text can make slide layouts very dynamic. But why does the upper text have a gap and the lower text does not?

There are 3 preset gap options, but both samples here have the same setting (zero gap).

The answer is the line spacing is different. The larger the line spacing the larger the reflection gap – even when set to zero gap option. The top sample has a line spacing of 2.0, which creates a gap:

The lower text is setup with a .95 line spacing (note: 1.0, or single spacing, is the zero point for refections):

– Troy @ TLC

By |2016-08-16T11:47:30-07:00April 15th, 2010|Tutorial|

Adjusting Bad Line Breaks

Here is a graphic from a recent client presentation (as sent to me – but with some text ‘removed’).

A simpe line break, soft-return (shift-return) grouped the topic/cities onto a single line which is much easier for the audience to interpret quickly.

– Troy @ TLC

By |2016-09-16T08:54:39-07:00January 13th, 2010|Tutorial|

Customizing SmartArt – Shadows

SmartArt is a great solution for converting text to visual elements. For a recent project I modified a simple timeline SmartArt (Closed Chevron Process) with customized drop shadows to add some visual interest to the slide.

All was accomplished by adjusting the shadow distance for each of the 3 elements.

Download the slide here.

– Troy @ TLC

By |2016-09-16T09:10:42-07:00January 5th, 2010|Portfolio, Tutorial|

PPTLive in Atlanta – Text Effect

I am very happy to have made it to PPT Live this year with the crazy project schedule and it being on the other side of the country I feared I would miss out on this great event. But I am in Atlanta and looking forward to the next few days!

Just for fun I quickly created this slide using the great, but often overlooked, feature of picture fills for text.

The visuals are great, easy to do, and fast. The word “Atlanta” is made of a skyline shot of downtown Atlanta (at night). Even better is this is just one text box with different style treatments applied to text selectively!

To fill text with an image, SELECT text >> FORMAT >> open FORMAT TEXT EFFECTS dialog >> TEXT FILL tab >> select PICTURE OR TEXTURE FILL >> FILE and select image.

– Troy @ TLC

By |2016-09-16T09:32:58-07:00October 11th, 2009|PowerPoint|

Cutout Text Effect

There are lots of great Photoshop quality effects that can be easily created in PowerPoint. Here is how I create a cutout effect for text.

1. Here is our sample text. Just black text.

2. I change the text color to white.

3. Then apply one of the preset INNER SHADOWs.

4. I modify the preset settings to be darker (transparency), less blur, more distance.

5. Here is my text now with the cutout effect.

6. Finally, here is the same text set on top of a textured background where it really shows the cutout effect.

– Troy @ TLC

By |2016-09-16T09:44:35-07:00August 30th, 2009|Tutorial|
Go to Top