shapes

Gradient Triangle Accent Elements

This is another layout recently developed for a project. The goal was to avoid a bulleted list and create a more dynamic, and memorable, graphic layout.

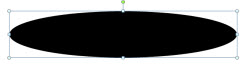
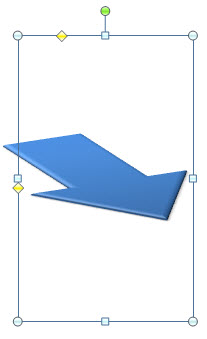
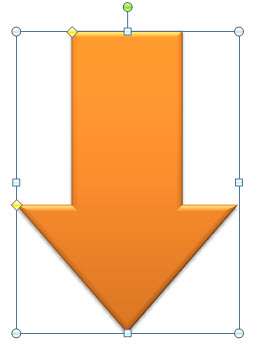
1. Create a tall triangle

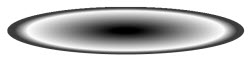
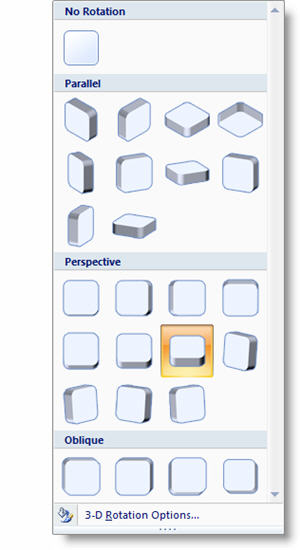
2. Using the gradient fill options modify the triangle to move from semi-opaque to transparent

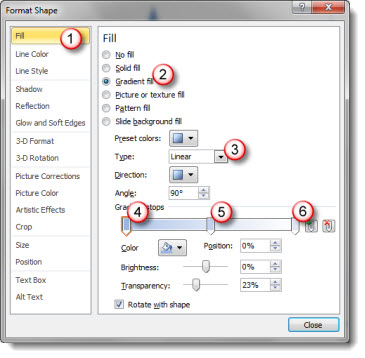
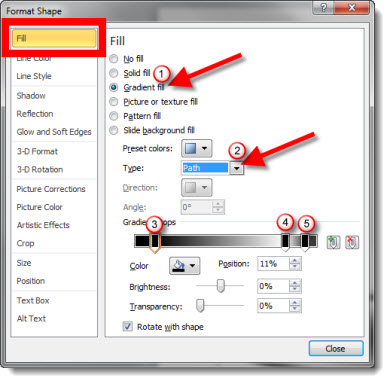
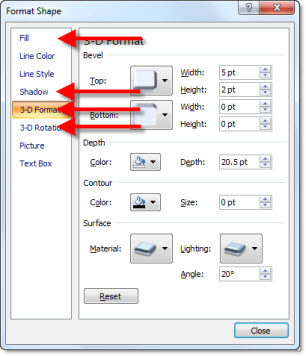
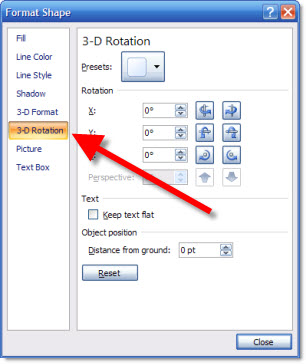
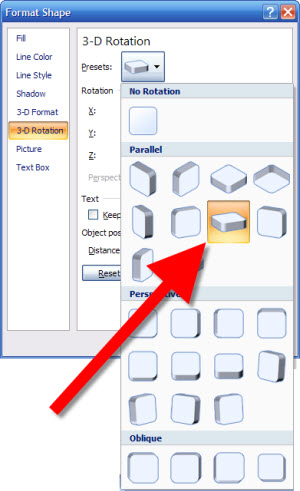
1. Open the FORMAT SHAPE dialog and go to the FILL section
2. Select GRADIENT FILL
3. Make certain the type is LINEAR
4. Stop 1 (top of triangle) is desired color and 20-25% transparency
5. Stop 2 (middle of triangle) is a lighter color and 40-50% transparency
6. Stop 3 (bottom of triangle) is any color and 100% transparency

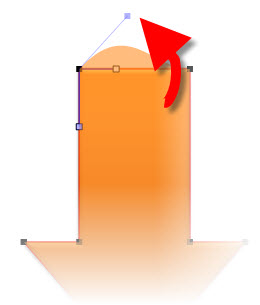
3. The result transforms the triangle to this

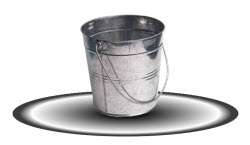
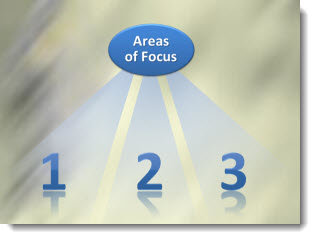
4. And here is an example layout using all PPT shapes and text

5. The great thing is the triangles use transparency and not white, so they can be used on any background

Click here to download the slide layout (29K).

– Troy @ TLC

By |2016-08-16T11:02:24-07:00October 13th, 2010|Tutorial|

Gradient Circle Fill Effect

I have been experimenting with gradient fills for a recent project. First, the gradient tool in PPT 2010 is great! It still has some usability issues, but overall it is easy to use and has a lot of flexibility. Here is one effect I developed and below is a link to download a slide with the gradient shape.

1. Start with an oval. No outline and any fill.

2. After applying a custom gradient fill here is the result.

3. To create the gradient fill I adjusted 5 elements:
1. Open the FORMAT SHAPE dialog, go to the FILL section and for fill type choose GRADIENT FILL
2. Change the type of gradient to PATH
3. Make the far left color black. Slide to position of 10-15%. Transparency = 0% (solid black).
4. Move second color to right side at position of 80%. Make color white, or change Brightness to 100% (white) and set Transparency to 100% (no fill).
5. Add a third color bar/stop even further to the right at position of 95%. Make color white (or set brightness to 100% to change any color to white) and make it slightly transparent with Transparency at 25%.

4. Now position gradient cirle under any object for a bit of perspective.

5. Because the shape was created with transparency, it can go onto any color background.

Download slide with gradient shape here (35K).

– Troy @ TLC

By |2016-05-04T09:45:29-07:00October 11th, 2010|Tutorial|

Clear Formatting Fast (With Keyboard Command!)

Q – What is the fastest way to clear the formatting to text, shape or picture?
A – Select and use keyboard

Here is my example. I have formatted the company name with a gradient fill and reflection. Now I want to go back to just the original text (bottom). To get there I just select the text and click the CTRL + SPACEBAR. Done.

– Troy @ TLC

By |2016-08-16T11:07:13-07:00September 3rd, 2010|Tutorial|

3D Star Sample

For a recent project I needed some eye catching callouts/starbursts. I created a series of 3D stars and overlayed text boxes with the key phrases (New, Now, Available, etc.). It was a quick solution that looked really nice.

I started with a simple Star autoshape.

Adjustments to several tabs of the Format Shape box was all that was needed to create the visual.

One of the tricky adjustments is changing the perspective to have a left facing star and a right facing star. Only 2 tabs are needed. The Shadow tab, adjusting the Angle and the 3D Rotation tab. Compare the numbers on the Rotation tab.

You can download a slide with these 3D stars on it here (33k ).

– Troy @ TLC

By |2016-08-16T11:56:19-07:00March 24th, 2010|Portfolio, Tutorial|

Shapes Menu in Different Shapes

I get this question a lot – even from people that have been using PPT 2007 for awhile. “where is my insert shapes?” It is obvious, but we get used to things being a certain way and when it changes we overlook things. This also happens most often when the computer is hooked up to a projector, where the screen resolution is reduced to the projector resolution (eg. my monitor is 1900×1200 but most projectors are lower at 1280×1024 or 1024×768).

Here is what most see on their ribbon:

But with a smaller screen resolution, the ribbon adjusts to smaller options and the shapes library becomes a simple button:

– Troy @ TLC

By |2016-09-16T09:54:53-07:00August 18th, 2009|Software/Add-Ins|

Give Depth To a 3D Shape

PPT 2007 has some create functions for converting even the simplest shape into a 3D element. But there is some interaction of features needed to create the effect.

1. Here is my sample arrow with some stylizing applied.

2. To convert to 3D I like to open the full FORMAT SHAPE dialog. To open, select the shape >> FORMAT tab >> SHAPE STYLES section >> small OPEN dialog in lower right corner

3. Go to the 3-D ROTATION tab

4. From the drop-down menu of preset I choose OFF AXIS 1 TOP

5. Here is my arrow converted to 3D

6. To add some depth to the arrow go to the 3-D FORMAT tab and increase the DEPTH point size

7. This menu has live preview, so as you adjust the shape will update. For my I increased the DEPTH to 20 points for my final image.

– Troy @ TLC

By |2016-09-16T09:59:25-07:00August 12th, 2009|Tutorial|

Using Edit Point Tool on Shapes

With SP2 (Service Pack 2) the Edit Points tool has been updated and become a very useful tool. The Edit Points tool is a simple vector image editor (think Illustrator 1.0). You can create your own custom shapes or modify preset shapes, which is what I am going to show here.

1. Here my sample shape, an arrow with some stylizing applied

2. Select shape >> FORMAT tab >> INSERT SHAPES section >> EDIT SHAPE drop-down menu >> select CONVERT TO FREEFORM

3. Now select shape >> FORMAT tab >> INSERT SHAPES section >> EDIT SHAPE drop-down menu >> select EDIT POINTS

4. Note the bounding box around the shape changes to a series of edit point dots at each intersection

5. By clicking and dragging an adjustment handle the shape is transformed

6. Select on of the edit points and adjustment handles are available

7. After changing the adjustment handles on top of both the left and right edit points I have created a custom arrow

– Troy @ TLC

By |2016-09-16T10:00:01-07:00August 10th, 2009|Tutorial|

Instantly Select The Box – Not The Text

With text boxes, or autoshapes with text in them, there are two types of selection:
1. Selecting the text so it can be edited.
2. Selecting the shape so it can be edited or moved.

Selecting the text is easy, just click inside the box near the text and you get the text cursor. Note, when you have text selected the shape has a dotted line border.

But to select the shape I see people struggle all the time. The three common ways are:
1. Select the text, then carefully click on the dotted line border to change the selection to the shape.
2. Carefully position mouse at edge of shape and click (same as #1, but skipping the text selection – usually).
3. Select the text, then press the ESCape key to change the selection to the shape (this is a great trick if you are unfamiliar with it).

But the 4th, and often best, way to select a shape and not the text is also the easiest.
4. Hold the shift key and click on the shape – anywhere. This only allows the shape to be selected, never the text.

Note: the border is a solid line when the shape is selected.

– Troy @ TLC

By |2016-09-16T10:54:15-07:00March 10th, 2009|Tutorial|

Resize From Center: PPT vs. Photoshop

A great feature is resizing (enlarging or shrinking) images and autoshapes from their center point.

This feature is available in PowerPoint and Photoshop, but using different key combinations.

PowerPoint: CTRL + SHIFT + adjust with mouse

Photoshop: CTRL + ALT + adjust with mouse

– Troy @ TLC

By |2016-09-16T11:10:30-07:00January 23rd, 2009|Tutorial|

3D Perspective to Images and Shapes

The ability to add perspective to images, and maintain editability/adjustability adds some great design tools. Here is my sample image with two 3D perspective styles applied.


Both of these styles were applied in a matter of seconds from the preset options.

– Troy @ TLC

By |2016-11-17T13:44:08-07:00January 9th, 2008|Tutorial|
Go to Top