powerpoint

Create a Custom PowerPoint Bullet

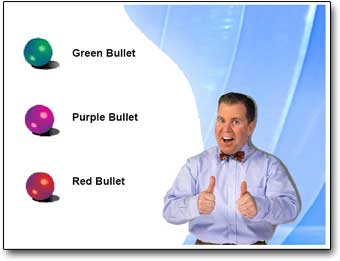
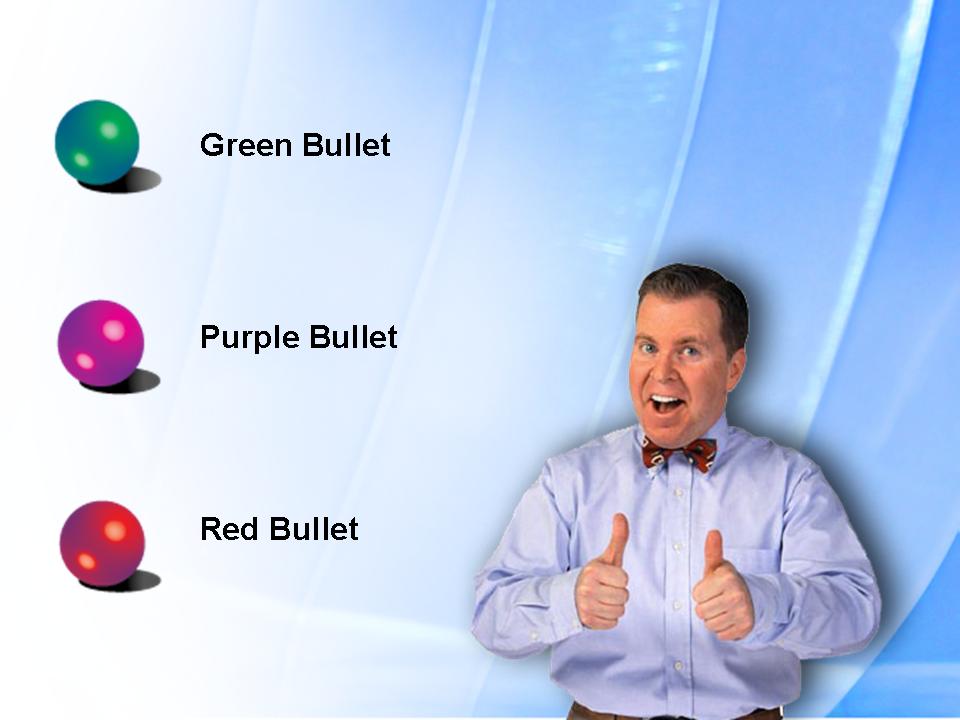
This is the first in at least a 4 part mini-series. Custom picture bullets were introduced with PowerPoint XP and they make a great addition to any presentation! I use custom picture bullets in many ways, always with the idea of how can they coordinate with the overall presentation. My custom bullets have ranged from simple color coordinated stylized shapes, to miniatures of the company logo, to small object icons that relate to the subject.

The first step is developing the artwork for the custom bullet. Note: I am using PhotoShop CS for this tutorial, but the process can be applied to virtually any image editing application.

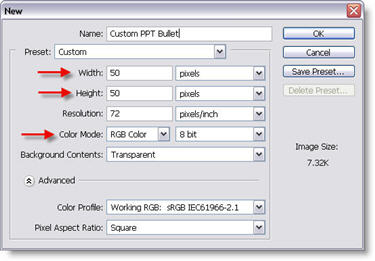
(1) Create a new document. Note the file size is very small and we ALWAYS use RGB for PowerPoint images.
New PhotoShop File

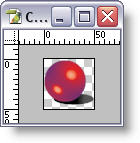
(2) Create your bullet artwork, sized to stay within the 50x50px area. I am creating a simple 3D sphere with a drop shadow.
Artwork for custom bullet

(3) Go to IMAGE >> CANVAS SIZE. Here we are going to increase the canvas size so the final image will have our bullet artwork horizontally on the far left and centered vertically.
Adjust Canvas Size
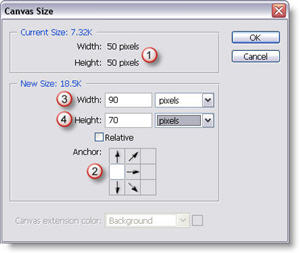
1. This is our original file size
2. Use this setting to force the new canvas area to keep the artwork on the far left, but allow it to be vertically centered.
3. Increase the width to 90px, this will provide a space between our bullet and the PowerPoint text.
4. Increase the height to 70px, this will vertically center our bullet on the PowerPoint text.

(4) The final step is to save the image as a .png with transparency (see “The Power of Ping” tutorial here for details).

– Troy @ TLC

By |2016-09-16T11:50:53-07:00May 2nd, 2006|Tutorial|

Create Shadow Boxes

A simple shadow element can add depth and eliminate some of the flat look and feel of a slide. In the last post I added a simple shadow box to a list box and a chart, here is how to create the shadow box – using PowerPoint autoshapes.

First create a rectangle. Set the fill to black and no outline/stroke.
PowerPoint rectangle autoshape

With the rectangle selected go to the Fill Effects.
Fill Effects

(1) In the Fill Effects window
(2) Go to the Gradient tab
(3) Move the slider all the way to the right/lighter
(4) Adjust the From opacity to 40%
(5) The To opacity should be at 100% (set when we moved the slider in #3)
(6) In the Shading Styles select From Center
Fill Effects Settings

Your rectangle will now look like this:
Smooth Gradient Filled Rectangle

The best thing about this rectangle is that it is a native PowerPoint autoshape. It can be adjusted as large or small as needed without any distortion or loss of quality. In addition you can go back into the Fill Effects and change the color and the inner opacity to best suite your slide!

Troy @ TLC

By |2016-09-16T11:44:50-07:00April 20th, 2006|Tutorial|

(Now) PowerPoint is Just the Beginning

I really enjoy the projects that are continuously flowing in. One reason is the variety; different clients, different visual needs, different requests. But as I look back over just the past 6 months or so, the big difference has been the variety of output needs. All of the projects revolve around PowerPoint, but PowerPoint is just the stage for creating the final product. I have some thoughts on that, but I will save those for later.

As information to think on, here are five of the projects that I have had within the past few months that all start with PowerPoint, but end up as something else:
1. Convert a PowerPoint presentation and provided video clips into a technical training DVD. Playback on consumer DVD, distributed around the world to train employees of a major Cruise line about the new safety doors and gangways being installed. The PowerPoint slides provided the technical content. Video clips demonstrated each step of the process.

2. Sync PowerPoint presentation with live video taping of presenter and convert to an online webcast.

3. Convert a PowerPoint presentation into a kiosk mode display for a tradeshow booth.

4. Convert a themed countdown timer presentation to a movie format for playback from a beta tape.

5. Create a themed announcement presentation (company logo, press event time, company slogan, press event time, etc.) into a looping DVD. Only the DVD was left running in between events.

Of course over the same months we have had plenty of the traditional speaker support presentations, templates, custom animation and clean-up projects too. But the world is changing and from my perspective the way PowerPoint is being used is evolving too!

Troy @ TLC

By |2016-09-16T11:33:15-07:00March 21st, 2006|Personal, PowerPoint|

Rename Master Slides

Things can get confusing working with a presentation that has multiple masters. Especially if the Master Slides are very similiar (eg. One with a primary bullet, one without). The solution is to name the Master Slides to something meaningful. I have added a tutorial on renaming PowerPoint Master Slides here.

Troy @ TLC

By |2016-09-16T11:26:55-07:00February 25th, 2006|Tutorial|

PPT + .png transparent images = ugly print

If you have ever printed a presentation that contained a .png image with transparency the results were certainly less than desirable. Here is the printed slide with a number of transparent .png images – not so good…
Tech Table
Note the jagged edges around the 3D spheres, Missing portion of background, solid/jagged dropshadow around the person.

○ The solution is a few easy steps and provides ‘picture’ perfect printouts.
○ Go to SAVE AS and export all slides to .JPG images. It is a good idea to save all of these to a new folder (Note: For higher quality images I use the PPTXtreme Import/Export add-in for this process. I export slides at 1600×1200 pixels for better quality).
○ Create a new presentation
○ Import all of the .jpg images/slides using the Photo Album feature, PPTXtreme’s Import/Export add-in, or Shyam’s Image Importer add-in.
○ Print

Here is a slide that was exported as a .jpg, then placed on a slide and printed
Tech Table

Side Note: If you delete all slides from real presentation, do a SAVE AS, then insert all of the .jpg slide images the master slide, header/footer and properties information will be preserved.

Troy @ TLC

By |2016-09-16T11:26:34-07:00February 23rd, 2006|Tutorial|

Placeholders for photos, diagrams, etc.

Plain text floating under a photo. A diagram that uses lots of bland color boxes. A solid color callout on a chart. All are things that generally make a slide boring and look standard/’off the shelf.’

To create a polished look I create virtually all of these placeholder elements in PhotoShop (with bevels, glows, highlights, drop shadows, etc.) and import into the presentation. But aesthetic placeholders can be created in PowerPoint with a bit of creativity with custom fills, bold lines and layered shapes.

Download a quick 1 slide sample here.

Download this 1 slide demo
Troy @ TLC

By |2016-09-16T11:22:11-07:00February 7th, 2006|Portfolio|

Movies and PowerPoint

https://www.tlccreative.co…ials/movies.htm

Frustration is getting things working perfect on your computer and then discovering they do not work on another computer. This is a very common tech support call I get when it comes to movies playing in PowerPoint.

Knowing some of the behind the scenes workings of PowerPoint and multimedia. I added a page that covers the big points and offers a few solutions that I have had good results with. To see it click here.

By |2016-05-12T10:02:59-07:00February 4th, 2006|Tutorial|

Movies from PowerPoint

I have just added a project write-up and movie that was ‘authored’ in PowerPoint. It is a good example of how PowerPoint is moving beyond PowerPoint and evolving into much more than slides for a presentation. Check it out here.

Troy @ TLC

By |2016-09-16T11:21:50-07:00February 3rd, 2006|PowerPoint|

PowerPoint for the Mime

The requests for presentations always prove to be interesting. But this one initially was out of the ordinary even for me. A professional mime was the opening act of a corporate event and they needed a presentation to correspond with the mime’s acting. A speaker support presentation – but with no speaking 🙂

Click here to see the project write-up, online movie of the presentation AND download of the full editable presentation.

Troy @ TLC

By |2016-09-16T11:13:07-07:00January 3rd, 2006|Portfolio|
Go to Top