powerpoint

Make the “Hidden” Marker Disappear

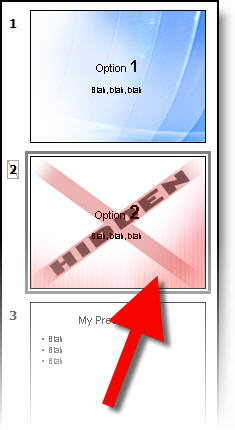
So you designed a presentation using a ‘hidden’ graphic to identify the hidden slides during review. Then during the show you manually enter the slide number to show the hidden slide. Now the audience sees the slide AND the full slide ‘hidden’ graphic – oops.

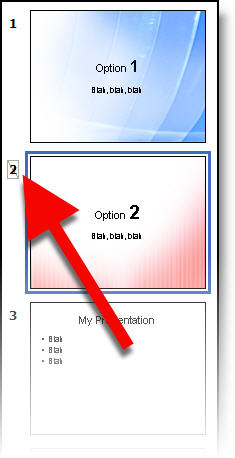
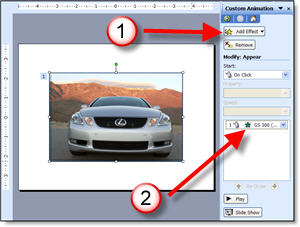
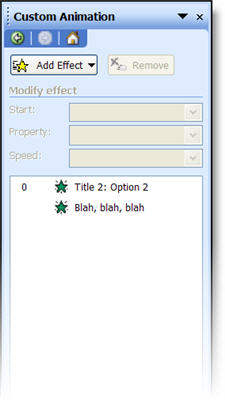
In this case all can work out with a little custom animation. Here is our example slide:

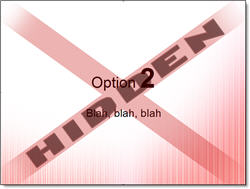
The animation for this slide has both lines of text with animated entrances:

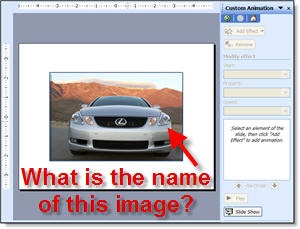
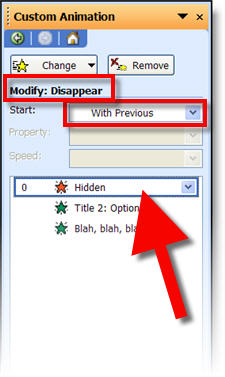
The solution is first to apply an Exit animation to the hidden image. I use EXIT >> DISAPPEAR >> WITH PREVIOUS.
The second step is to make this the first animation in the sequence.

Now you have added a custom graphic that makes it easy to identify which slides are hidden – in slide sorter and printouts. The slide can also be used during a presentation, because the hidden graphic is never shown in slide show mode!

– Troy @ TLC

By |2016-11-17T14:22:27-07:00September 19th, 2006|Tutorial|

Show A Hidden Slide During A Presentation

A hidden slide does not show up during a slide show – unless the slide is manually brought up.

If slide 3 contains optional information that you have hidden, it can be show by typing “3” + “ENTER.” This brings up the hidden slide #3 for your presentation.

– Troy @ TLC

By |2016-11-17T14:21:15-07:00September 15th, 2006|Tutorial|

Make a Hidden Slide Seen

The ‘hidden slide’ feature is great. It can be used to design a master presentation that contains a couple of versions of key slides – just hide the ones that do not apply to that audience. Or you want to edit a slide, but keep the original for that ‘just in case’ scenario.

No matter what the use, the one constant is that it is difficult to identify which slides are hidden. You have to look for the small hash mark here:

Not only is small, put the is no way to identify hidden slides on a printout. This poses a large problem when supplying printouts to clients for review. What I have done is create a semi-transparent, slide-sized “hidden” graphic in PhotoShop that is inserted on hidden slides. Easy to see in the slide sorter and very obvious in printouts.

– Troy @ TLC

By |2016-11-17T14:20:53-07:00September 13th, 2006|Tutorial|

What is the File Name of that Image?

You carefully label all of the layers and saved out images from Photoshop with descriptive names. But once imported into PowerPoint you lose all reference to what image it is… Take this example:

You have a dozen very similiar images in the presentation, but you need to verify what model this one is. Is it a 300, 350, 430… You know the file name says exactly what it is, but where is the file name to be found?

If you have an animation applied, open the CUSTOM ANIMATION PANE, click on the image and reference the animation, it contains the file name! If you do not have an animation applied – temporarily apply one so you can read the info. Here I quickly applied the first animation in my list, APPEAR. Now I can read the file name, verify what model vehicle it is, delete the animation and move on.

Note: Hovering over the animation will let the pop-up info appear, which is helpful for reading long file names that become cut off in the animation bar.

– Troy @ TLC

By |2016-11-17T14:19:35-07:00September 5th, 2006|Tutorial|

Use PowerPoint Presenter View

After activating Extended Desktop (Oct. 1 post) and setting up PowerPoint to display the presentation on the secondary monitor (Oct. 3 post), you have the option of displaying the Presenter View on your local monitor.

In PowerPoint go to: SLIDE SHOW >> SET UP SHOW. In the Multiple Monitors section check “Show Presenter View.”

When you go into show mode your computer will display this view:

– Troy @ TLC

By |2016-11-17T14:19:16-07:00September 5th, 2006|Tutorial|

Find the RECOLOR button

I like to setup PowerPoint so I can get edit accomplished in the fewest clicks. If you find a need to use the RECOLOR function (see Saturday’s post), you can add the RECOLOR button to your PICTURE toolbar.

Click the far right edge of the picture toolbar, choose ADD OR REMOVE BUTTONS >> PICTURE >> RECOLOR PICTURE. Now select the Excel table (that does not have data with it), click the recolor button, adjust colors, done.

– Troy @ TLC

By |2016-11-17T14:14:47-07:00August 30th, 2006|Tutorial|

Use the RECOLOR tool

So you have a slide like this with an imported Excel table:

And you need to adjust the colors of the excel chart to coordinate with the presentation template. You double-click the table and get the image format box, not the Excel data:

But all is not lost! Some information is still there. On the PICTURE tab, click the RECOLOR button to access this “secret” data.

In the RECOLOR PICTURE dialog you can see the original colors formatted in Excel and have the ability to change to any other color in a few easy clicks.

This is an invaluable tool within PowerPoint to know of and use when faced with pasted in Excel tables.

-Troy @ TLC

By |2016-11-17T14:14:01-07:00August 26th, 2006|Tutorial|

Great “PhotoShop” Shadows Inside PowerPoint

Often you have a nice, well designed slide such as this title slide. It does not really need any images or animation, but it would be nice to give it a bit of depth.

Adding a soft, PhotoShop, drop shadow to the title text helps the slide differentiate itself from the “standard” PowerPoint content and add some depth and appeal.

This effect was created in less than 4 seconds using PPTXtreme‘s SoftShadow add-in. I selected the text box and clicked on the QuickShadow button.

Looking closer you can see the smooth feathered black shadow that was applied to each letter. Something that helps the text float above the background artwork.

– Troy @ TLC

By |2016-11-17T14:12:17-07:00August 18th, 2006|Software/Add-Ins, Tutorial|
Go to Top