powerpoint

Drop Shadow on Select Text Same

One of the frustrations of earlier versions was that drop shadows were applied to all or none in a text box. Fortunately PPT 2007 solves that limitation!

As example, PPT 2003 you cannot apply a drop shadow to just one word – here I want to apply the yellow drop shadow to just certain words … can’t be done.

And here is the same text in PPT 2007 – now you can apply the drop shadow to any selected text desired

– Troy @ TLC

By |2016-11-17T14:53:29-07:00November 19th, 2007|Tutorial|

Applying Effects Inside One Text Box

With previous versions select words could be a different color, font or size. With PPT 2007 the same is true and now to an even greater degree. Several of the new visual effects can be applied to select words in the same text box.

As example, here I have selected a few key words and given them a multi-colored gradient fill.

– Troy @ TLC

By |2016-11-17T14:53:02-07:00November 16th, 2007|Tutorial|

Text is Word Art

One of the great features is that ALL text is now basically Word Art. That means it can have lots of visual customization:

This sample is standard text I typed in and then applied visual formatting to – these new capabilities have opened huge design options within PowerPoint!

– Troy @ TLC

By |2016-11-17T14:52:40-07:00November 14th, 2007|Tutorial|

Awesome has Great Examples of PPT 2007

Why reinvent something that already exists… I am coming to the party later than many, so I thought my first stop would be to point out some already great examples of what can be accomplished with PPT 2007.

Taj at Awesome Backgrounds has a page that showcases many of the great effects that can be achieved with the graphics engine in PPT 2007.

Click here to go to Awesome Backgrounds.

– Troy @ TLC

By |2016-11-17T14:52:15-07:00November 12th, 2007|PowerPoint|

(Updated) PPT Overlays To Graphics

Sorry for the bad link posted a week ago. I just updated the download link to actually allow you to download the sample file. Here is the original post again (link also works in original post too).

————-
The final element was to create a placeholder for the financial information. I added another custom fill autoshape, this time a rectangle. After sized it was ‘sent to back’ and the appropriate text was added.

If you would like to download this slide, click here.

– Troy @ TLC

By |2016-11-17T16:15:53-07:00July 19th, 2007|PowerPoint|

PPT Overlays To Graphics (4)

The final element was to create a placeholder for the financial information. I added another custom fill autoshape, this time a rectangle. After sized it was ‘sent to back’ and the appropriate text was added.

If you would like to download this slide, click here.

– Troy @ TLC

By |2016-11-17T16:07:33-07:00June 18th, 2007|Portfolio, Tutorial|

Google and PowerPoint

This week Google made an integrated PowerPoint viewer option to its online tools. Basically if you receive a PowerPoint presentation in a gmail account, there are a few options for the attachment; view as HTML, view as Slideshow, and download. Of course the key new option is VIEW AS SLIDESHOW.

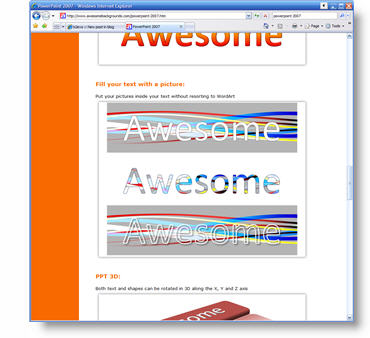
Clicking View as Slideshow opens a new window and the presentation is displayed in a Flash based application. It does not handle everything perfect (I tested with an animation heavy presentation) and it is only a viewer. So there are no editing capabilities – yet. In reading others news feeds I noted that Google said edit & create slideshow tools would come by this summer…

– Troy @ TLC

By |2016-11-17T16:06:10-07:00June 14th, 2007|Software/Add-Ins|

PPT Autoshape BG (6)

Here is the finalized background with the title area drop shadow.

Click here to download PowerPoint file.

For virtually all presentations I develop the custom background art and elements in Photoshop. But with creative use of the available tools in PowerPoint, some great effects can be achieved!

– Troy @ TLC

By |2016-11-17T16:03:09-07:00May 31st, 2007|Portfolio, Templates/Assets, Tutorial|

PPT Autoshape BG (4)

Using another gradient autoshape I created the title text area.

By having the more transparent area over the already darker right corner another sense of depth is created.

– Troy @ TLC

By |2016-11-17T16:02:47-07:00May 29th, 2007|Tutorial|
Go to Top