photoshop

Background vs. Layer in Photoshop

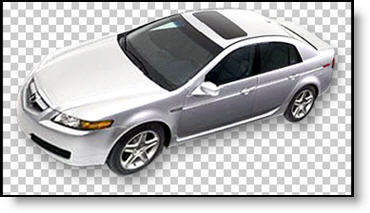
You are trying to remove the background from an image in Photoshop but when you hit the delete key it fills the selection with a solid color. This is an easy oversight, and even easier to correct. Most likely your image is set to a single merged/flattened layer. In Photoshop:
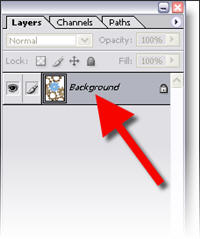
○ Open the layers palette by going to WINDOWS >> LAYER
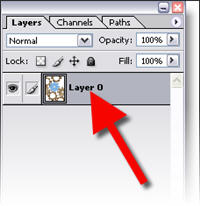
○ Look at your image layer. It will either say BACKGROUND, LAYER 0 or another name. We are only concerned if it says “background.”

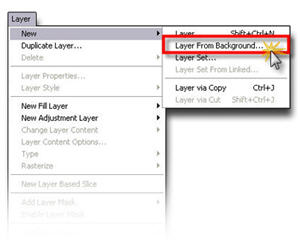
○ Either double-click the layer or go to LAYER >> NEW >> LAYER FROM BACKGROUND

○ Optionally name the layer in the New Layer dialog, click OKAY

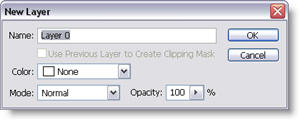
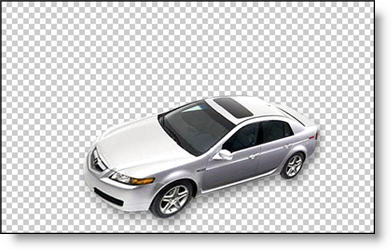
○ Now in the layers palette the “background” has been replaced with “Layer 0” or the name you set. Make a selection, hit delete and the transparency checker board will be all that remains.

Troy @ TLC

By |2016-11-17T14:06:00-07:00July 14th, 2006|Tutorial|

Online Movie Tutorial : Remove Image Background in PhotoShop

In this screen capture tutorial I go through the process of exporting an image from a presentation, opening it in PhotoShop, removing the background, properly saving it with transparency and then inserting back into the presentation.

This is a 4 minute narrated online movie – because seeing a real demonstration saves hours of frustration! To view click here.

– Troy @ TLC

By |2016-11-17T14:05:43-07:00July 12th, 2006|Tutorial|

Make Your Images RGB in Photoshop

When creating or editing an image in PhotoShop – be sure it is set to RGB. I recently encountered a situation with a clients files that was perplexing (aka: extremely frustrating). They were scanning photos at a print resolution (300 dpi and very large) and also as CMYK images. I figured out their problem, corrected the images in the current presentation and gave them a scanning tutorial so future efforts will work better.

For any images you will be using in a PowerPoint presentation, make sure your images being edited in Photoshop, or any image editor, are set to RGB. In Photoshop:

○ Check the top information bar of your image to see what color mode it is currently set to. Common mode are RGB, CMYK and INDEX

○ To change your image to RGB go to IMAGE >> MODE >> RGB

Done.
You now know your image is compatible with PowerPoint and one potential conflict/problem has been eliminated!

Troy @ TLC

By |2016-11-17T14:05:22-07:00July 10th, 2006|Tutorial|

Online Movie Tutorial : Export image from PPT to add PhotoShop Dropshadow

I have just completed a screen capture tutorial that walks through the process of exporting an image from a presentation, opening it in PhotoShop, adding a soft dropshadow, properly saving it out and then inserting back into the presentation. This is a 4 minute narrated online movie, because if a picture is worth a 1,000 words, seeing a real demonstration is worth hours of frustration! To view click here.

– Troy @ TLC

By |2016-11-17T14:03:10-07:00June 28th, 2006|Tutorial|

PhotoShop’s Trim Feature

When creating presentations I spend a lot of time in PhotoShop. And a lot of that time is spent creating images with no background around the object so it can float anywhere on the PowerPoint slide. The TRIM feature in PhotoShop is invaluable – yet few designers have heard of it!

(1) So you have an image like this.

(2) You spend time in PhotoShop “cutting out” the image so it sits on a transparent background.

(3) Now you are going to save it as a .png with transparency. But any space around the image is only going to make for a larger file size (it is transparent space, so you don’t need it, or want it). Enter the TRIM tool.
In Photoshop go to IMAGE >> TRIM.

(4) Make sure the settings are like these.

(5) PhotoShop will crop the image down to the exact pixel dimensions of the image!

Now when you save the image as a .png with transparency you are assured of only saving the necessary file size!

Troy @ TLC

By |2016-11-17T13:54:02-07:00May 20th, 2006|Tutorial|

Animation Sample (Airport Security Analogy)

Here is a presentation that is a series of animated slides from a project where the speaker needed to explain the company’s medical process to a non-medical audience. We decided on developing an analogy of the various industry processes with something everyone is familiar with – airport security.

As is typical for many of the presentations I work on, it is primarily 90% custom PhotoShop elements animated in PowerPoint. Download the presentation for review and inspiration. I have left it as an editable presentation for those that want to look at the animation timeline and techniques can do so. Click here to download (4.5 MB ).

Troy @ TLC

By |2016-11-17T13:56:02-07:00May 14th, 2006|Portfolio|

Add Custom Bullets to a Presentation

Now that we have developed our custom picture bullet in PhotoShop, we can insert them into a PowerPoint presentation. The process is fairly simple (Note: I am using PowerPoint 2003 for this tutorial).

(1) Select the bulleted text. Go to FORMAT >> BULLETS AND NUMBERING.

(2) From the BULLETS AND NUMBERING dialog click PICTURE.

(3) From the PICTURE BULLET dialog click IMPORT.

(4) Note the next dialog box is the ADD CLIPS TO ORGANIZOR dialog (import later in this series). From here find the .png image created and click ADD.

(5) Find the newly added picture bullet in the PICTURE BULLET dialog and click OK.

(6) Your selected bulleted text now has a COOL and NIFTY custom bullet!

(7) If the bullet is to large or small, select the bulleted text, go to FORMAT >> BULLETS AND NUMBERING, and use the SIZE % OF TEXT to adjust.

– Troy @ TLC

By |2016-09-16T11:51:43-07:00May 4th, 2006|Tutorial|

Placeholders for photos, diagrams, etc.

Plain text floating under a photo. A diagram that uses lots of bland color boxes. A solid color callout on a chart. All are things that generally make a slide boring and look standard/’off the shelf.’

To create a polished look I create virtually all of these placeholder elements in PhotoShop (with bevels, glows, highlights, drop shadows, etc.) and import into the presentation. But aesthetic placeholders can be created in PowerPoint with a bit of creativity with custom fills, bold lines and layered shapes.

Download a quick 1 slide sample here.

Download this 1 slide demo
Troy @ TLC

By |2016-09-16T11:22:11-07:00February 7th, 2006|Portfolio|
Go to Top