Office 365: Change to First Release Channel
The big, and confusing question, is how to change from CURRENT CHANNEL version of Office 365 to FIRST RELEASE version. This is accomplished in the Office 365 Admin Console – so you will most likely need to be an administrator on the account to access these options. One of the confusion points is Office 365 Admin Console itself. If you search the web for tutorials on where to find the settings, the older tutorials often reference an older build of Office 365, which shows how quickly Microsoft is changing and updating things. I have been using Office 365 to run TLC Creative Services since its release in 2011 and the Admin area has had many overhauls during that time, which makes things difficult to keep things running smooth when the entire interface changes.
Based on the 2016 Office 365, Business Premium account admin console, here are the steps to change which Office Channel you have:
- Log into your Office 365 account
- Click the “checker board” selection button in the upper left
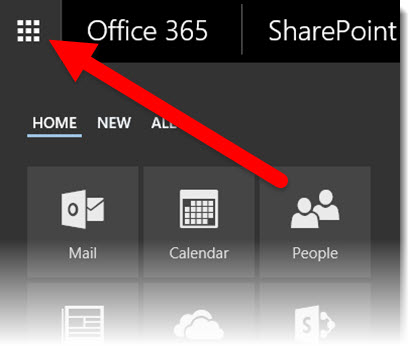
- Find and click the ADMIN button

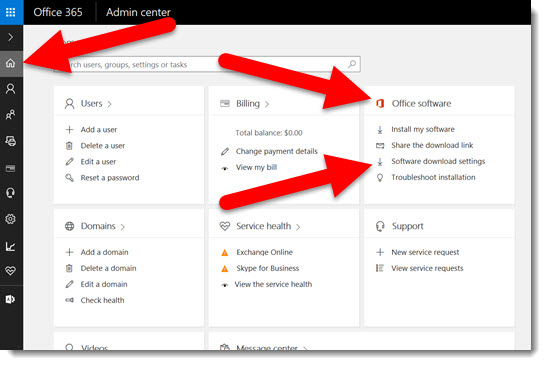
- In the Admin Center > HOME > OFFICE SOFTWARE > click SOFTWARE DOWNLOAD SETTINGS
- The SOFTWARE DOWNLOAD SETTINGS dialog will open. In the SOFTWARE FOR PC section, confirm 2016 VERSION is on, and the “How often do you want users to get feature updates for Office apps” is set to EVERY MONTH (CURRENT CHANNEL)
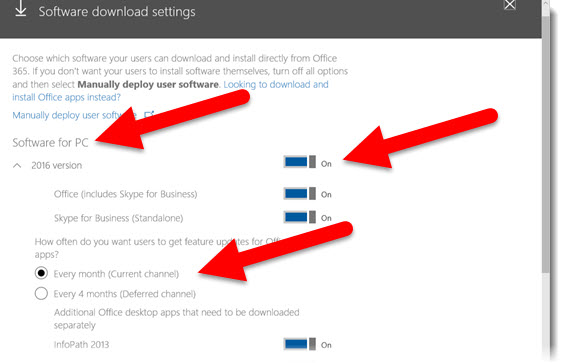
- Click SAVE
- Someone with Admin Rights to the Office 365 needs to complete these next 3 steps
- Log into the Office 365 Account
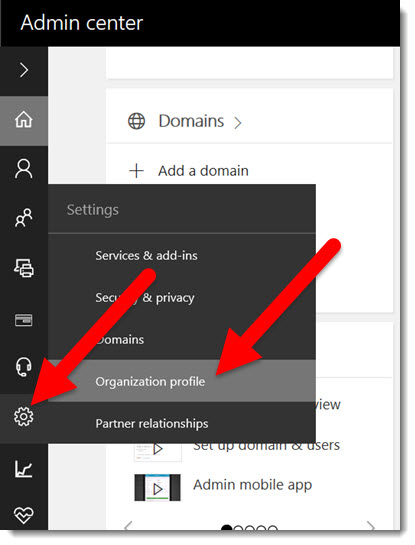
- Go to SETTINGS > ORGANIZATION PROFILE
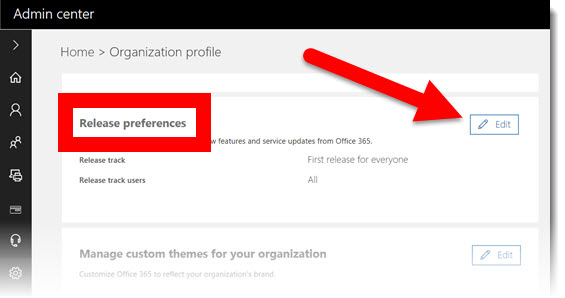
- In the RELEASE PREFERENCES section, click EDIT
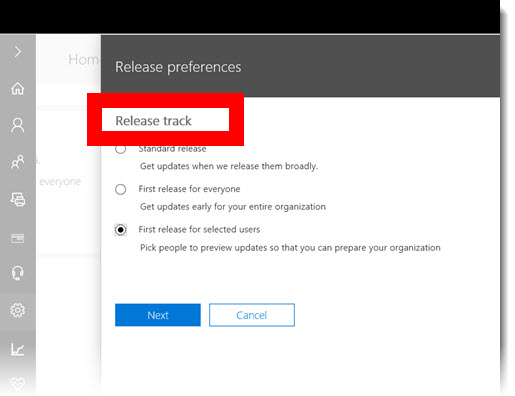
- Select a RELEASE TRACK (a “track” is going to be the “channel” option) and go through the settings process
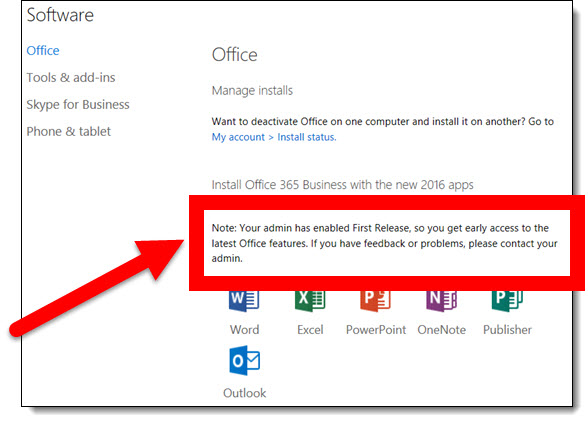
- When the above items are complete, go to this web page: https://portal.office.com/OLS/MySoftware.aspx
- Log into your Office 365 account
- If the above steps were completed, you will see this message that your Office 365 account can be changed to the FIRST RELEASE CHANNEL
- Note: if you already have Office 2016 installed (which I am guessing most everyone will), this next step is installing the First Release version, but it will not (at least from my testing and use) affect your current install – it automatically upgrades the current install and keeps all settings, files and data
- Close all Office apps (PowerPoint, Outlook, etc.)
- Click INSTALL
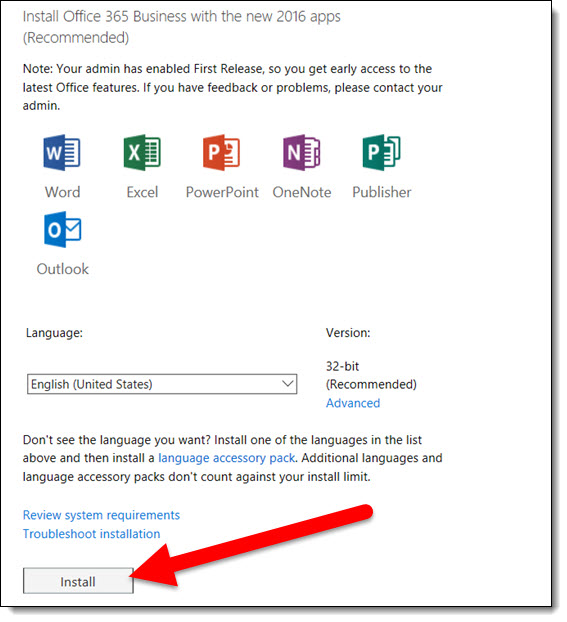
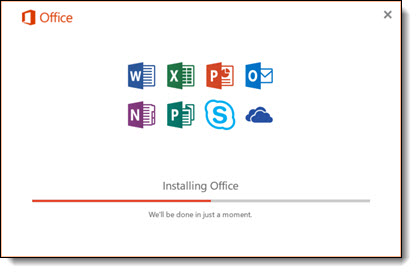
- The Office installer will run
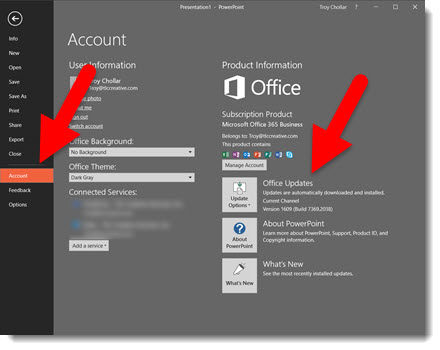
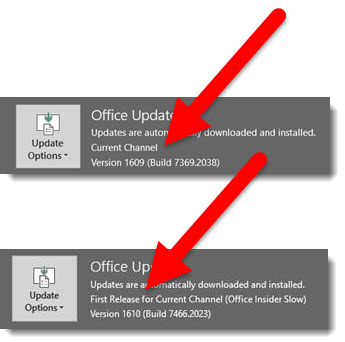
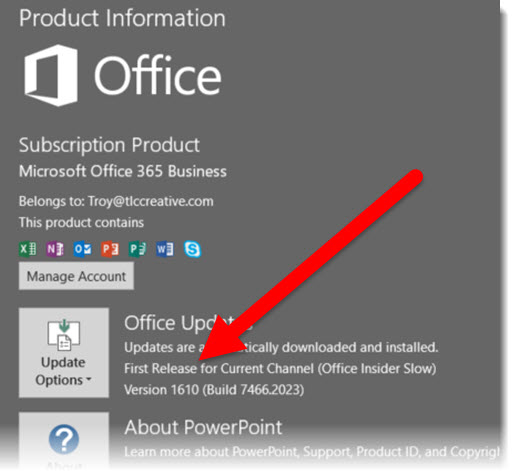
- Open PowerPoint, go to FILE > ACCOUNT > OFFICE UPDATE and it should now list FIRST RELEASE
-Troy @ TLC