images

Using BackGround Removal and Blur Tools (by Ric Bretschneider)

PowerPoint MVP Ric Bretschneider added a great tutorial to his personal blog this week called “The PowerPoint Blur Trick”.

The image effects are done by combining the Background removal tool, duplicate images, and the Blur tool – all really good ways to achieve ‘Photoshop’ images direct in PowerPoint.

Check out the full tutorial here.

– Troy @ TLC

By |2016-08-16T10:39:09-07:00January 13th, 2011|Tutorial|

Animation Using Super Wide Panoramic Photo

Using the panoramic image from the previous post, here is a sample animation. Actually the audience sees a continuous animation, but from the designer view is a series of slides that use Slide Transitions for the animation effect.

1. Insert panoramic image (it is almost 5Xs the width of a slide)

2. Position it by using the Align tools. (1) Align left. (2) Align Middle.

3.Duplicate the slide. Right-click the image >> Format Picture >> Position (left pane) >> set Horizontal to -10.5″ (right pane)

4. Duplicate the slide and repeat process to set horizontal another 10.5″ to the left (-21″)

5. Duplicate the slide and repeat process to set horizontal another 10.5″ to the left (-31.5″)

6. Because the image is not exactly another 10.5″ wide, go to HOME tab >> ARANGE >> ALIGN >> ALIGN RIGHT

7. Select all 5 slides and set the slide transition to WIPE

8. With all 5 slides still selected adjust the slide transition – TRANSITIONS tab >> EFFECT OPTIONS >> FROM RIGHT, so the slide transitions visually act as the on-click animations.

The result is a slide show that lets you pan through image from left to right. Download this presntation here.

– Troy @ TLC

By |2016-08-16T10:39:33-07:00January 11th, 2011|Personal, Tutorial|

Create a Panoramic Image in Photoshop

Sometimes presentations need specialty images that are beyond the capabilities of PowerPoint. Here is my process for creating panoramic images:

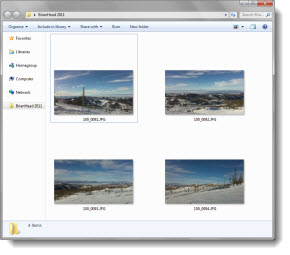
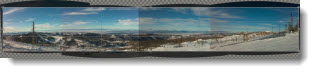
1. Take a series of photos, aligning as close as possible. Here are my sample images – 4 photos taken from the 11,000′ elevation peak at BrianHead ski resort in Utah.

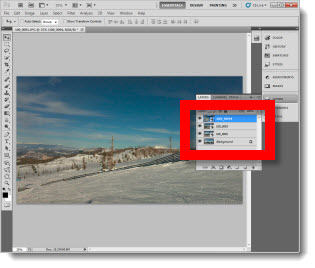
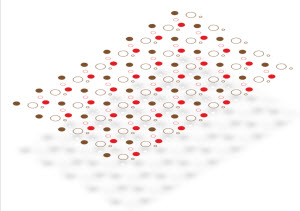
2. Open PhotoShop and import all images as separate layers. Be sure the layers are in order of what will be the side-by-side order.

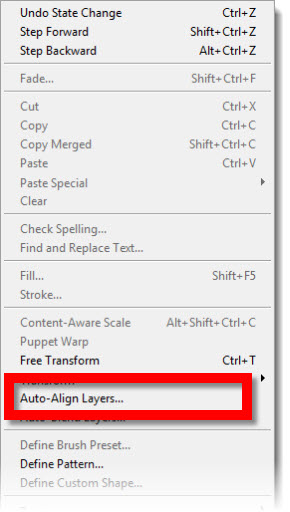
3. With all 4 layers selected go to EDIT >> AUTO-ALIGN LAYERS.

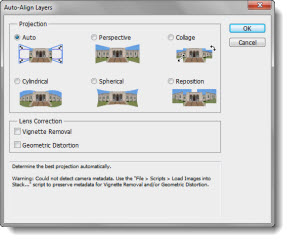
4. In the Auto-Align Layers dialog there are a number of options, for this one I am going to use AUTO.

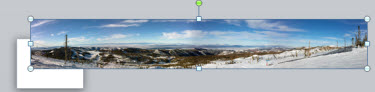
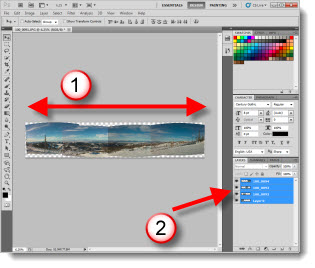
5. The result is (1) a super wide image, that is (2) made up of the layers, each repositioned side-by-side.

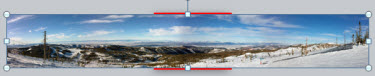
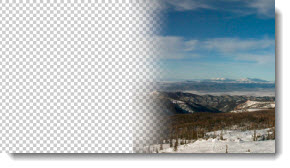
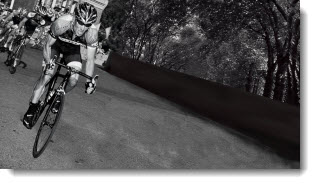
6. Then use the cropping tool to remove excess areas and create a clean rectangle.

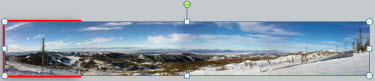
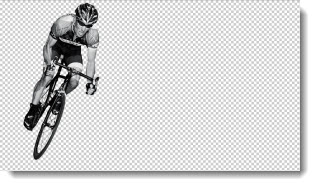
7. Because my images have slightly different exposures, the individual images can still be seen. First I quickly apply an AUTO TONE, AUTO CONTRAST, AUTO COLOR to each layer. Then I use the eraser tool to blend the edges – which is easy because the AUTO ALIGN tool overlaps the images.

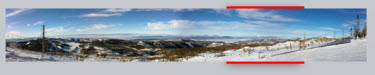
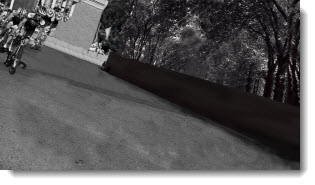
8. Now with the edges blended I have a super wide panoramic image ready to be saved as a .jpg and inserted into a presentation.

– Troy @ TLC

By |2016-08-16T10:39:49-07:00January 9th, 2011|Tutorial|

Recolor .png Images in PPT

I am continously reflecting on how much more I can do inside PPT 2010 vs. going out to an external application such as Photoshop when developing slides. Here is an example from a recent project that was done in PPT in a matter of seconds vs. opening image in Photoshop, adjusting, saving, importing new version of image.

Here is my highly stylized trend line (used on a slide to show the economy is making progress, without showing any detailed numbers or facts). It is a .png image I prepared in Photoshop and inserted into the presentation.

Here is the same image, now full screen and on the presentation template backgound – it does not have enough contrast against the background.

By selecting the image and then going to FORMAT >> CORRECTIONS I used the presets (all based on the template color scheme) to recolor the trendline image to a color with more contrast.

Done. Move on to next slide.

– Troy @ TLC

By |2016-08-16T10:51:13-07:00November 3rd, 2010|Tutorial|

Small Textures for Big Images

This is can be a great visual effect that can make large images out of very small files. The concept of using repeating pattern images to fill a large object has been used, by me, since the 1980’s for web design. It is still a valuable tool to use for presentations today. Here is an example:

1. Here is my very small image. It is a .png image, 102×102 pixels and only 2KB file size.

2. Here is the large rectagle shape on my slide.

3. I then change the fill from SOLID to PICTURE OR TEXTURE FILL, then FILE and finally choose my seamless texture image.

4. This is the first result – which is not the final result.

5. Click TILE PICTURE AS TEXTURE.

6. This is now the same image. It can be resized, to any size and the pattern background does not distort or loose quality.

7. In addition any of the formatting options can be applied, because it is a PowerPoint shape. Here I used the 3D Rotation and a drop shadow to create a new, very small file size, image for my slide.

– Troy @ TLC

By |2016-08-16T10:54:04-07:00October 23rd, 2010|Tutorial|

Mac – Windows – It’s Doesn’t Matter To Me

When the client does image research and finds the perfect image – great! But when the perfect image has a Windows PC vs. a Mac it is time for some Photoshop work.

Here is the original image with the “windows” monitor.

And after a quick photoshoot of an iMac and some Photoshop work, the new version:

– Troy @ TLC

By |2016-08-16T11:01:17-07:00October 17th, 2010|Portfolio|

Lance Armstrong Animated Slide

People ask all kinds of questions about slides created. If it is a cool topic like this one, Lance Armstrong, I hear “Wow, that is really awesome to work on stuff like that.” But the comment about the same slide from the client is usually, “How long did it take to create that really awesome slide…”. Just depends on your perspective.

But this was an awesome slide to have the opportunity to develop for a presentation. Awesome subject. Awesome photography. Awesome animation. Here is the image preparation needed in Photoshop:

1. Original Photo

2. Drop out background and have just Lance Armstrong

3. Make background without Lance Armstrong

4. Create motion streaks of Lance Armstrong speeding away (key for the animation)

5. Create semi-transparent background image

Here is what it took to create the animated slide:

1. start with opaque background image and .png image of Lance Armstrong (looks like original)

2. Fade in the motion streaks .png image

3. Grow/shrink and slight motion path on Lance Armstrong image and motion streaks. Fade out opaque background and fade in semi transparent background

4. Done. Total billable time – few hours. Result – (hopefully) audience wow.

– Troy @ TLC

By |2016-08-16T11:03:56-07:00September 23rd, 2010|Tutorial|

Apply “Sharpen” to Images

PPT 2010 has lots of great Photoshop-like effects built into the application. This post is highlighting the SHARPEN AND SOFTEN filter in a real-world situation.

Here is my original image.

Here is the effects applied to stylize the image (rounded corners, bevel, reflection, etc.). All looks great, but look at the face – it is not as crisp and defined.

With the image selected go to FORMAT >> ADJUST section >> CORRECTIONS

Looking at the top row is the SHARPEN AND SOFTEN quick options. The highlighted box shows what is currently applied to the image. I am going to click and apply the far right option which is a much greater sharpen filter.

Here is the same image, same stylizing effects, but with the greater sharpen filter setting. The bevel is there, the reflection is there and the face is super crisp.

– Troy @ TLC

By |2016-08-16T11:06:32-07:00September 10th, 2010|Tutorial|

Clear Formatting Fast (With Keyboard Command!)

Q – What is the fastest way to clear the formatting to text, shape or picture?
A – Select and use keyboard

Here is my example. I have formatted the company name with a gradient fill and reflection. Now I want to go back to just the original text (bottom). To get there I just select the text and click the CTRL + SPACEBAR. Done.

– Troy @ TLC

By |2016-08-16T11:07:13-07:00September 3rd, 2010|Tutorial|

Customize an Image With Recolor

The recolor feature (FORMAT >> RECOLOR) can customize an image, saving a trip to Photoshop. For this presentation I needed to use the same content in 3 color coded sections. Once the funnel image was optimized and saved from Photoshop as a .png with no background I was able to do the rest in PowerPoint. Here is my original, simple greyscale funnel.

And here the funnel on 3 slides – no grey.

The funnel image used the custom color recolor:

The bars use a 2 color gradient fill with just color 1 adjusted (color 2 = white and 100% transparent).

Download the sample presentation to see the recolor tool in use (129K). Note: if your browser changes downloaded file to”.zip” rename to “.pptx”.

– Troy @ TLC

By |2016-08-16T11:59:17-07:00March 10th, 2010|Portfolio, Tutorial|
Go to Top