images

Design Idea – Image Fill Text (Part 1)

The previous post walked through how to “knock out” text from a shape. One negative to that technique is the text is no longer editable. In this post, we are adding a visual styling to text AND keeping it editable. All text can have a color fill, gradient fill, texture fill or PHOTO/IMAGE fill.

Here is my sample text slide, one a black background to help the fill options display.

Image Fill Text 1

1. Select the text to fill (*Tip: It does not have to be all of the text in a text box, select just the text you want – this can be a great solution for adding accent focus on specific text).

2. Go to FORMAT >> WORDART STYLES section >> FORMAT TEXT EFFECTS to open the FORMAT SHAPE pane to the text formatting tab.

Image Fill Text6

3a. Select PICTURE OR TEXTURE FILL.

Image Fill Text 8

3b. This defaults to filling text with the first texture in the Microsoft library.

Image Fill Text 2

4. Click FILE.

5. Select an image to use as the fill – I am using an abstract image.

Image Fill Text 12

And here is the stylized text, which is editable (change the font, size, text, etc.) and can have any PowerPoint styling options applied (drop shadow, bevel, glow, etc.).

Image Fill Text 3


– Troy @ TLC


By |2016-08-10T09:09:38-07:00February 18th, 2015|Resource/Misc, Tutorial|

Using Pic Resize to Optimize Images for PowerPoint

Pic Resize is a useful web-based app to optimize images for presentations, that is FREE. Images can be resized, cropped and have many editing options applied. This is a good, quick solution in the process of making images sized for a presentation and not jumbo multi-megabyte sized files from a digital camera or print project. TLC designer, Michelle, put together this overview of how Pic Resize is used and some of its options.

To get started, go to the Pic Resize webpage (here).

Click From Computer and then the Browse button. Locate a image on your computer and click Open.

Pic ReSize-1

Pic ReSize-2

Once you have selected the image, click the Continue (Resize, Crop & Special Effects) button.

Pic ReSize-3

On the top portion of the next page, you can crop or rotate your image, if needed. Continue on to the second section to resize your image. The website defaults to resizing the image to 50% of the original size. If you need a different size, click on the drop down menu and select another preset percentage or resolution. You can also select Custom Size… to enter in the dimensions of your choice.

Pic ReSize-4

To optimize this image for use within PowerPoint, I will resize this image to 800 pixels wide. By leaving the Height field empty, Pic Resize will automatically keep the image proportionate by determining the correct height value.  You can also select a custom percentage of the original image by selecting Percent from the drop down image next to the Width or Height fields. The new dimensions of the image can be found on the right next to Estimated Final, which will be highlighted in green.

Pic ReSize-5

In the next section, you can select one of many special effects to enhance the image, if desired. Some of these special effects include Oil Paint, Scorched, Grayscale, and Sharpen, which can be seen below.

Pic ReSize-6

Pic reSize-7


In the last step, you will select the format, quality (if JPEG) and maximum file size (optional) to save your image as. The original format of the image will be automatically populated but JPEG, GIF, PNG, and BMP are all supported. PNG images with alpha transparency are supported, so transparency will be maintained if resized. If resizing to a JPG as the format, you can also select the quality of the image being saved.

Pic ReSize-8

Once you have selected the format and quality, click the I’m Done, Resize My Picture! button. When successfully resized, you can select View Image to preview, Resume Edit to continue editing, Save to Disk to save onto your computer, or Save to Web to upload the image onto a social media website of your choice. For this instance, we would save the image to the desired location by clicking Save to Disk.

Pic ReSize-9

Once saved, you now have an optimized version of your image that can be easily used within PowerPoint. Below, you can see the new, optimized image, which was resized from 5184 x 3456 pixels down to 800 x 533 pixels.

– Michelle @ TLC

By |2016-08-10T09:23:22-07:00October 20th, 2014|Software/Add-Ins|

Distorted Images – How To Fix Through the Ribbon

As another option to correcting images that have been stretched and distorted, the Reset Image options are available on the Ribbon. This is usually quicker way to accomplish the same thing detailed in last blog post.

Here is my stretched and distorted sample image.

distorted-7

To reset the image:

1. Select the image.

2. Go to the FORMAT tab, PICTURE STYLES section, and the RESET PICTURE drop down.

distorted-10

3. Click the triangle on the RESET PICTURE option.

distorted-11

4. RESET PICTURE will remove any styling, such as drop shadow, bevel, border, etc.

5. RESET PICTURE & SIZE removes any styling and reverts the image to the inserted size.

Using RESET PICTURE & SIZE the stretched TLC logo is returned to its correct aspect ratio and is no longer distorted.

distorted-12


– Troy @ TLC

By |2016-08-10T09:27:39-07:00September 24th, 2014|Tutorial|

Distorted Images – How to Fix

There has been an increase in requests for help with distorted images. I believe a big reason is the shift from 4×3 to 16×9, and images becoming stretched when the page setup is changed.


Here is the TLC image that has been inserted onto a 4×3 slide.

distorted-1


When I change the page setup from 4×3 to 16×9, images distort and the TLC logo looks like this:

distorted-7


Note: With PowerPoint 2013, there are some really great aspect ratio conversion options built in, and for PPT 2007/2010 users, there are some very helpful 3rd party add-ins that make the aspect ratio conversion much easier. All are created to help you from starting on the left and getting the image on the right:

distorted-8


To restore any inserted image to its original aspect ratio:

1. Right-click the image and select FORMAT PICTURE


distorted-3

2. From the Format Picture Dialog, go to the SIZE AND PROPERTIES tab

distorted-9


3. Click the RESET button

distorted-6


The image will reset to the original inserted size (which also means all effects – shadow, bevel, brightness are removed). Resize the image to fit the slide content area for images that look proportionally correct!


– Troy @ TLC

By |2016-08-10T09:28:32-07:00September 22nd, 2014|Tutorial|

Mockup Everything for Presentation Images

Mockup Everything is a web-based application that lets us quickly create custom graphics with images embedded in iPads, t-shirts, iPhones, magazine covers and many other objects.
Mockup everything 19

TLC staff designer, Michelle, spent some time working with Mockup Everything’s website and wrote up this great overview tutorial on using it.

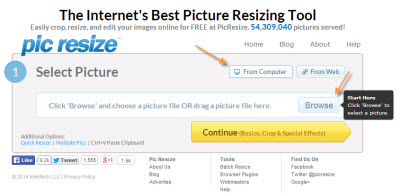
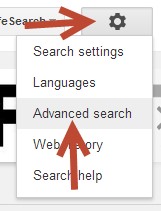
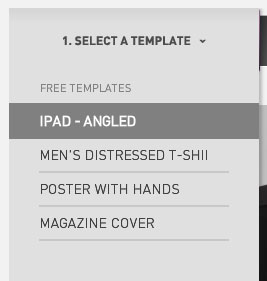
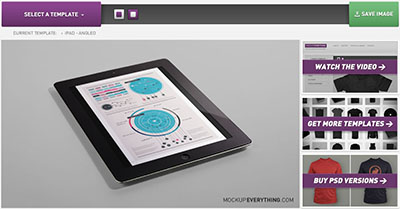
1. To get started, click on SELECT A TEMPLATE on the homepage to choose one of the free templates to work with.

Mockup everything 1

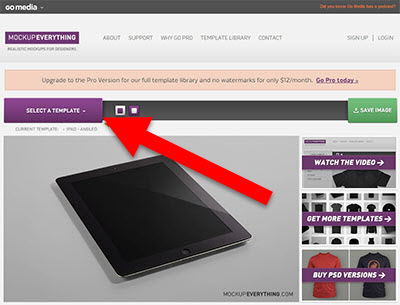
2. For this tutorial, I selected the IPAD – ANGLED template to place our design on.
Mockup everything 2

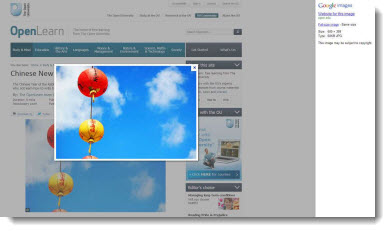
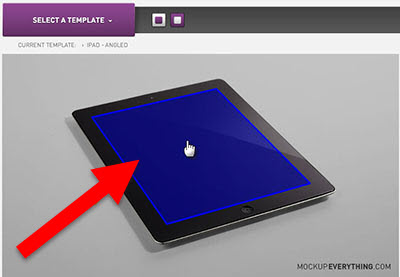
3. Hover over the image of the iPad until you see a blue area highlighted, then click the blue highlighted area to open the import image dialog.
Mockup everything 3

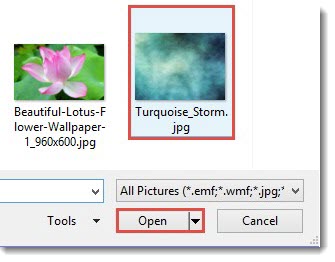
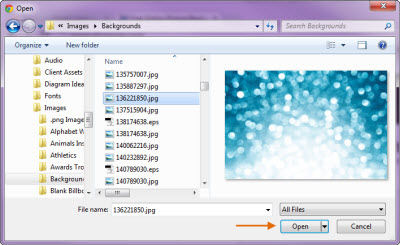
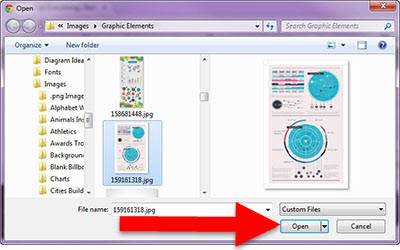
4. Select the image from your computer that you want to place on the template, and click Open.
Mockup everything 4

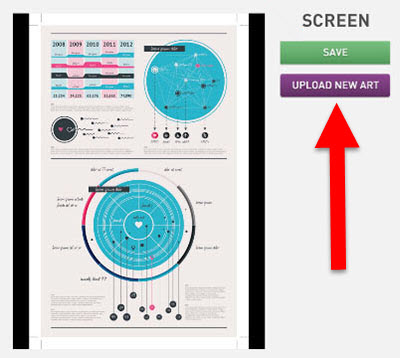
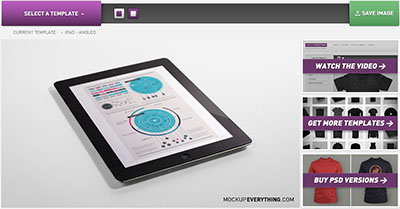
5. Verify that you have selected the correct image by clicking SAVE (or select UPLOAD NEW ART to change the image), and the image will be placed on the template.
Mockup everything 5 Mockup everything_6

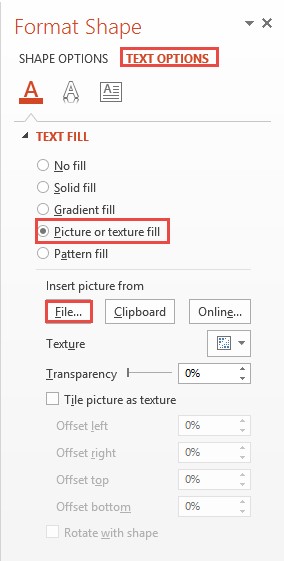
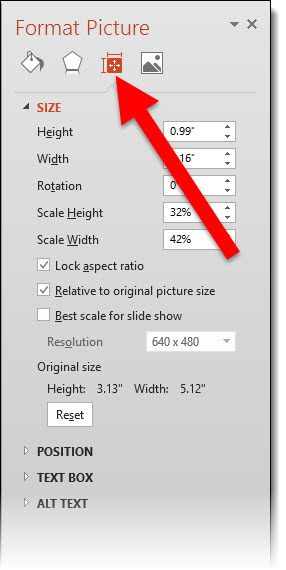
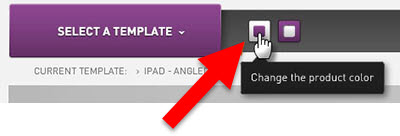
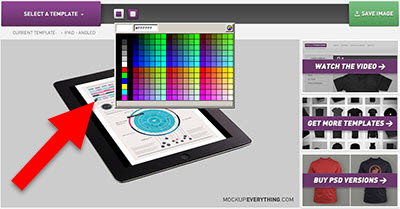
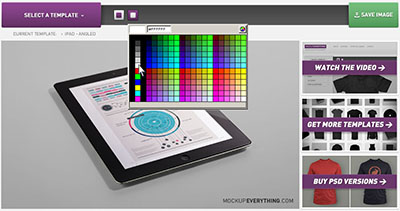
6. My image is not the exact size of the template’s area for the ipad screen, so I am changing the background color behind the image. Select the small square on the left, and choose a color, there are options to use a preset color or an eyedropper tool.
Mockup everything 7 Mockup everything 8

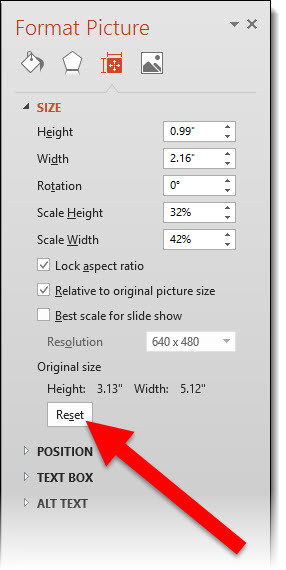
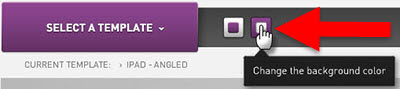
7. Now, I want to change the background image of the template itself by clicking on the other small box, and I will use white as our background.
Mockup everything_10 Mockup everything 11 Mockup everything 12


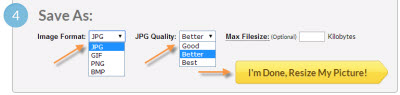
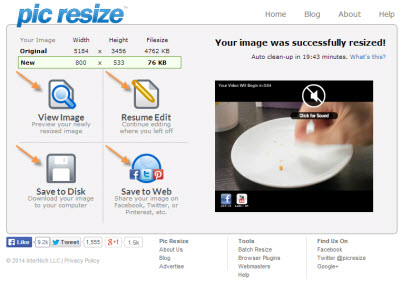
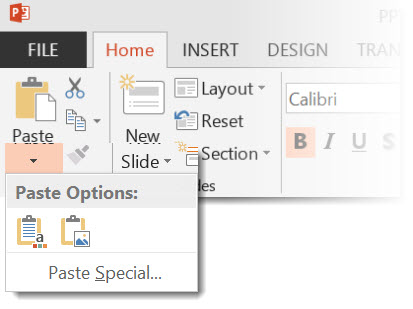
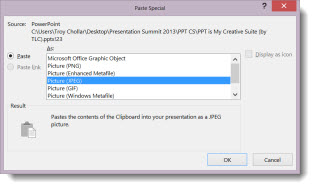
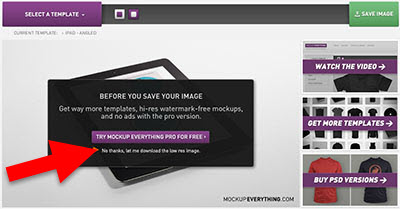
8. To save the custom image, click SAVE IMAGE. If you are using the free version of Mockup Everything, there are options to upgrade for a higher quality resolution and size image. For now, I am just clicking No thanks, let me download the low res image to save the image at a resolution of 72 ppi and a size of 750 x 422 pixels, which is good for most presentation design needs.
Mockup everything 13


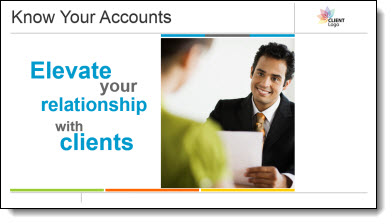
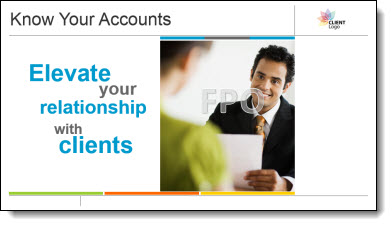
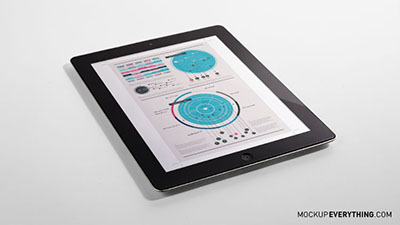
9. Once saved, I have an image like the one below ready to insert into PowerPoint.
Mockup everything 14


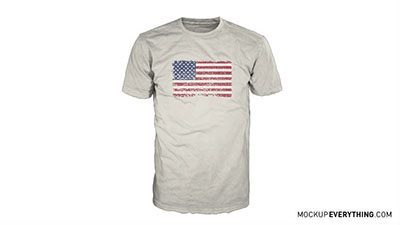
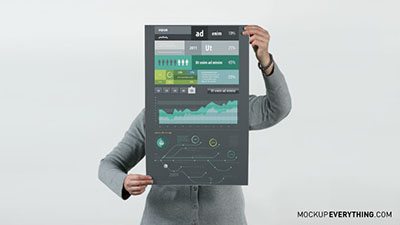
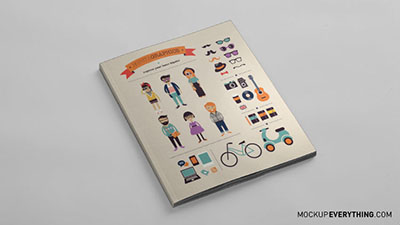
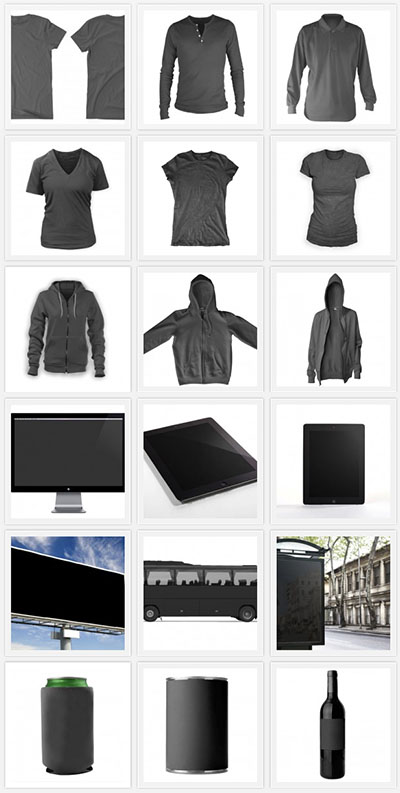
10. There are some great options in the free templates options on Mockup Everything.
Mockup everything 16 Mockup everything 15 Mockup everything 17


11. The PRO version of Mockup Everything is $12 per month and has many more objects, angles and options such as: men’s, women’s, baby and youth apparel, books, magazines, posters, envelopes, business cards, bags, boxes, vinyl records, CD cases, and much more. There are even templates for skateboards, snowboards, different technological devices, outdoor scenes (such as billboards and buses), and beverage containers.

Mockup everything 18


– Michelle @ TLC

By |2016-08-10T09:35:08-07:00September 8th, 2014|Tutorial|

Using Pic Resize to Optimize Images for PowerPoint

Pic Resize is a very useful tool to resize and edit images that are larger than needed. This website offers a quick and easy-to-use method to optimize a large image so that it fits your needs.

To get started, make sure you have selected From Computer to choose an image on your computer to resize. Click Browse to locate the image on your computer, select the image desired and click Open.

Once you have selected the image, click the Continue (Resize, Crop & Special Effects) button.

On the top portion of the next page, you can crop or rotate your image, if needed. Continue on to the second section to resize your image. The website defaults to resizing the image to 50% of the original size. If you need a different size, click on the drop down menu and select another preset percentage or resolution. You can also select Custom Size… to enter in the dimensions of your choice.

To optimize this image for use within PowerPoint, I will resize this image to 800 pixels wide. By leaving the Height field empty, Pic Resize will automatically keep the image proportionate by determining the correct height value. You can also select a custom percentage of the original image by selecting Percent from the drop down image next to the Width or Height fields. The new dimensions of the image can be found on the right next to Estimated Final, which will be highlighted in green.

In the next section, you can select one of many special effects to enhance the image, if desired. Some of these special effects include Oil Paint, Scorched, Grayscale, and Sharpen, which can be seen below.

In the last step, you will select the format, quality (if JPEG) and maximum file size (optional) to save your image as. The original format of the image will be automatically populated but JPEG, GIF, PNG, and BMP are all supported. PNG images with alpha transparency are supported, so transparency will be maintained if resized. If resizing to a JPG as the format, you can also select the quality of the image being saved.

Once you have selected the format and quality, click the I’m Done, Resize My Picture! button. When successfully resized, you can select View Image to preview, Resume Edit to continue editing, Save to Disk to save onto your computer, or Save to Web to upload the image onto a social media website of your choice. For this instance, we would save the image to the desired location by clicking Save to Disk.

Once saved, you now have an optimized version of your image that can be easily used within PowerPoint. Below, you can see the new, optimized image, which was resized from 5184 x 3456 pixels down to 800 x 533 pixels.

– Troy @ TLC

By |2016-08-10T09:41:20-07:00May 21st, 2014|Software/Add-Ins, Tutorial|

Search for Images on Google by Usage Rights

Legal use of images is something we at TLC are always concerned about. It is also something we see abused by many presentation designs (ie. using copyrighted images without permission). One of the largest image resources for someone putting together slides is web images searches, particularly Google Images.

But, Google does provide some good search options to use “legal” images, by searching by usage rights.

Begin by initiating a Google image search for what you are looking for (in our case, we searched for “picture”), and hit enter, or click search.

After the search results for “picture” have loaded, you’ll find you have some additional search tools available. What we are looking for in this case is “advanced search,” which you’ll find by selecting the gear icon at the top-left corner.

After selecting Advanced Search, you’ll find in the following options available to you under usage rights:

A cautionary note: Some of the images returned under “free to use or share, even commercially” still required attribution, so it’ll be important to double check the terms for each image.

– Troy @ TLC

By |2016-08-10T09:42:15-07:00May 16th, 2014|Resource/Misc, Tutorial|

Watermark Images Direct in PowerPoint

Watermarking an image is common in several scenarios. Identifying who owns the image and copyright and indicating it is a low resolution “proof” image are the two most common watermarking scenarios I see.

TLC Creative Services has a large library of royalty free images and subscribes to image sites which make developing visual presentations much easier. In both cases, our designers can download the low res, watermarked version of the image(s) they want to use in the presentation. Then, when the client approves the images, they can download the high resolution version of each image and replace the watermark images throughout the presentation. Of course, this routine takes a lot design time and it displays the company watermark vs. a generic watermark.

Note: “FPO” is an design industry standard phrase, “For Placement Only.”

TLC Creative Services creates all our watermark images directly in PowerPoint.

1. Here is our slide layout with high res (optimized for use in PowerPoint) image. But we do not release the slides with usable images until it has been approved.

Watermark images 1

2. Here is our PowerPoint stylize “FPO” text box.

Watermark images 2

3. We paste the “FPO” text box onto each slide and position over the image.

Watermark images 3

4. We then select the image and FPO text box and copy them.

5. Next we delete the image and FPO text box.

6. We then PASTE SPECIAL as a .png (this assures quality and eliminates issues if the text box extended paste the image).

Watermark images 4
Watermark images 5

7. This adds a new image to the slide that is watermarked.

Watermark images 6

8. We position the new watermarked image on the slide.

Watermark images 7

9. Last, we do a SAVE AS so the “real” presentation with the high res images is not lost.

By |2016-08-10T10:08:26-07:00November 14th, 2013|Tutorial|

Online Art with Silk

Silk is an online interactive art generator, where you create the art. The art is based on mirrored, or reflective, creation and it is much easier to experience than explain – so go experience it here.

I have saved out some images from Silk to use in PowerPoint template background development and also used the abstract art as images on slides. It is definitely a unique site that quickly produces unique art images.

– Troy @ TLC

By |2016-08-10T10:39:05-07:00June 12th, 2013|Resource/Misc|

Google and its New Image Searches

Click here to read the full commentary article on Google’s new/refined image search process.

“I did a Google search for the image” has become a standard phrase I hear a lot. It is said without thought of image quality (which often is why I am asking where the image was sourced from, in hopes of getting a higher resolution image to work with), ownership or copyright issues. Recently, Google has revised its image search display process to simplify the process. For presenters, this may be helpful, but I can definitely understand the loss of website recognition and ease of “borrowing” images.

Example of the “old” Google search results (shows source website in background):

Here is what is seen from a Google image search today (shows only image, mage specs, and related images):

– Troy @ TLC

By |2016-08-10T10:42:19-07:00April 22nd, 2013|Resource/Misc|
Go to Top