As everyone that has worked in PowerPoint knows, matching rotated items to the same angle can be a challenge. This is especially true when using the rotation handle (the click and drag method). To take the frustration out of this task, let us walk you through manually setting the angle and easily getting multiple items exactly aligned with the same rotation!
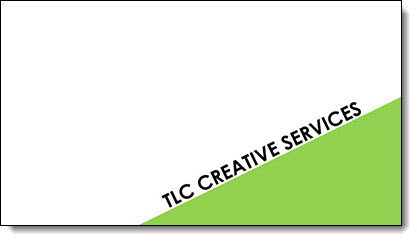
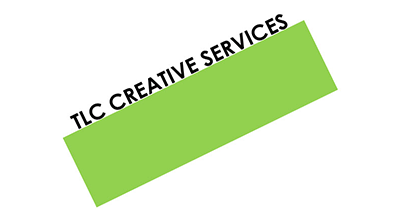
Here is our sample slide being created. It has a green rectangle (not a triangle, so we can know the exact angle), and a text box matched to the same rotation as the green rectangle.
1. First add a rectangle.

2. Next, bring up the Format Options Dialogue Box either by going to Format tab on the tool bar or by right clicking the shape.
– Select SIZE AND POSITION from the right-click pop up menu.
– The Format Shape pane opens to Size and Properties tab.
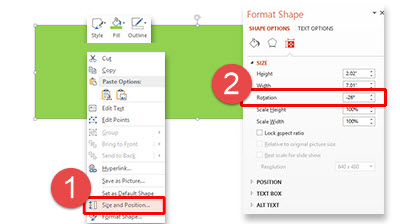
3. In the SIZE section is the ROTATION box.
4. Enter any angle needed (this has a live update, so you can see the angle applied to selected item). For this sample, we used -26 degrees.

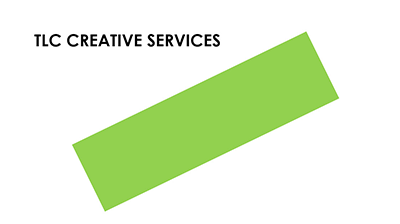
5. Add a text box and type (we added TLC CREATIVE SERVICES).
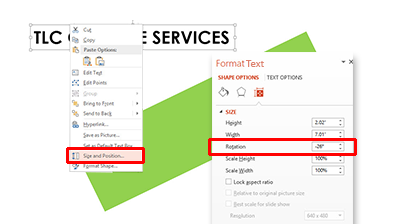
6. With the text selected, we followed the same steps above to rotate the text. Using the Format tab on the tool bar, or by right clicking the text, bring up the Format Options Dialogue Box.
– Select SIZE AND POSITION from the right-click pop up menu.
– In the ROTATION box, enter the angle as the rectangle (-26 degrees in our sample).
7. Position the angled text box above the rectangle.
8. Select both the rectangle and text box and move to the lower right of the slide for a great visual layout using perfectly aligned and angled elements for your design!
– Troy @ TLC