(Try 2) Animation Sample – It’s a Small World
—
This is the 2nd posting of this sample as the post last week did not include the video of the PowerPoint slides… oops.
—
These are slides from a recent presentation and the video below is the animated version of the 4 slides:
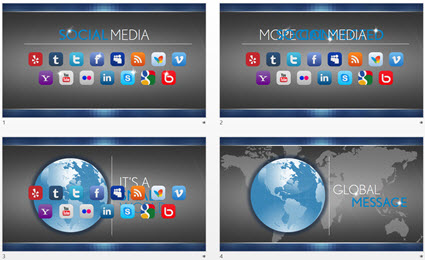
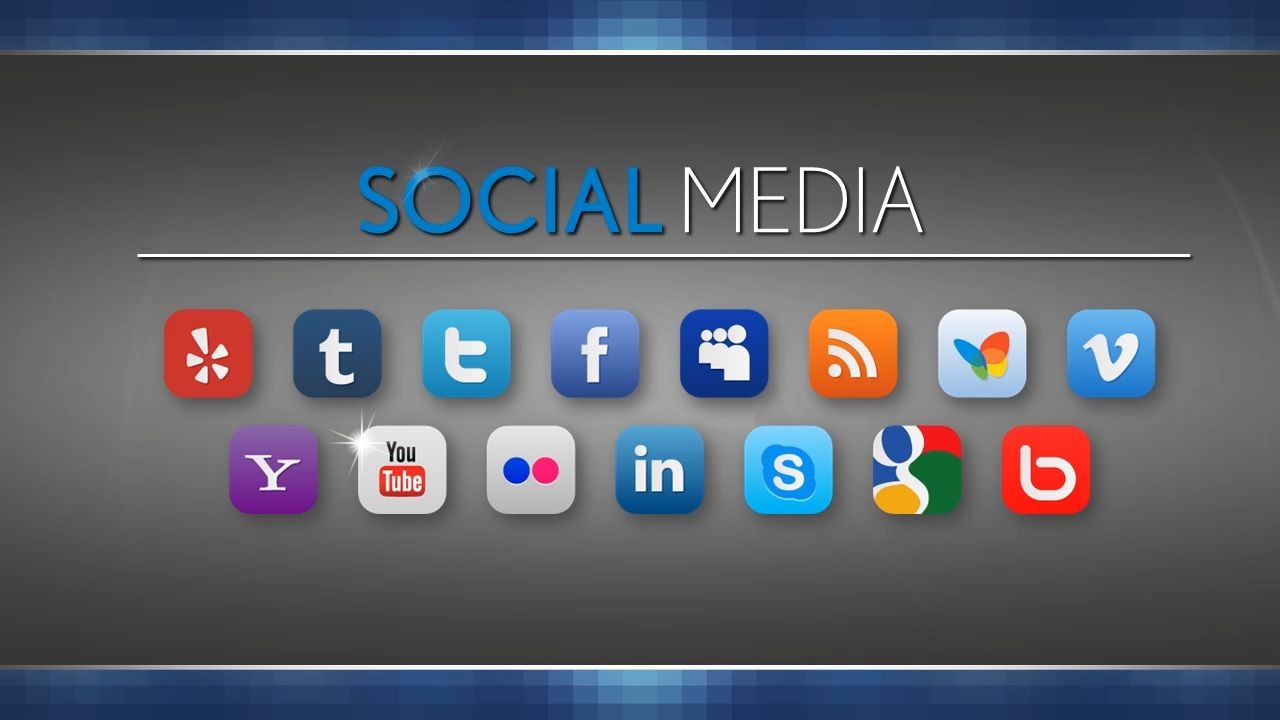
With some creative layout and PowerPoint animation, the presenter used this animated sequence to convey the message of their expanded Social Media presence and how it has a global reach (all animated on clicks):
[KGVID]https://thepowerpointblog.com/wp-content/uploads/2014/10/unnamed-file-2.mp4[/KGVID]
– Troy @ TLC
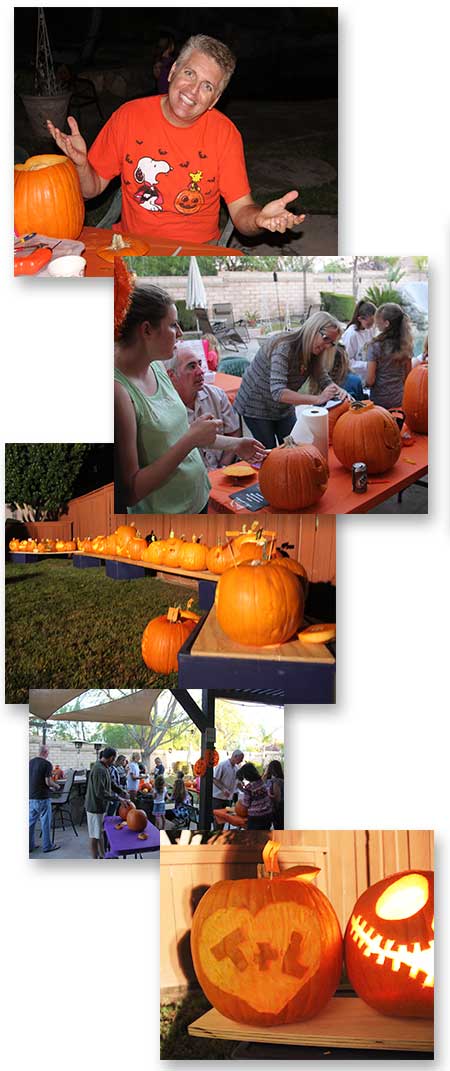
Happy Halloween! Pumpkin Party 2014
Our annual pumpkin carving party was a lot of fun this year with everyone showing great creativity!
– Troy @ TLC
Halloween 2014 PowerPoint Template
This is a fun time of the year and Cara, a new TLC staff designer, developed this fun Halloween themed template.
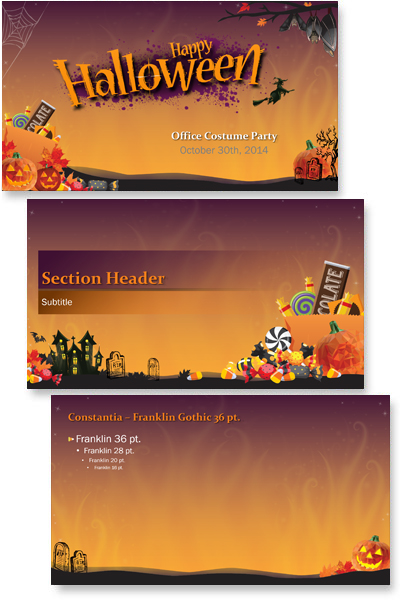
This is a FREE download, full featured PowerPoint template with all standard layouts customized to theme, custom color scheme, custom transitions, and more. Have fun using this template from TLC Creative Services!
Download here: Halloween-2014
– Troy @ TLC
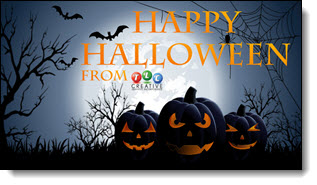
Halloween Animation
This is a great animation from a Halloween themed template TLC designer, Jennifer, developed.
[KGVID]https://thepowerpointblog.com/wp-content/uploads/2014/10/unnamed-file.mp4[/KGVID]
The slide was developed with this nice background art setup on the master slide.

Then the Halloween art elements were added to the slide.
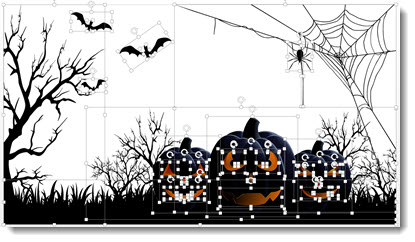
Here is the slide composed of the full moon background, all art elements and text boxes.
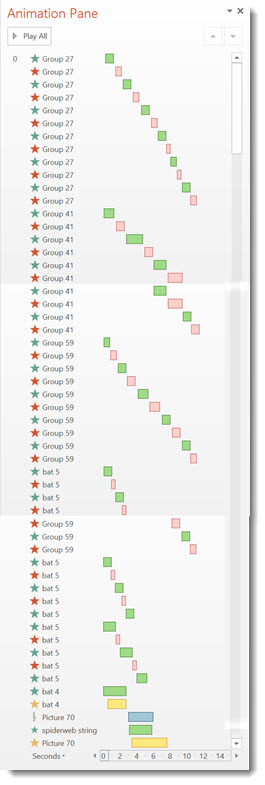
The animation pane shows lots is going on to create the motion on the slide (the addition of a real ‘loop animation section’ would make this type of slide much easier!).
– Troy @ TLC
Slides From Lexus
There are not a lot of slides that can be publicly displayed from the projects TLC designs. Here is a sample of some of the slide designs we created for a recent meeting Lexus had.
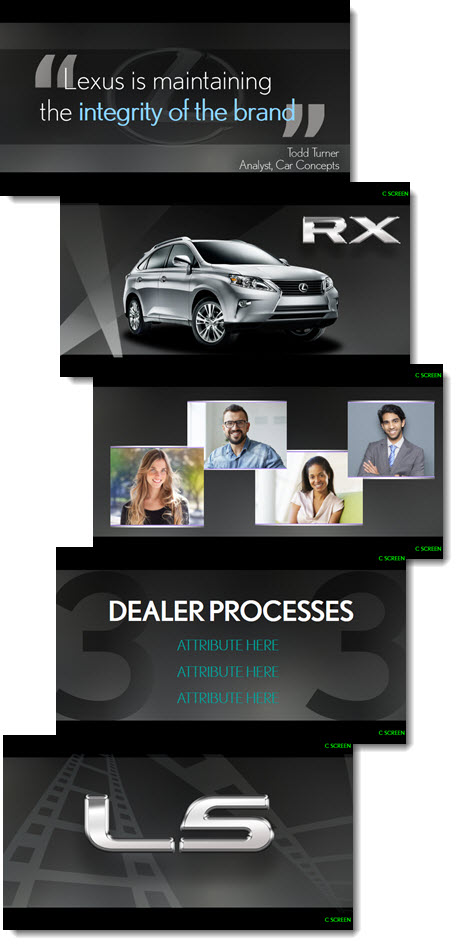
All slides were developed at 16×9 and different size letter box bars (black bars top/bottom) were added to adjust the slides to the various LED wall configurations. The green text is notes about the slide (who the presenter was for that slide, which screen it was set to display on, etc.) and are in the non projected section of the slide.
Of course these are also a static image of the slides. For the meeting every slide had dynamic animated entrances which were developed with a combination of slide transitions and animation.
– Troy @ TLC
Animation Sample – It’s A Small World
These are slides from a recent presentation and the video below is the animated version of the 4 slides:
With some creative layout and PowerPoint animation, the presenter used this animated sequence to convey the message of their expanded Social Media presence and how it has a global reach (all animated on clicks):
– Troy @ TLC
Using Pic Resize to Optimize Images for PowerPoint
Pic Resize is a useful web-based app to optimize images for presentations, that is FREE. Images can be resized, cropped and have many editing options applied. This is a good, quick solution in the process of making images sized for a presentation and not jumbo multi-megabyte sized files from a digital camera or print project. TLC designer, Michelle, put together this overview of how Pic Resize is used and some of its options.
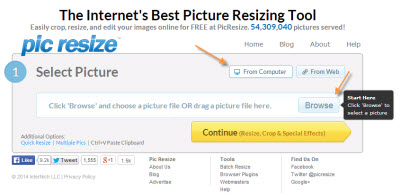
To get started, go to the Pic Resize webpage (here).
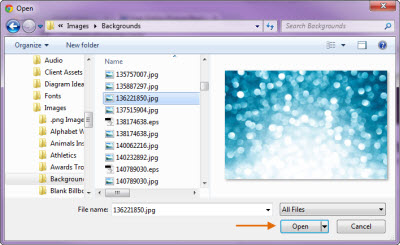
Click From Computer and then the Browse button. Locate a image on your computer and click Open.
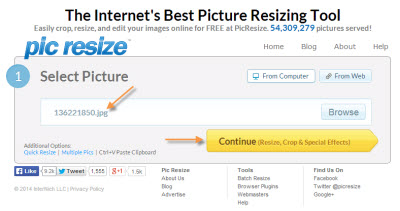
Once you have selected the image, click the Continue (Resize, Crop & Special Effects) button.
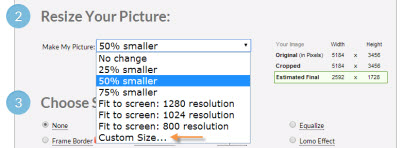
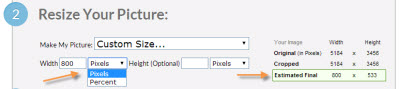
On the top portion of the next page, you can crop or rotate your image, if needed. Continue on to the second section to resize your image. The website defaults to resizing the image to 50% of the original size. If you need a different size, click on the drop down menu and select another preset percentage or resolution. You can also select Custom Size… to enter in the dimensions of your choice.
To optimize this image for use within PowerPoint, I will resize this image to 800 pixels wide. By leaving the Height field empty, Pic Resize will automatically keep the image proportionate by determining the correct height value. You can also select a custom percentage of the original image by selecting Percent from the drop down image next to the Width or Height fields. The new dimensions of the image can be found on the right next to Estimated Final, which will be highlighted in green.
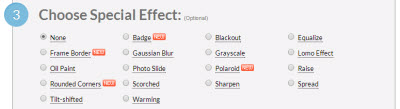
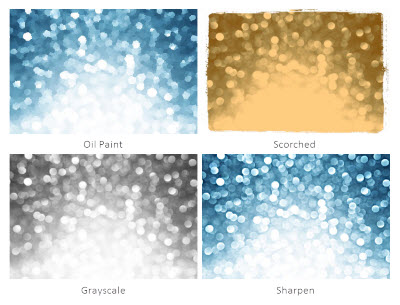
In the next section, you can select one of many special effects to enhance the image, if desired. Some of these special effects include Oil Paint, Scorched, Grayscale, and Sharpen, which can be seen below.
In the last step, you will select the format, quality (if JPEG) and maximum file size (optional) to save your image as. The original format of the image will be automatically populated but JPEG, GIF, PNG, and BMP are all supported. PNG images with alpha transparency are supported, so transparency will be maintained if resized. If resizing to a JPG as the format, you can also select the quality of the image being saved.
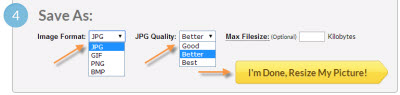
Once you have selected the format and quality, click the I’m Done, Resize My Picture! button. When successfully resized, you can select View Image to preview, Resume Edit to continue editing, Save to Disk to save onto your computer, or Save to Web to upload the image onto a social media website of your choice. For this instance, we would save the image to the desired location by clicking Save to Disk.
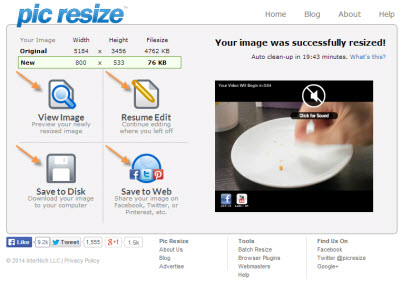
Once saved, you now have an optimized version of your image that can be easily used within PowerPoint. Below, you can see the new, optimized image, which was resized from 5184 x 3456 pixels down to 800 x 533 pixels.
– Michelle @ TLC