Tutorial

PowerPoint “Sketched” Shapes

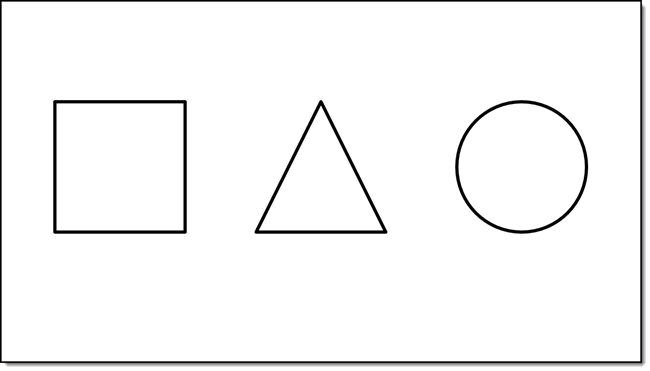
Outline Sketched is one of the newest design features in PowerPoint O365 version (on Windows, Mac, but on Online version yet). It applies a hand drawn, or “sketched” styling to shapes. As example:

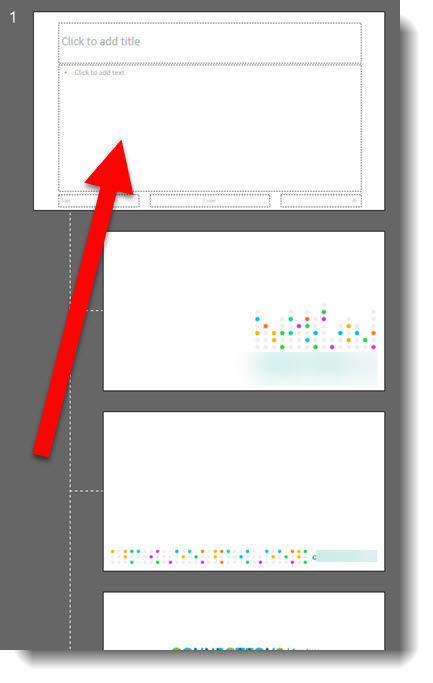
The 1st step is to create any shape or insert a ppt object (read below for details)

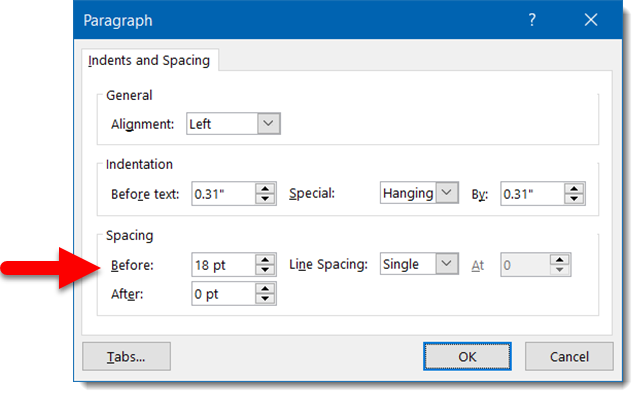
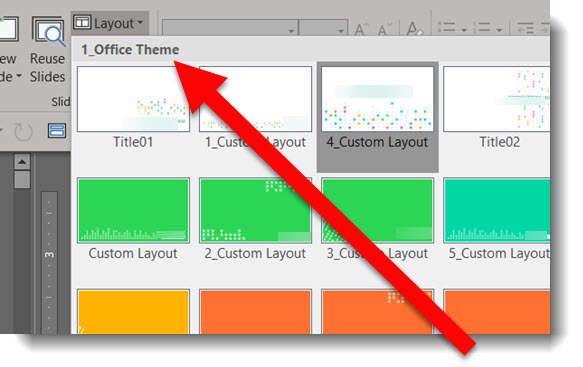
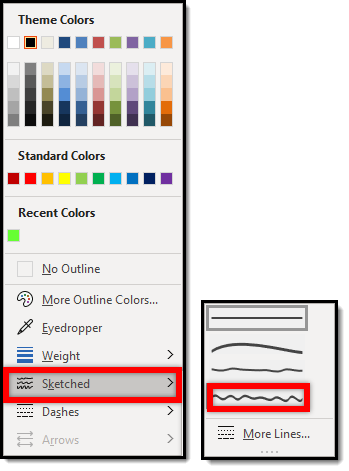
Select the object(s) and go to Shape Format > Shapes Styles tab > Shape Outline

In the Shape Outline drop down menu go to the new SKETCHED option that offers serveral preset “sketched” styles

Notes:
There are several ways to access the Shape Outline menu (at TLC Creative we have it on our QAT).
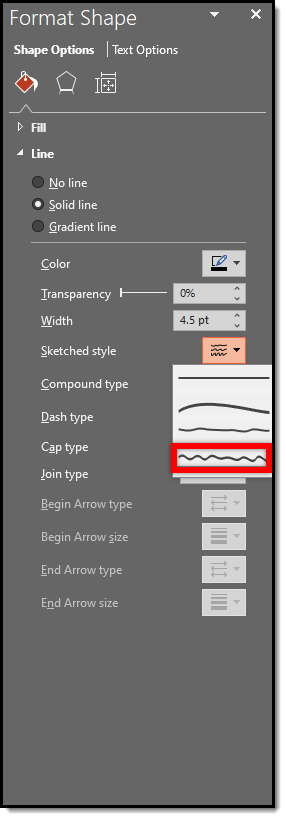
Also, the Sketched settings are available in the “Format Shape” pane


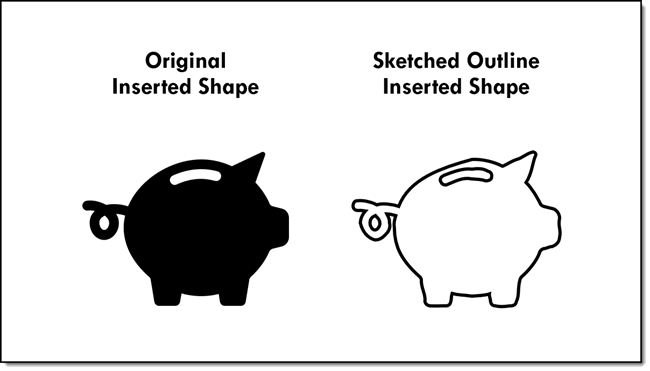
Applying a Sketched outline to the example objects does this:

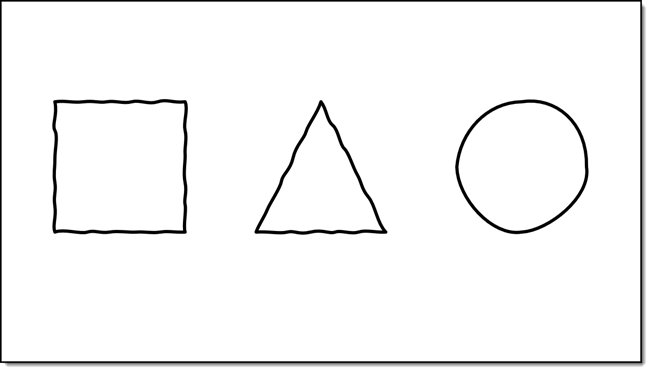
  • The PowerPoint shapes remain completed editable!
  • Objects can be filled and with the ability to still apply a sketch outline.
  • Inserted .SVG graphics
    • The only way to apply this outline to an inserted .svg art is to ungroup the svg file within ppt. However, this will ultimately change the svg into an emf shape and might change the look of the svg, i.e. if the svg is inserted with a gradient style and the object is ungrouped the object might become distorted in color etc.
  • Inserted PowerPoint icons
    • The native icons are basically an internal library of .svg graphics. The sketched styling can be applied the same way it can be applied to .svg graphics described above
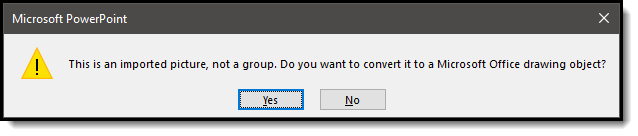
    • Ungroup the icon > click yes at the warning pop up, click yes > apply sketched outline styling
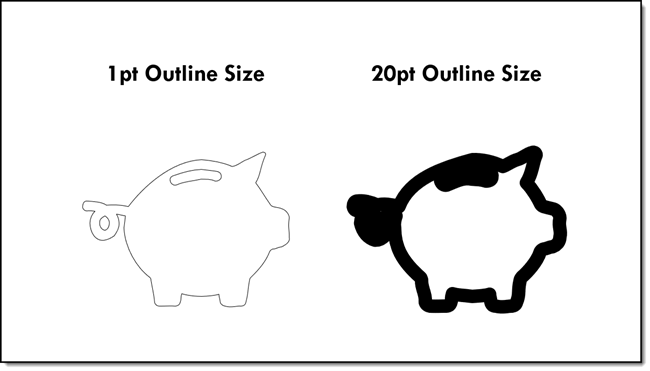
  • Outlines can vary in weight (thickness). Test different weights to find the one that best works with the graphic. As example, our sample PowerPoint icon looks very different with a a thin 1pt outline and a thick 20pt outline
    •  
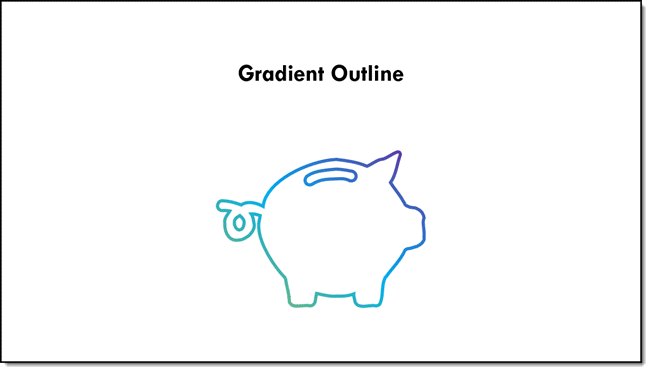
  • Sketched outlines can have all PowerPoint styling options applied; color, shadow, or  gradients
    •  

Troy @ TLC

By |2019-09-27T22:00:41-07:00October 3rd, 2019|PowerPoint, Tutorial|

The Magic Of F4

While doing some production design on a presentation, the client – who is very PowerPoint savvy – leaned over with wide eyes and said “how are you doing that!?”

What I was doing was making the very tedious process of applying custom paragraph spacing to various text boxes throughout a presentation. How, the power of the F4 key. F4 – first introduced to me I believe by the late (and very great and very much the queen of the color red accessories) Sonia Coleman. 

F4 is “repeat last command’. It is not new, but it is one of those small gems for production work that is not widely used.

In my case I had set a paragraph of text to have a custom SPACE BEFORE of 18 pt. The key was adding space before just the primary paragraphs, not the sub-bullet paragraphs. This means the setting cannot be applied to the entire text box, and the current Paragraph Styles functionality is not modal, so must be applied to each paragraph separately.

The tedious process of applying this even just  few paragraphs is a minute. Applying this setting to paragraphs throughout a presentation can be 5-10-30 minutes of many extra mouse clicks selecting the paragraph – opening the Paragraph Styles dialog – updating settings and repeating for every paragraph. BUT, do this to 1 paragraph, select the next paragraph and click F4. The last command is repeated, in this case, applying a custom paragraph style. Fly through the slides, selecting paragraphs and clicking F4 and be done with the formatting in a few minutes!

before and after example of where the above custom paragraph spacing was applied to specific paragraphs.

Troy @ TLC

By |2019-08-22T16:34:54-07:00August 23rd, 2019|Tutorial|

Forcing Morph To Move The Right Shape

This is Part 2 of this tutorial (see Part 1 here). This is the same 4 slide deck with the exact same Morph transitions applied:

The critical difference is I went in and named each of the 6 shapes in the Selection Pane. This is the new Morph Object Tagging feature – it allows us to force associations of objects across slides, which forces Morph to transform exactly the objects we choose.

The behind the scenes coding (as I understand it) is a really clever hack by the Microsoft team. Each object (photo, shape, vector graphic, text box) is assigned a unique ID number, something we as a user cannot control, and is separate from the Selection Pane naming. Each slide, even with the same objects, is reassigned ID numbers, so there is not a guarantee of association from slide to slide. The Morph Object Tagging steps in as the slide transition starts, reading the Selection Pane names for each object. Then reads the Selection Pane names of objects on the next slide. If the objects start with a double exclamation mark “!!” and have the same name, Morph overrides the PowerPoint ID number and associated those two objects – a fantastic hack for everyone to take advantage of! 

Slides 1-2; the logo and shapes go to the expected locations, with or without Morph Object Tags applied (see Part 1).

slides 2-3: All of the shapes rearranged themselves with Morph, again with or without Object Tags applied (which as a good surprise).

slides 3-4: without Object Tags, there was no motion and a legacy Fade Off/Fade On effect which really was not the desired motion. With Object Tags applied, the Morph transition works perfect!

[KGVID]https://thepowerpointblog.com/wp-content/uploads/2019/06/unnamed-file-5.mp4[/KGVID]

Troy @ TLC

By |2019-10-28T15:33:28-07:00June 12th, 2019|Tutorial|

Morph Does Not Move the Right Shape!

We love the Morph transition. Animation is so fast and so easy to setup! But there is no control over what morph does. Usually this is not a problem and the motion effect works well enough. But sometimes it really is not working and it is frustrating! This is a 2 part tutorial. Part 1, this post, walks through morph not working, and there is no fix without the new Object Tagging feature. Part 2, the next post, updates the exact same slides with Morph Object Tagging and what was not possible works as expected!

Here is the sample slide deck, 4 slides with PowerPoint shapes (okay, slide 1 is our logo). No animation is used on the slides, just Morph.

Object names: open the Selection Pane and we see the PowerPoint auto assigned names. Note: Morph really does not care what these names are as each object has a code ID number. But the Selection Pane naming plays an important role in some clever coding by the Microsoft team – explained in the next post.

Slide 1 to 2, the motion animation is because on slide 1 all the shapes are ready for Morph to use by being positioned off the visible area.

slides 2-3 work just fine. The goal is to move the shapes into numerical order, and Morph does a perfect job of keeping track of the shapes and moving their were we want (note: I actually had expected this to be a problem for Morph).

slides 3-4 is a disaster. Each of the shapes was first changed to a triangle using Change Shape, and then repositioned and resized. Morph does not keep shapes associated when Change Shape is applied, so we get a very boring fade off/fade on effect.

Here is everything in motion:

[KGVID]https://thepowerpointblog.com/wp-content/uploads/2019/06/unnamed-file-4.mp4[/KGVID]

Up next, the same slide deck and forcing Morph to do exactly what we want!

Troy @ TLC

By |2019-10-28T15:34:13-07:00June 10th, 2019|Tutorial|

Photo-to-Photo Morph Effect, with Object Tagging

In the previous post it was all about the frustration of not being able to morph one image to another image. Today is all about Morph’s new feature addition, Object Tagging, gives us a way to do this!

Same 3 slides. Same images. Same position and sizing. Same Morph transition applied to each slide. The difference is the 3 images have been given Object Tag names in the selection pane with a double exclamation “!!”.

The results this time, are exactly what was envisioned. The wolf photo grows and transforms into the scenery image, and the photo outline changes from blue to orange.

[KGVID]https://thepowerpointblog.com/wp-content/uploads/2019/06/unnamed-file-6.mp4[/KGVID]

Troy @ TLC


By |2019-10-28T15:35:14-07:00June 7th, 2019|Resource/Misc, Tutorial|

Photo-to-Photo Morph Effect, with No Tags

Here is a limitation of Morph, it cannot change 1 photo to another. This example demo’s that issue. Slide 2 has an image. The animation goal is to have the image on slide 2 move-grow-and morph into the image on slide 3. Without morph object tagging there is no way to accomplish this (okay, we can insert a shape, fill with image and on the second slide change the fill to the other image – but this is a lot of effort and not needed if you read the next blog post!)

Here is how the Morph effect fails and reverts to a fade transition like effect.

[KGVID]https://thepowerpointblog.com/wp-content/uploads/2019/06/unnamed-file-1.mp4[/KGVID]

Up next, the exact same slide set and how to force Morph to accomplish what we want!

Troy @ TLC

By |2019-10-28T10:12:34-07:00June 5th, 2019|PowerPoint, Tutorial|

Making The Memorial Day 2019 Video in PowerPoint

To create the Memorial Day 2019 video was first about finding the art assets.

  • The US Flag was a vector art file downloaded from our Adobe Stock subscription. It was opened in Adobe Illustrator and saved as two art files; the flag with transparent “white” bands saved as an .svg, and the gradient white bands fills saved as an opaque .png.
  • The white bands gradient was saved as a .png so PowerPoint image transparency could be applied.

  • Next was searching our VideoBlocks.com account for the 4 videos.
  • Each was downloaded as .MP4 video files and in PowerPoint each was sized, cropped and duration trimmed.

Setting the animation on the slide was simple, but did require a few rounds of revision.

1 For an additional layer of motion, the U.S. flag has a very slow, horizontal only, scaling. This slow animation was used as the duration for the overall video.

2. The first video begins playback immediately.

3. The second video fades in, on top of the first video that is still playing (goal is no static pauses) and starts playback at the same time.

4. Like videos 2-3-4, the third video is set to fade in and start playing just before the end of the previous video.

5. The duration of the fourth video was set to match the U.S. flag emphasis animation.

6. All 4 videos fade out just before the U.S. flag animation completes, leaving a static U.S. flag with white bands, where the white is actually the slide background color.

Done! All layout, video compositing, animation timing and export completed in PowerPoint (note: video from PowerPoint exported at 1280×720, 30 FPS with audio channel. The exported video then brought into Adobe Media Encoder to render a blog friendly under 12MB version).

[KGVID]https://thepowerpointblog.com/wp-content/uploads/2019/05/unnamed-file-1.mp4[/KGVID]

Troy @ TLC

By |2019-11-12T14:43:04-07:00May 30th, 2019|Portfolio, PowerPoint, Tutorial|

Name the Master Slide

Every Master Slide has a name. The name is helpful in identifying the content/the purpose/the identity of the Master Layouts.

Often (far too often), when reviewing provided PowerPoint slide decks is the Microsoft default Master Slide name is there.

Updating the Master Slide name is very easy:

1. Under the VIEW tab select “Slide Master”

2. Click RENAME and change the name to something more descriptive

3. After changing the name, Click RENAME

4. The Master Slide layouts have now been updated

Troy @ TLC

By |2018-11-11T13:04:09-07:00November 30th, 2018|PowerPoint, Tutorial|

Make it ALL CAPS

“How Did They Do That? When I type into the title text placeholder, all of the text is automatically ALL CAPS.”

When developing a template or custom layout, this is a great way to help everyone using the template with consistent formatting.

Go to the Master Slide or specific Master Layout and select the title text placeholder.


On the HOME tab, in the FONT section, click the FONT DIALOG icon.

From the FONT dialog, check the ALL CAPS option, and OK.

That’s all the programming needed. That text placeholder will now be ALL CAPS text as it is added.

-Troy @ TLC

By |2018-11-11T13:52:54-07:00November 14th, 2018|Tutorial|

Placeholder Prompt Text – Make it Helpful

Every new slide, with text placeholders, have some informational prompt text to let users know it is available.

But the prompt text does not need to be the Microsoft supplied text! The prompt text can be updated to personalize to the audience, topic, or content needs.

-Troy @ TLC

By |2018-11-12T05:57:11-07:00November 12th, 2018|Tutorial|
Go to Top