Tutorial

PowerPoint “Paste Special” Tip – Fix Angled/Rotated Images

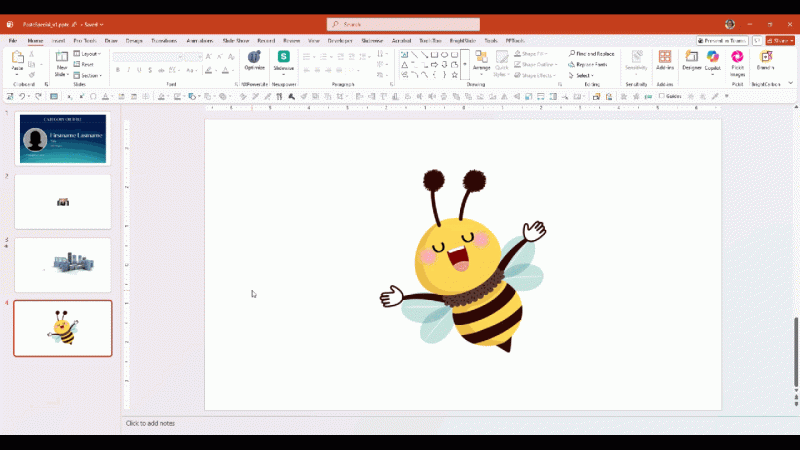
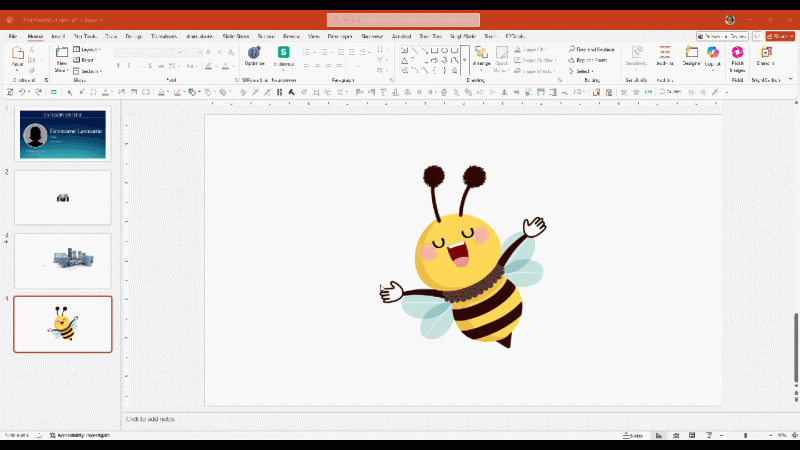
Imagine you’ve rotated a photo 30 degrees, using PowerPoint’s ability to rotate any shape, image or text box. It now fits the slide design better – YAY! But the image needs to now be cropped, and the cropping a rotated image is not going to allow the image to be cropped…

When you select Crop, you’ll notice that:

  • The crop handles follow the image’s original orientation.
  • Cropping can feel awkward and imprecise.
  • It’s difficult to crop exactly what you see on the slide.


This happens because PowerPoint stores the rotation as an attribute of the image instead of creating a new, rotated image. So, let’s use Paste Special to add a new version of image, that is on the 90-degree axis (eg. straight) and crop the image!

  • Select the rotated image
  • Copy (CTRL + C)
  • Delete the original (or hide it via selection tool)
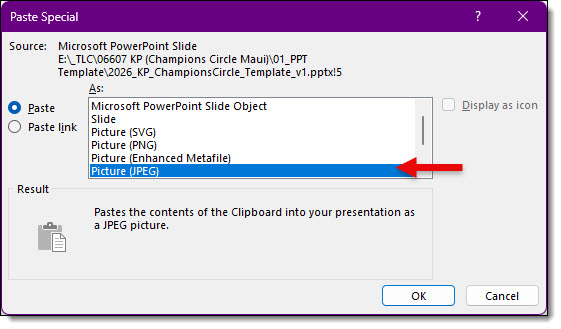
  • Use Paste Special > Picture (PNG) (or the Paste Special > PNG Quick Access Toolbar button)
  • The result is the same image (now in a .PNG format) is on the slide and ready to crop!

Now when you select Crop:

  • The crop handles align with the image as you see it.
  • Cropping feels natural.
  • Easier to make precise adjustments.


The picture hasn’t changed visually, the only thing changed is the way PowerPoint treats it.

TIP: Make this a 1-click formatting option. If you haven’t already added Paste Special – PNG to your QAT (Quick Access Toolbar), check out the on how to add this super helpful shortcut to your PowerPoint setup. This of course is if you are working in PowerPoint Windows desktop app. See the July 16, 2026 post, PowerPoint “Paste Special” Tip – Make it a QAT Button.

-Troy and the TLC Creative presentation design team

By |2026-07-22T14:56:46-07:00August 11th, 2026|PowerPoint, Tutorial|

PowerPoint “Paste Special” Tip – Create Images from Video

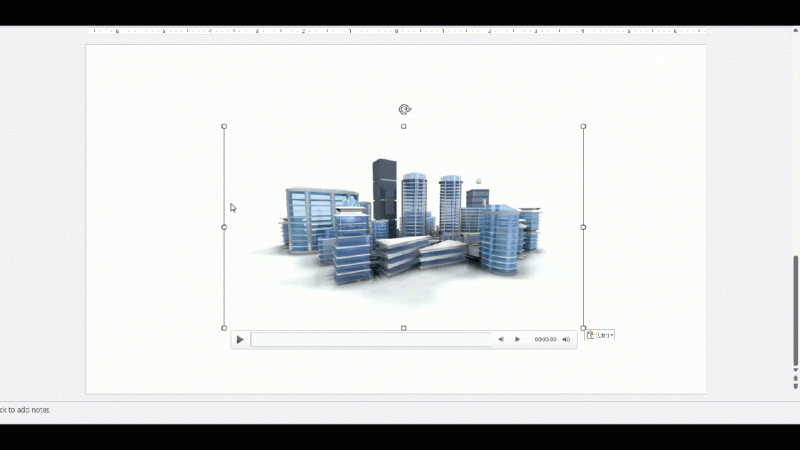
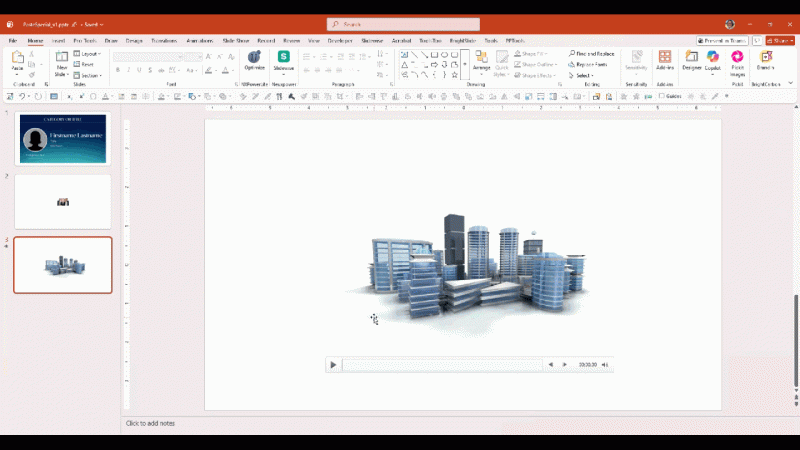
Videos are a great way to add motion and storytelling to a presentation, but what happens when you need a still image from that video? Maybe you need a thumbnail, a screenshot of a specific moment, or an image to use elsewhere in the presentation. Paste Special is the solution!


A simple copy and paste will not work, as it pastes another copy of the video – and our goal is a .png image of a specific frame of the video.


Instead, use Paste Special > PNG to quickly turn a video frame into an image.

TIP: Make this a 1-click formatting option. If you haven’t already added Paste Special – PNG to your QAT (Quick Access Toolbar), check out the on how to add this super helpful shortcut to your PowerPoint setup. This of course is if you are working in PowerPoint Windows desktop app. See the July 16, 2026 post, PowerPoint “Paste Special” Tip – Make it a QAT Button.

Let’s go through the step-by-step of creating an image from a video:

  1. Select the video
  2. Move the video playback slider to frame you want to add as an image – this frame will become your image
  3. Go to the Video Format tab
  4. In the Adjust section, click the Poster Frame dropdown
  5. Select Use Current Frame. PowerPoint will now use that frame as the visual preview image for the video
  6. Copy the video (CTRL+ C)
  7. Use Paste Special > PNG
  8. PowerPoint creates a PNG image of the selected video frame
  9. Adjust the new image as needed for the slide layout (resize, crop, add effects, etc.)

Note: the inserted .png image is the size of the video. As example, if the video is very small on the slide, the inserted image will also be small. If a large image is needed, temporarily make the video larger on the slide before copying it.


This is especially useful because a single video can provide many different images. Instead of searching for separate photos, you can scrub through the video to find a useful frame, set as poster frame, copy and Paste Special as PNG. Repeat as needed for additional images. You can quickly create library of still images from existing video content.
After creating your images, remember to reset the video poster frame!

To reset the poster frame on a video:

  1. Select the video
  2. Go to Video Format > Poster Frame
  3. In the Adjust section, click the Poster Frame dropdown
  4. Select Reset (back to the beginning frame)

-Troy and the TLC Creative presentation design team

By |2026-08-11T18:50:02-07:00August 6th, 2026|PowerPoint, Tutorial|

PowerPoint “Paste Special” Tip – Create Custom Shapes & Images

PowerPoint is a POWERFUL design tool. Why? Because it allows us to create graphics using editable objects like shapes, icons, and SVG files. And in most cases, keeping those objects editable is exactly what we want… But there are times when a finished graphic needs to become a single image.


That’s Where Paste Special > PNG Comes In

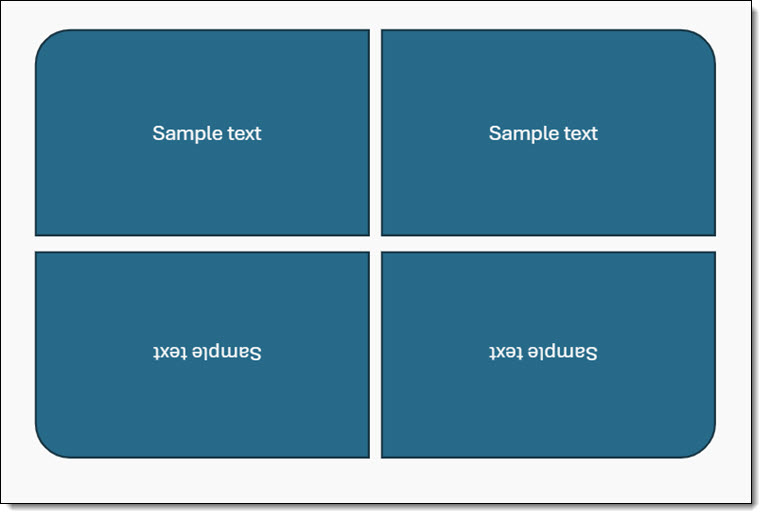
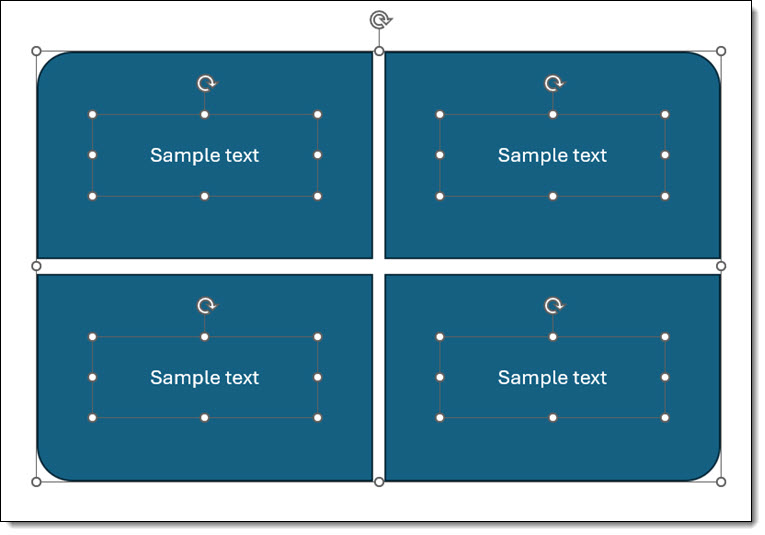
Take this 4-box quadrant for example with text set inside each shape. The goal is a rounded corner SWAT style grid accomplished with the PowerPoint shape “Single Rounded Corner Rectangle.” But when the shape is flipped vertically and horizontally to create rounded corners in all 4 quadrants, a problem arises with the text in some of the shapes ☹️. As you can see in the screen capture below, PowerPoint limits text box orientation when a shape is flipped. That means that embedded text does not work for the bottom two shapes.


Here’s what you do to work around this limitation: copy the 4 shapes removing any text inside them first (Select all > CTRL + C), delete the shapes, then Paste Special > PNG. The resulting PNG image has the 4-quadrants with the rounded corners, and as a PNG image the background around the quadrant shapes is transparent.

The downside is, since it’s one large image, these PowerPoint shapes are not editable. That means that for this example, additional text boxes need to be added and placed on top of the image.

TIP: Make this a 1-click formatting option. If you haven’t already added Paste Special – PNG to your QAT (Quick Access Toolbar), check out the on how to add this super helpful shortcut to your PowerPoint setup. This of course is if you are working in the PowerPoint Windows desktop app. See the July 16, 2026 post, PowerPoint “Paste Special” Tip – Make it a QAT Button.

-Troy and the TLC Creative presentation design team

By |2026-07-30T16:16:23-07:00July 30th, 2026|PowerPoint, Tutorial|

PowerPoint “Paste Special” Tip – Optimize a Single Image

Sometimes you know an image is just huge and needs to be optimized. Using paste-special is a great option to instantly create an optimized version of an image.
Presentations can quickly become bloated with large image files, even when the images appear small on the slide. One common reason is that PowerPoint stores the original image dimensions and resolution – not just the size you see on the slide. This means a small-looking image may contain a much larger image file behind the scenes.

Using Paste Special as PNG, you can create a new optimized version of an image that matches the actual size on the slide. Copying and pasting as a PNG image will optimize the image dimensions and remove unnecessary resolution + data which results in a smaller file size.

The TLC Creative presentation design team uses the Paste Special PNG shortcut on the Quick Access Toolbar (covered in our previous post) to quickly optimize individual images.
Here’s how:

  1. Select the image you want to optimize
  2. Copy the image (CTRL+C)
  3. Delete the original image (trust us, it’s okay to delete it)
  4. Use Paste Special > Picture (PNG)
  5. The new PNG image added to the slide is created based on the original image, but at the size it was copied at, creating an optimized exactly to the display size image!

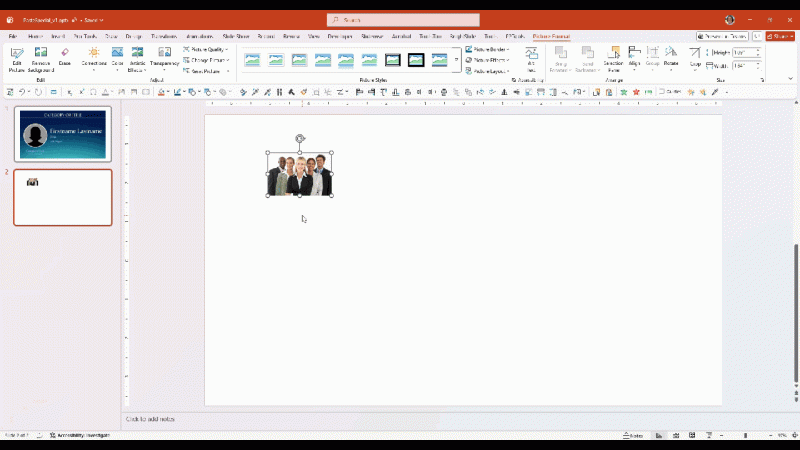
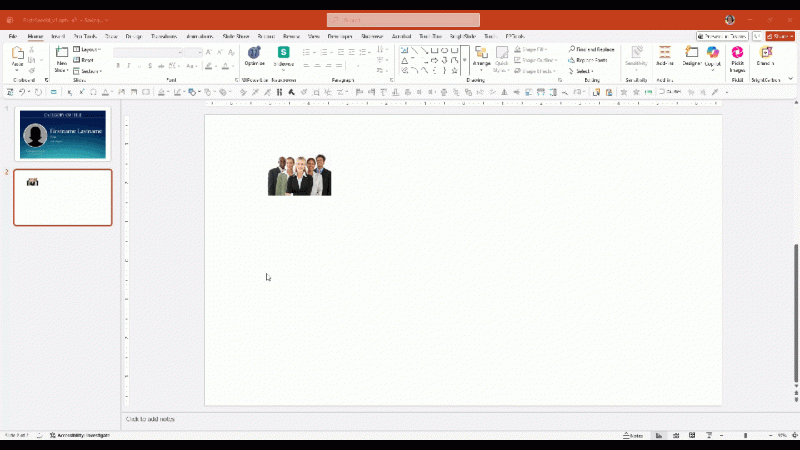
Here is an example of the original image, that is small on the slide, but really a massive file size in the PowerPoint file:


Here is the Paste Special PNG version of the image – what you see is the file size in the PowerPoint file:


Now when the image is reset, its no longer the unnecessarily large image – which results in a smaller file size for the presentation:


For entire presentations with many images, PowerPoint’s build in Compress Pictures feature can also help (but the TLC Creative design team trusts NXPowerlite for optimizing full presentations vs. PowerPoint’s built in option). But, when you need more control over individual images, PowerPoint’s Paste Special is a built-in option that works fast and really great, giving you a targeted way to optimize specific problem images!

-Troy and the TLC Creative presentation design team

By |2026-07-21T10:40:50-07:00July 28th, 2026|PowerPoint, Tutorial|

PowerPoint “Paste Special” Tip – Add an Image of a Slide, to a Slide

Need an image of  a slide, on your slide? We do – often! Here is a quick PowerPoint trick that will create a full-size image of any slide in just a couple of clicks.

This is built into PowerPoint, if you know about using Paste Special to convert a slide into a PNG or JPEG instantly.

Here’s how to do it:

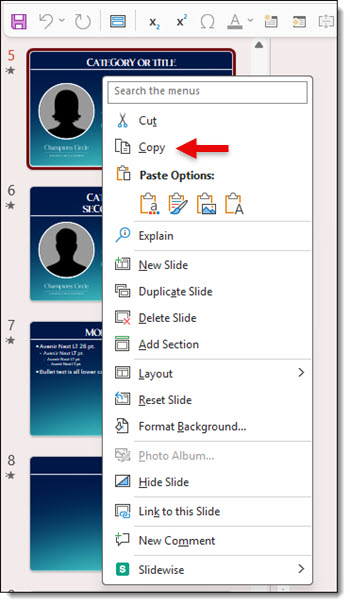
1. In the thumbnail pane on the left side of PowerPoint, select the slide to convert to an image and right-click the thumbnail
2. Choose COPY or press CTRL + C


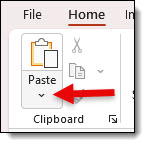
3. Go to HOME tab
4. Click the PASTE drop-down


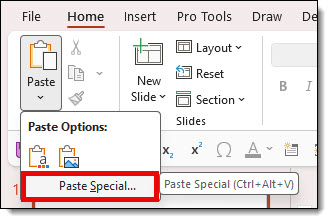
5. Select PASTE SPECIAL


6. Choose an image format and click OK


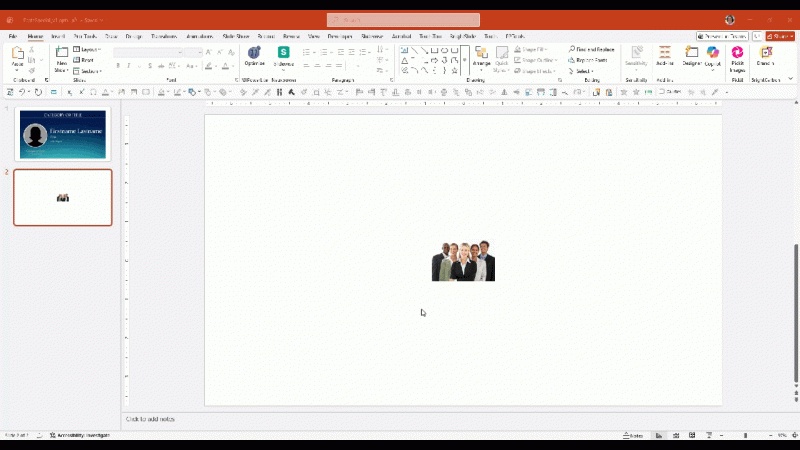
That’s it! PowerPoint creates a full-resolution image of the entire slide, which is inserted as a single picture. Unlike the original slide, the image can’t be edited object by object, but it can be resized, cropped, rotated, or have picture formatting applied (inserted here slightly smaller than the slide to see it is an image of the original slide, on a new slide, all created in just a few clicks!).

TIP: Make this a 1-click formatting option. If you haven’t already added Paste Special – PNG to your QAT (Quick Access Toolbar), check out the on how to add this super helpful shortcut to your PowerPoint setup. This of course is if you are working in PowerPoint Windows desktop app. See the July 16, 2026 post, PowerPoint “Paste Special” Tip – Make it a QAT Button.

-Troy and the TLC Creative presentation design team

By |2026-07-22T14:34:21-07:00July 23rd, 2026|PowerPoint, Tutorial|

PowerPoint “Paste Special” Tip – Make it a QAT Button

If you regularly use Paste Special in PowerPoint, navigating through Home > Paste > Paste Special every time can quickly become repetitive. The TLC Creative Services design team uses Paste Special dozens of times a day – most often to paste content as a PNG image. To optimize our workflow, we’ve added Paste Special as .PNG directly to the PowerPoint Quick Access Toolbar (QAT), turning a multi-click process into a single click.


The QAT is always visible, regardless of which ribbon tab is open. Adding frequently used commands means less time spent navigating menus and more time designing, this is definitely a great power-user setup hack!

Here’s how to add Paste Special to the Quick Access Toolbar:
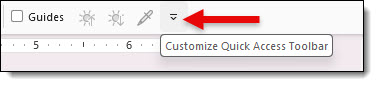
1. Click the small Customize Quick Access Toolbar arrow on the QAT


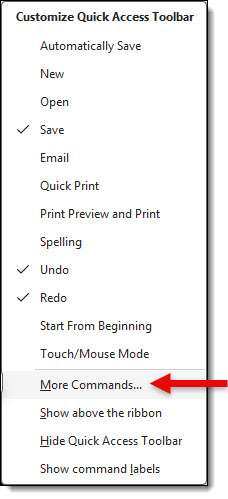
2. Select MORE COMMANDS


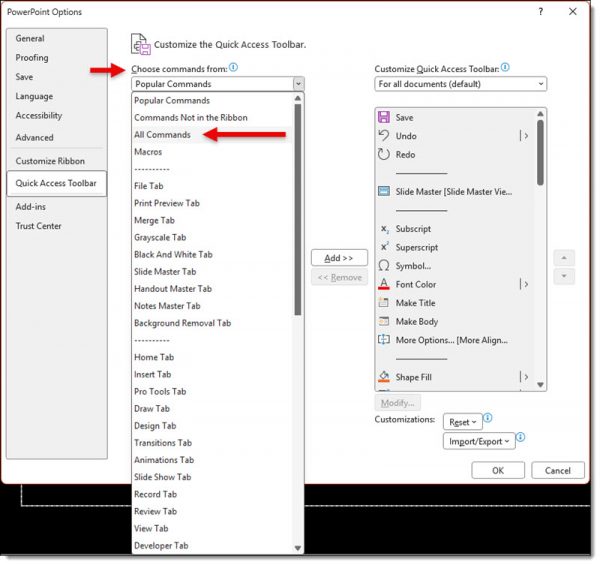
3. In the CHOOSE COMMANDS FROM dropdown, select ALL COMMANDS


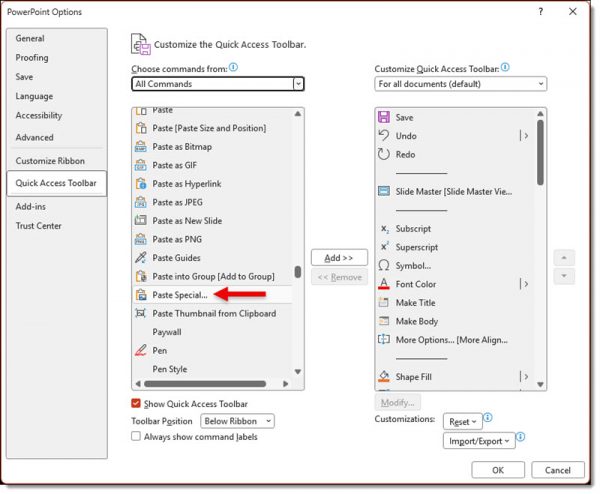
4. Scroll down to PASTE SPECIAL


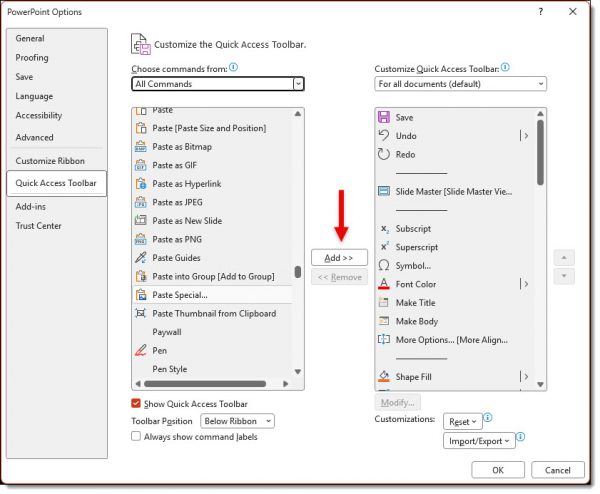
5. Click ADD >>


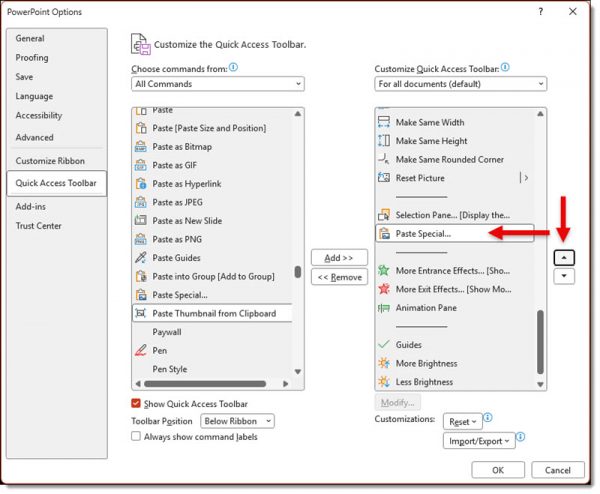
6. Optional – use the MOVE UP button to position it where you’d like on the toolbar

7. Click OK
The Paste Special button will now appear in the Quick Access Toolbar and be available no matter which ribbon tab is active.


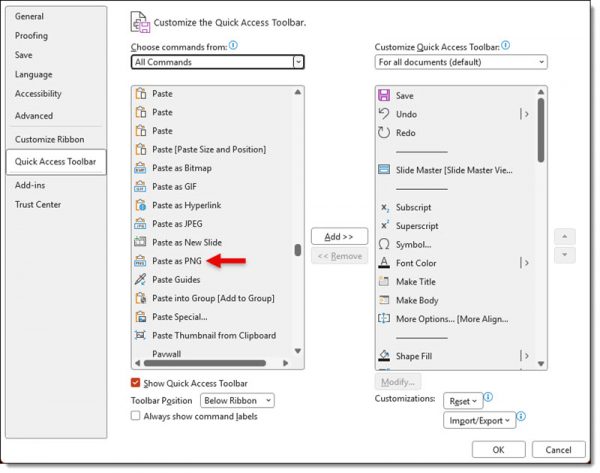
Paste as PNG can also be added to the QAT by following the same steps and choosing PASTE AS PNG from ALL COMMANDS. While Paste Special offers several formats, the design team most often selects Picture (PNG) because it provides a great balance of quality and reliability. We still use other Paste Special options when appropriate, but PNG is our default choice for most design work.

-Troy and the TLC Creative presentation design team

By |2026-07-21T09:13:38-07:00July 16th, 2026|PowerPoint, Tutorial|

Hack PowerPoint Transitions for a Great Effect!

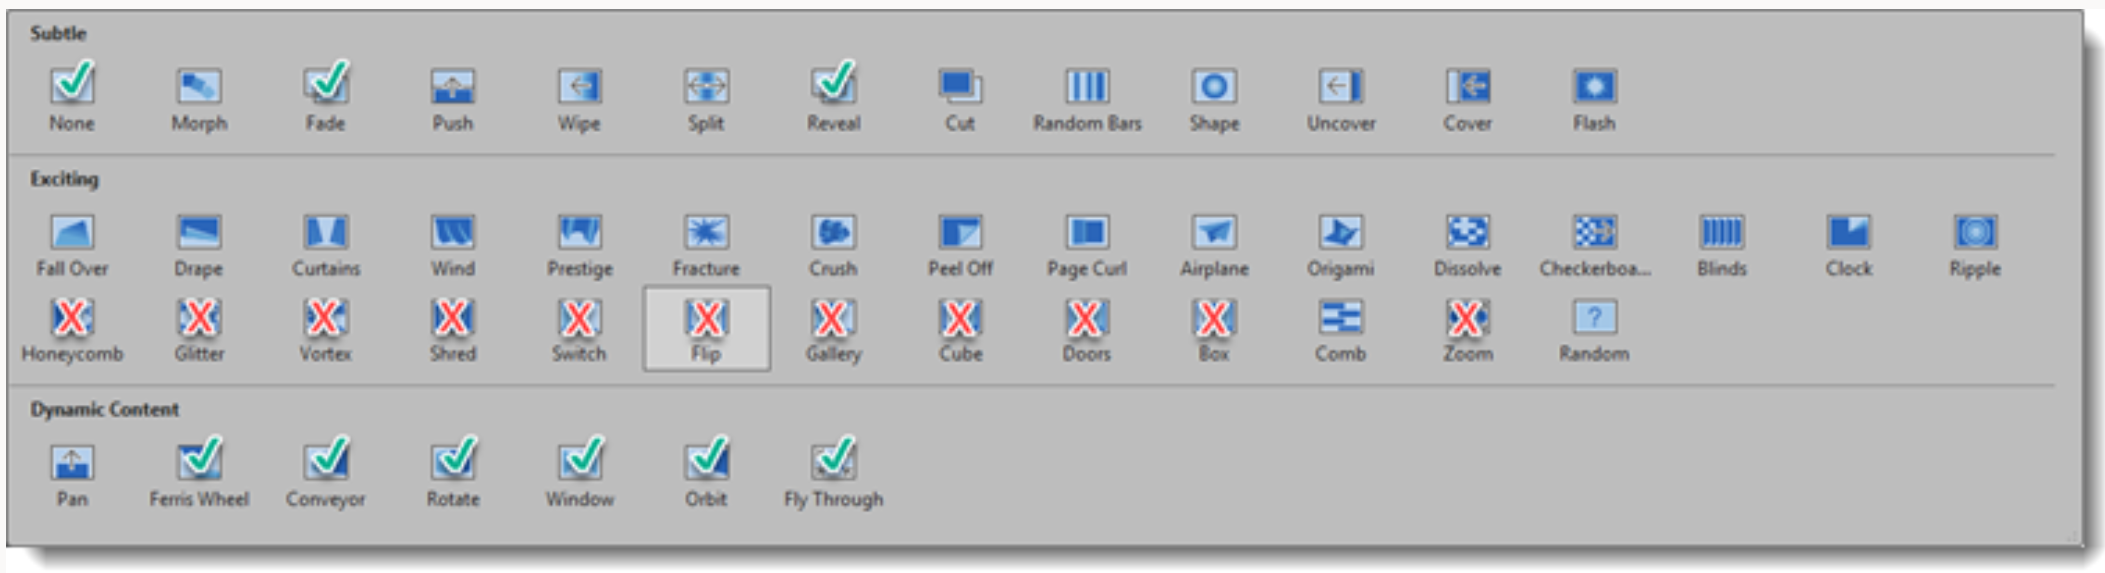
When using dynamic PowerPoint transitions there is a hack to giving the transition a custom middle color! For example, on this Reveal transition below, we see the slide background during the transition effect. It’s black or white by default, according to the Background Style of the master slide assigned. In this example the slide background is set to white, which is the mid-transition color we see.

However, there is a transition hack for PowerPoint’s dynamic transitions – the background color in the middle of the transition can be customized! To confirm, this is dependent on which transition is in use, and it will not work with all transitions (see transition types below). 

For example, the Reveal transition above uses the CURRENT slide background color, which is white, as part of the transition. By default, this is the Background Style assigned to that Master slide (almost always white or black).   

TIP: Use caution when changing Background Styles! Changing a Background Style has a lot of tangent updates that can change slide content. 

SET THE SLIDE BACKGROUND COLOR  

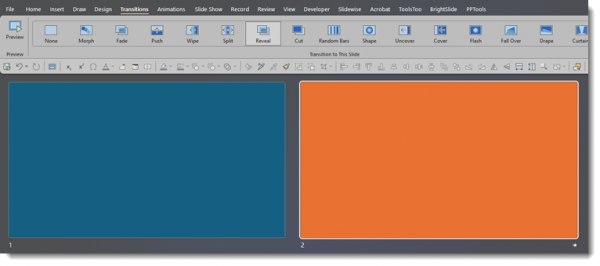
For example, create 2 slides, and set the first slide to a blue background and the second slide to an orange background. This must be the true slide background setting – it will not work if you add a blue or orange box to the slide – the background must be set via Format Background > Solid Color. 

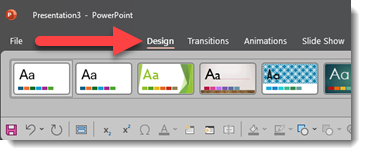
To set the slide background color, click on the Design tab and then the Format Background button to the right of the toolbar (or simply right-click off the slide and select Format Background).  

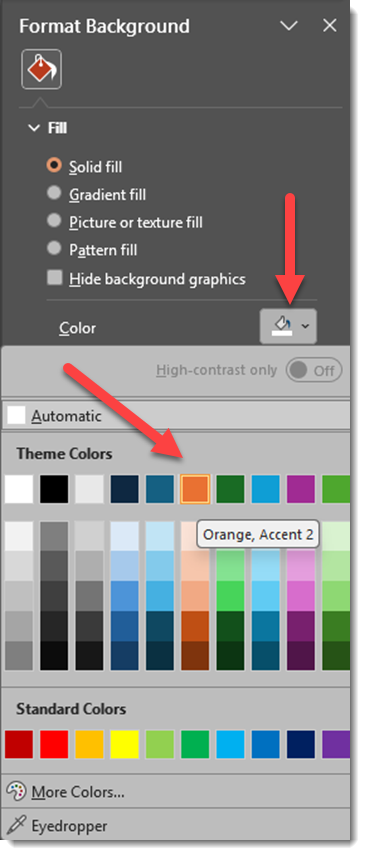
With the SOLID FILL button selected, click on COLOR to change to blue for the first slide and orange for the second slide of the presentation.  

Now the Reveal transition has a subtle fade from blue to orange, which is like getting a bonus, custom visual effect! 

However, the slide backgrounds are only going to be seen during the transition effect. To demonstrate this, let’s add our full slide images from the first example to our blue and orange slides (an image on each slide that “covers” the assigned color background). 

The result: instead of the slides flashing to white during the transition, there is now a blue-to-orange color shift during the slide transition! 

MORE OPTIONS 

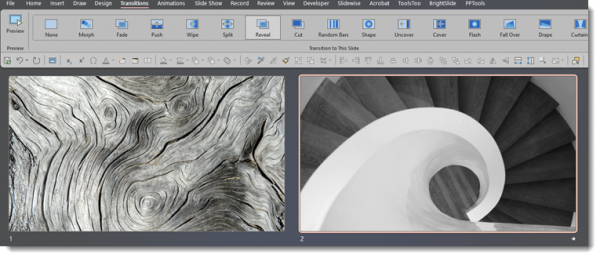
In addition to setting the background with a solid color, other options are supported, like gradients, and image backgrounds – if they are true embedded background images set in the Format Background dialog.  

As an example, here the same Reveal transition is used. In the first slide, the background is the default black background. The second slide has a background image of colorful glitter. The Reveal transition adds the colorful glitter image as part of the transition! 

THIS DOES NOT WORK EVERYWHERE 

Unfortunately, this transition hack doesn’t work on all transitions. Transitions indicated below with a (✓) use the slide background color as part of the transition effect, and the color can be modified as we described above. The transitions, noted with an (x) use a black between color – that cannot be changed. And the transitions without a symbol do not have a “between color” for the transition. 

Enjoy these PowerPoint transition hacks to further customize your presentations! 

-The TLC Creative Services design team 

By |2026-01-09T10:54:48-08:00January 27th, 2026|PowerPoint, Tutorial|

A Look Back at Using PowerPoint’s Picture Fill for Dynamic Slide Design

Two years ago, we wrote a blog post about one of PowerPoint’s most underutilized features: the PICTURE FILL option. 

This option, with creative use, can take a presentation slide from good to GREAT! So, let’s revisit how to take stock vector art (such as .svg) and make it dynamic using PowerPoint’s Picture Fill. 

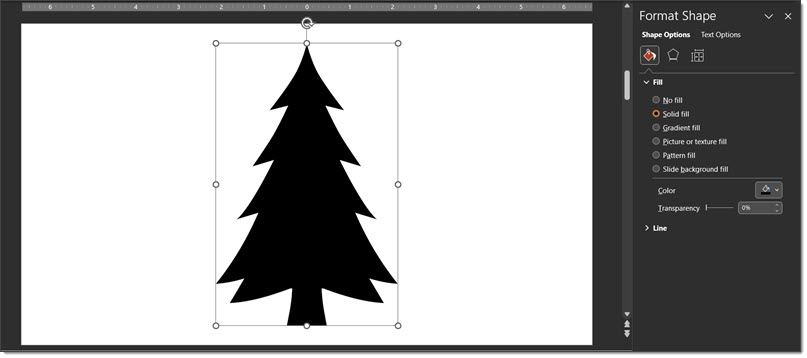
First, is adding a nice Christmas tree .svg graphic that is appropriately themed for this time of year. 


COLOR FILL 

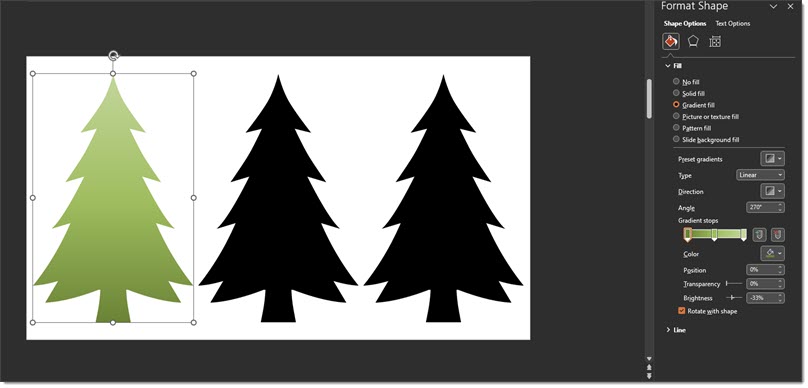
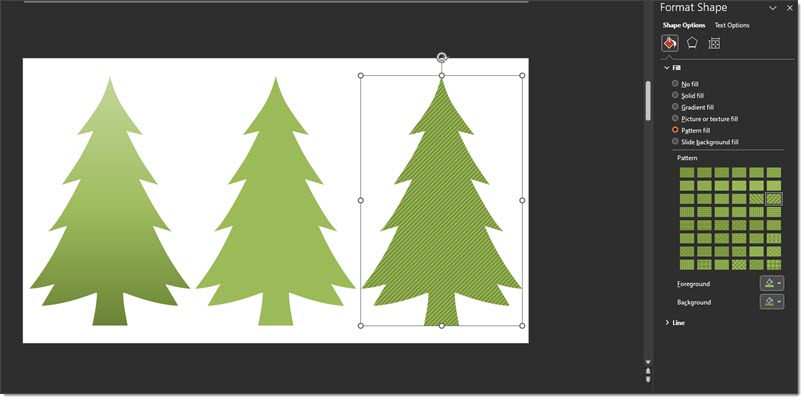
Obviously, we can use the paint bucket to change the color of the tree, but a step further is to use PowerPoint’s gradient fill option. 

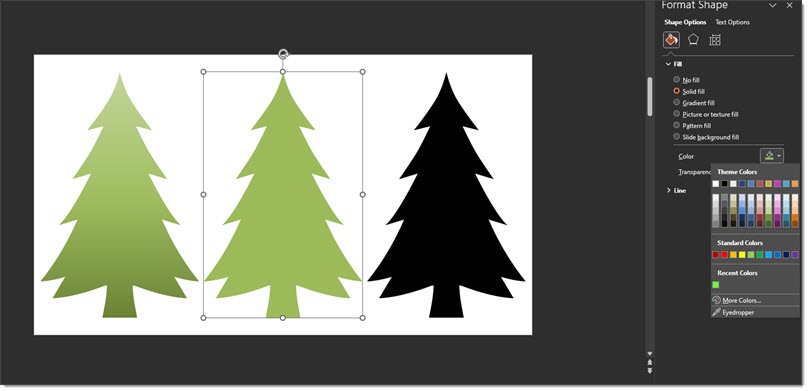
A gradient fill (left tree image) is a bit more stylized than solid green (middle tree image). 


But maybe hold off using the pattern fill options for this example (right tree). 

Just as a note: if you’re doing a pattern fill, the pattern colors and the background color can both be customized – but still, let’s hold off on using the pattern fill for this slide! 

PICTURE FILL 

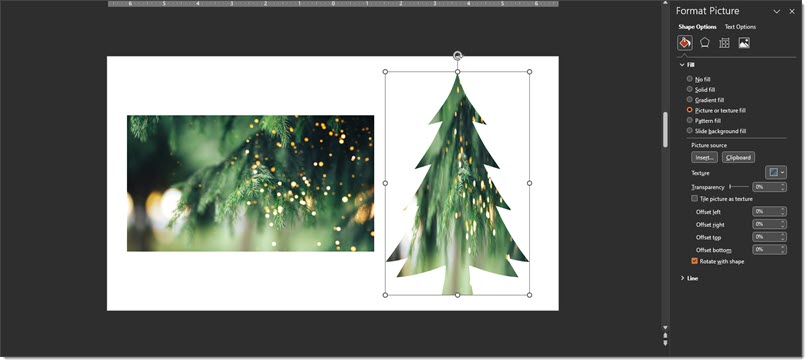
And while these are all nice options, we can get an even more realistic result if we use the Picture Fill option! To use this option, select your vector art on the slide > open the FORMAT SHAPE dialog > then select PICTURE OR TEXTURE FILL > then locate the photo image you want to use within your computer. 

Here’s a tip! If you don’t want to go through the above rigamarole, you can also CTRL + C the photo image you’d like to use, and then simply click on your vector image and paste the photo into your vector art! 

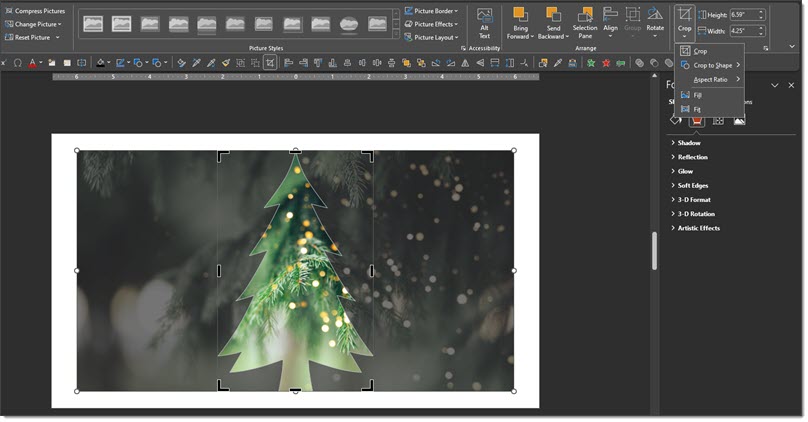
You’ll also notice that the inserted image is distorted to fit into the size of the vector art (the tree). You can adjust the distortion and size by using PowerPoint’s CROP tool. 

First, select the tree > click the CROP tool > adjust the width of the fill image with its size/shape points. This, of course, applies to vector art of any shape or size! 

And here is the final slide from our December 21, 2023 blog post – polished vector art and all design created directly in PowerPoint. Download this slide to use in your own presentations here! 

-Troy @ TLC (with special thanks to Christie for this design example, created 2 years ago!) 

By |2026-01-09T10:58:28-08:00December 26th, 2025|PowerPoint, The PowerPoint® Blog, Tutorial|

Add a “Traffic Light” Timer to Speaker Notes Slides!

Speaker Notes have been part of PowerPoint for a loooong time. As a result, we’ve experienced many of the formatting, display, and export limitations that Speaker Notes has – usually during one of the many corporate event projects we handle.

However, limitations aside, Speaker Notes are definitely something in our standard workflow! Whether they be from a teleprompt system, using PowerPoint’s Presenter View, or separate “Notes Slides” (which is what we are going to talk about today), Speaker Notes are a must-use for us.
Notes Slides 

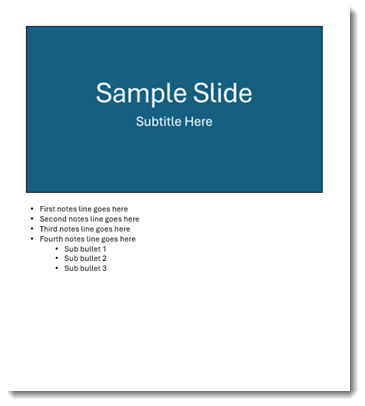
Lately, we have been asked more often to develop and manage “Notes Slides”.  First, let’s describe and define what “Notes Slides” are, as they are a hack to presenting with PowerPoint (the same can be done with Keynote or Google Slides). These are slides that have notes for a presenter to reference, but are not shown to the audience
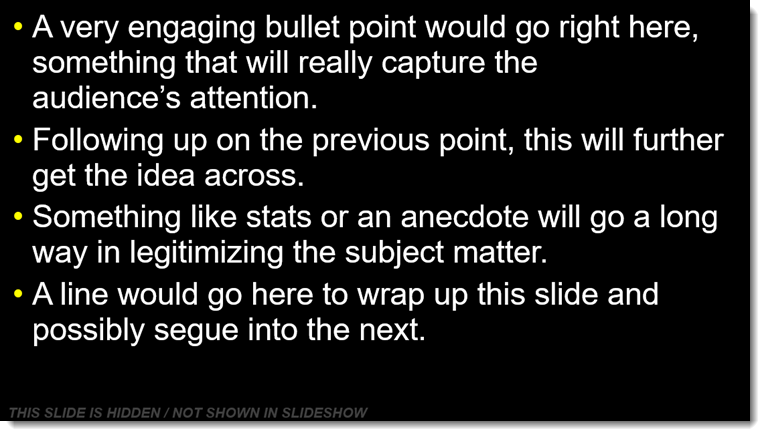
The idea is simple: for every presentation slide, create a parallel slide that has the presenter notes. We are not using a teleprompt system (though always our preference for stage presentations!), and we are not using Presenter View. 

For example, on the left is the presentation of 10 slides. On the right is a matched set of 10 “Notes” slides, one notes slide for each presentation slide (and click-for-click aligned to any animations that may be used on the presentation slides, but that’s for another day). 
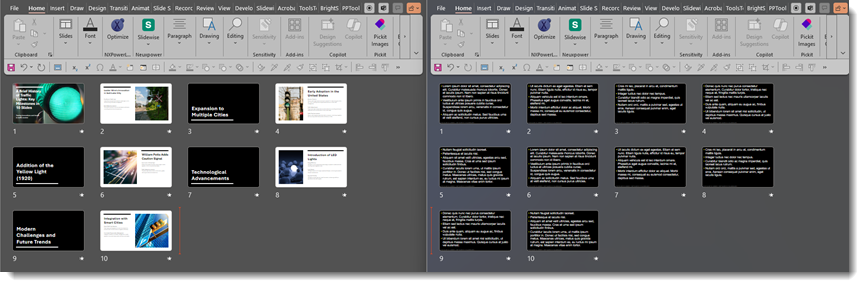
This example is based on a live event with at least 2 confidence monitors, viewable by the presenter from the stage. One confidence monitor shows the slide the audience sees on the screens, and the other confidence monitor shows the “Notes Slide” associated with that audience slide. 

Presentation Pace and Timing 

Another ask from presenters is to add timestamp notes or other indicators so they can target their pace for specific slides or pace their overall presentation. This is something we can easily do with Notes Slides (hint to Microsoft: this would be another good widget to add to Presenter View!). 

Traffic Light and Traffic Bar 

A novel and visual solution is to add an animated “traffic light” to each Notes Slides. The idea is that when the traffic light is green, the presenter is on pace and has time for the slide. When it is yellow, the presenter knows they need to wrap up that slide’s content. And when it shows red, it is time for the presenter to go to the next slide. 

Here is one way the TLC Creative design team implements a “traffic light bar” in Notes Slides. We basically add a thin, animated PowerPoint rectangle with a gradient from green to yellow to red, positioned either along the top of the slide, the bottom of the slide, or vertically top-to-bottom on the side. 

When used in a slideshow, it works just like a stoplight going from green to yellow to red. When animated with the “Wipe” animation, each bar is preset to finish animating at the allotted time for each slide. So, as you click on the Notes Slide, you see green – which means you are on track! When yellow appears, it is a reminder to wrap up. Red signals that it is time to move on to the next slide.  
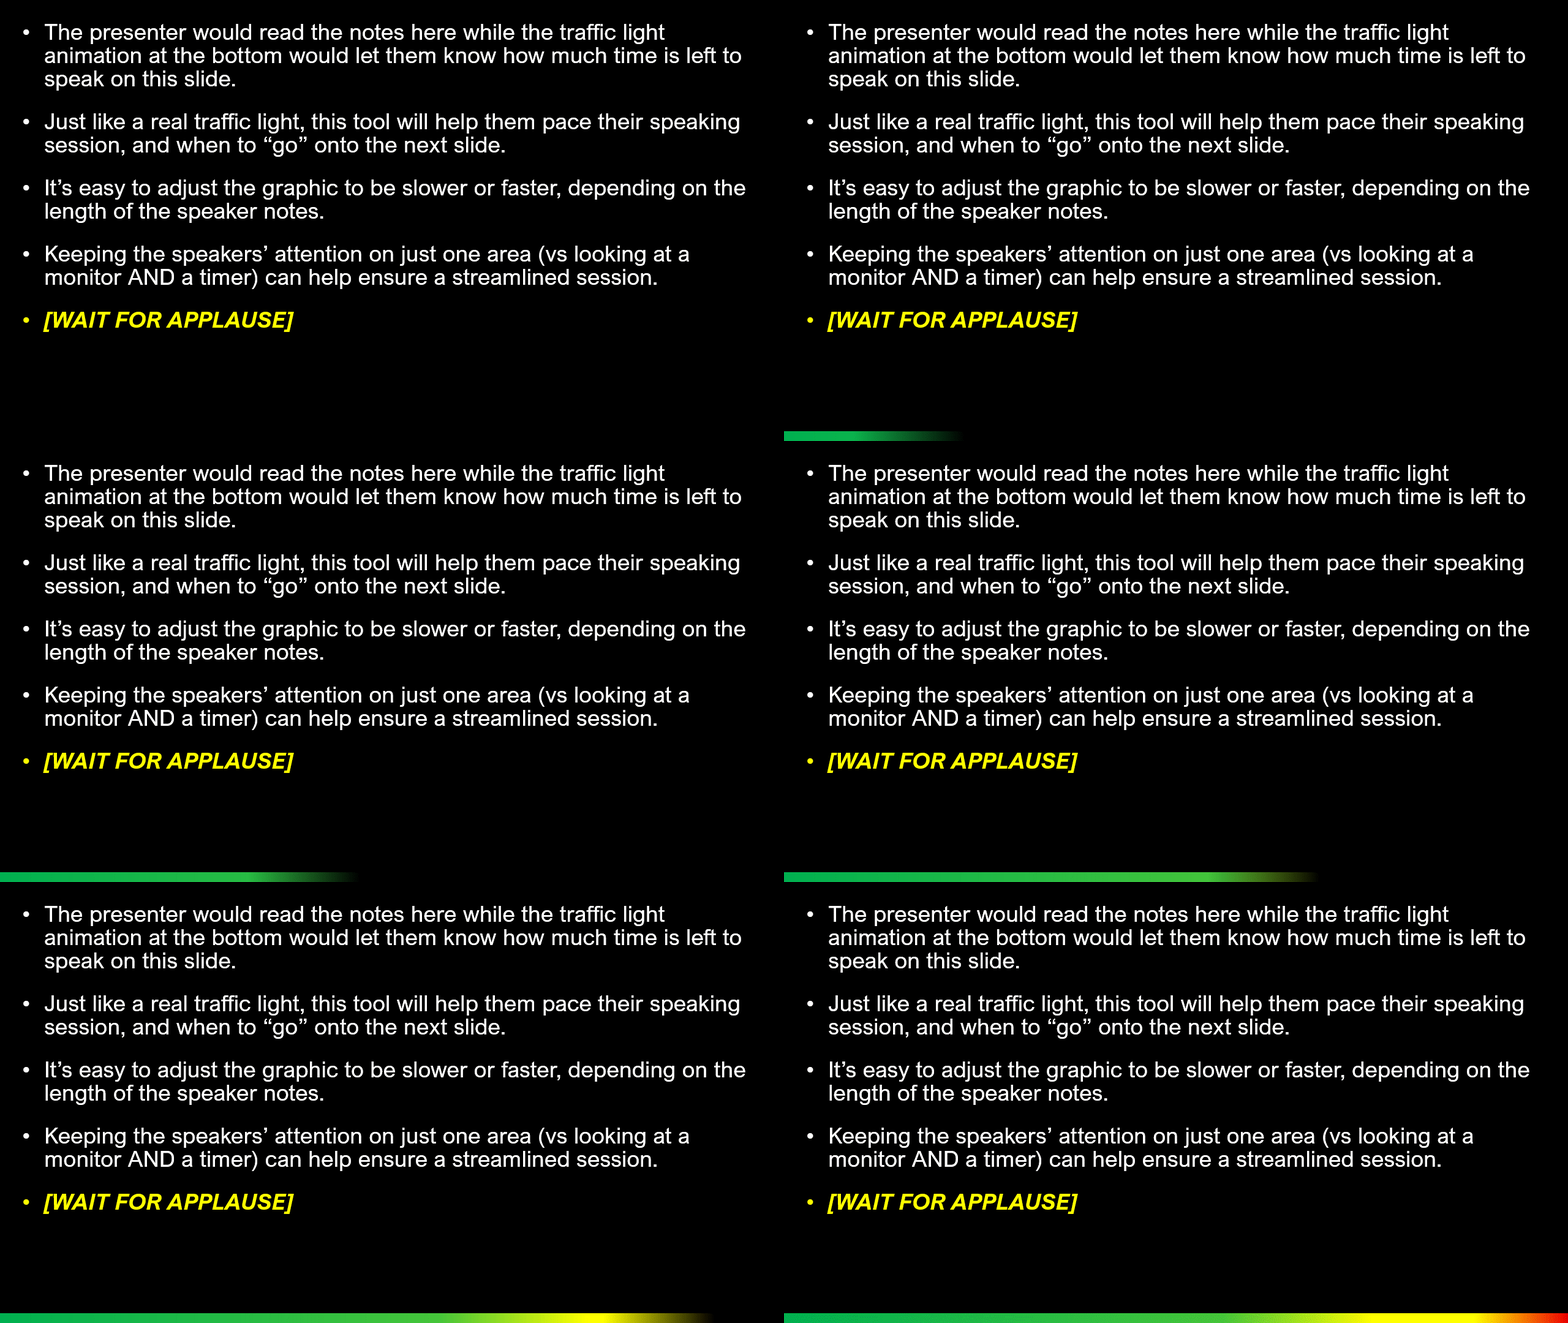
One key benefit is that the traffic light bar timing can be adjusted for each slide. The above example is a 10-second timer: green for the first 7 seconds; yellow from 8-9 seconds; red for the last half-second.  

The goal is to make this visual simple and intuitive for presenters to monitor their pacing on each slide – the animating colors are easier to visually process than looking at an actual timer.  

The result is less stress on stage, smoother timing, and audiences get the full story without the show running long. This is a small production trick that makes a big difference in live events and is quickly becoming a favorite among the executive teams we work with.  

Create Your Own Traffic Light Bar 

Creating a “traffic light” bar is simple: 

  • Add a thin PowerPoint rectangle  
  • Size it to fit across the top or bottom of the slide 
  • The goal is to be thin so it does not interfere with the notes, but is clearly visible as well 
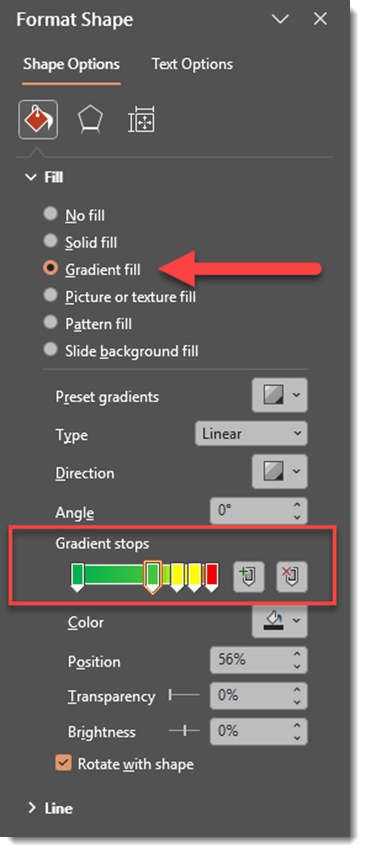
  • Fill the thin rectangle with a gradient 
  • Right-click the shape  
  • Select Format Shape  
  • Go to Shape Options 
  • Go to Fill 
  • Select Gradient Fill 
  • Add gradient stops for the green, yellow, and red sections, keeping the yellow section at the 80-95% area and the red at the very end.
Animate the Traffic Light Bar 

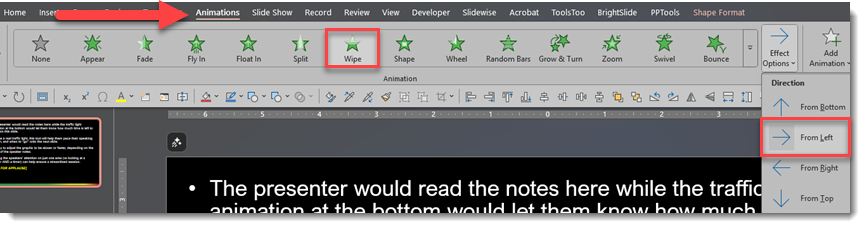
  • With the shape selected 
  • Go to the Animations tab  
  • Choose Wipe, and in the Effect Options, set to Direction from the From Left   
  • Set the animation to start With Previous 
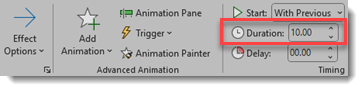
  • Update the animation duration to match the determined speaking time for that slide. For our example further above, the wipe animation duration is 10 seconds.  
TIP: Adjust the yellow and red gradient stop positions to adjust when each traffic light color displays.  

Happy Presenting 

With Notes Slides and a traffic light bar working together, presenters know what to say and exactly how long they have to say it. The setup is quick and easy, and the payoff is a presentation that flows smoothly, stays on time, and delivers a stronger experience for the audience. 

-Jake & the TLC Creative design team 

By |2025-12-12T11:28:26-08:00December 22nd, 2025|PowerPoint, Tutorial|

Animating an Instant Camera – Using Barbie Polaroids!

Bringing a Camera to Life with PowerPoint Animation 

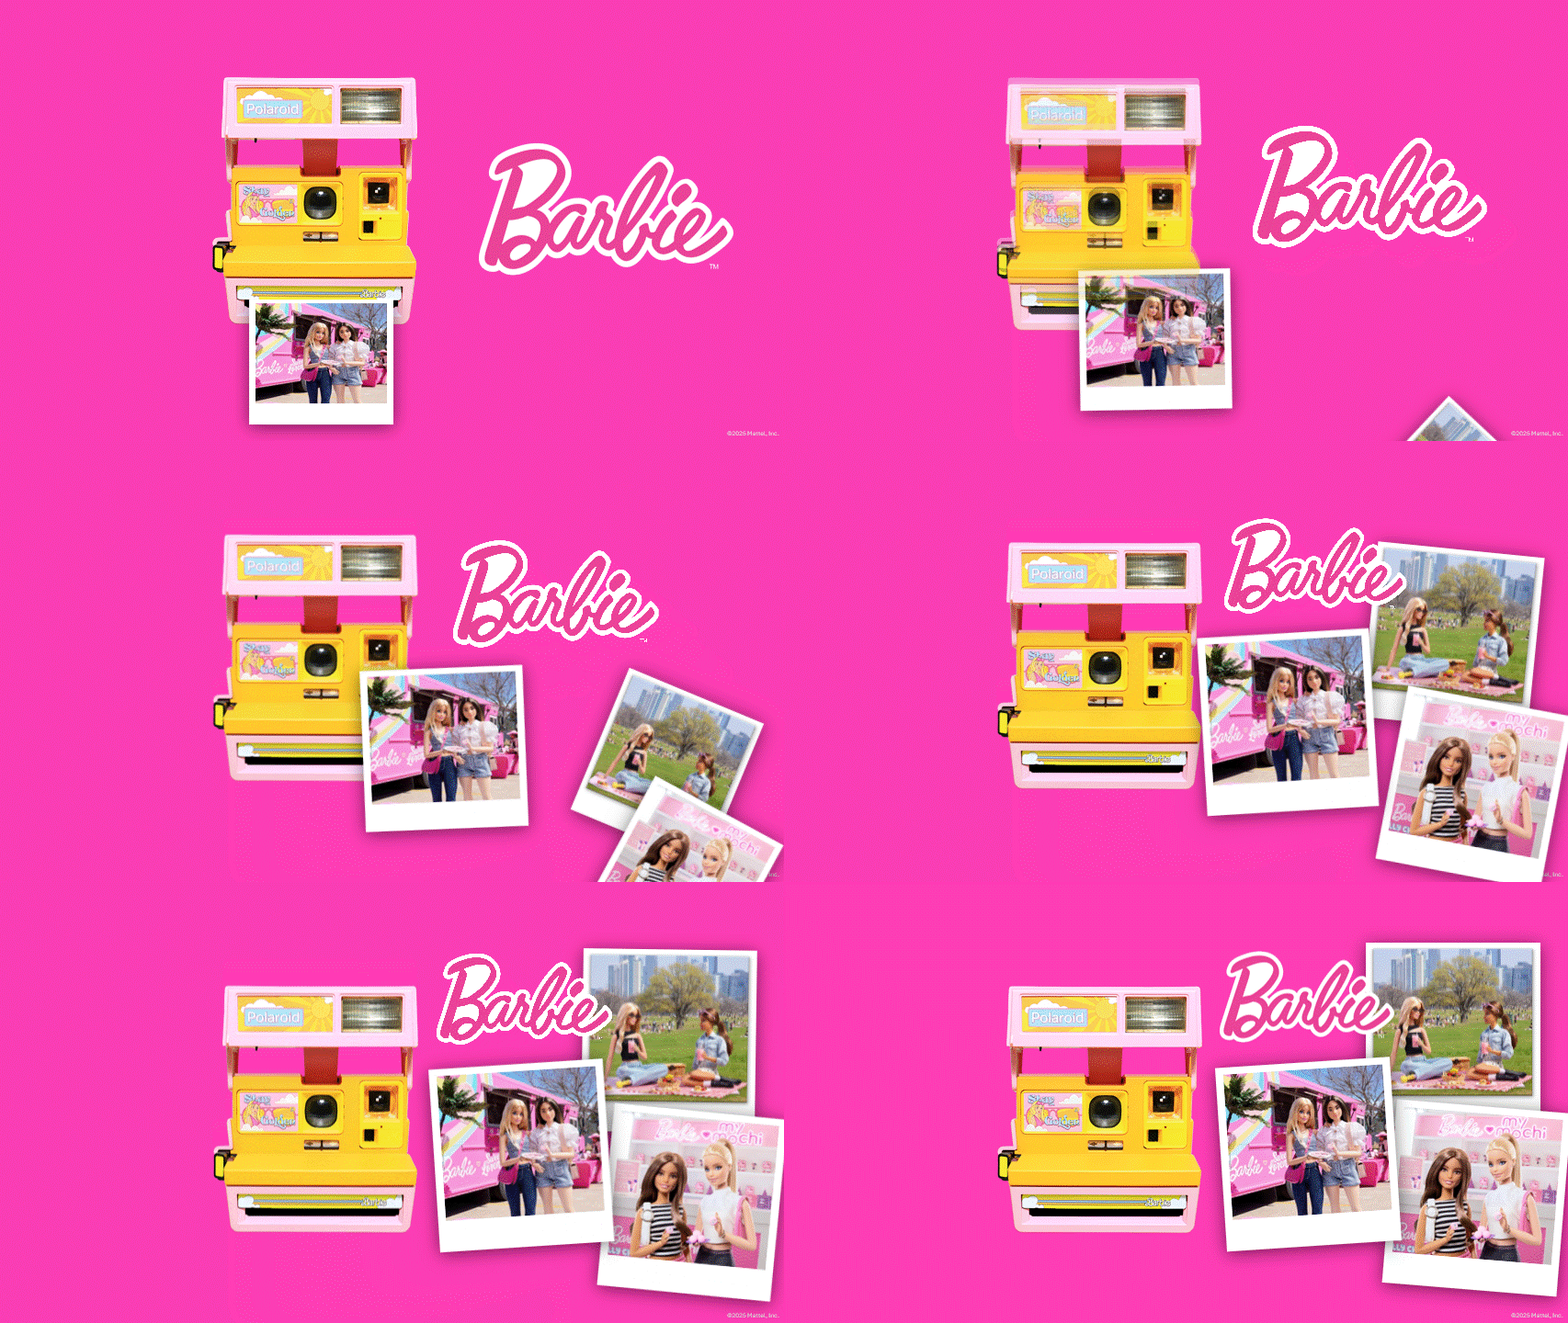
When one of our favorite brands approached us with a creative request, we knew we were in for a fun challenge! For this project, they wanted a camera animation — complete with a flash and a photo magically “printing” from it.  

The goal? Make it feel like the camera was taking a picture — all within PowerPoint. But like most creative adventures, this one had a few interesting twists behind the scenes. 

Preparing the Assets for Animation  

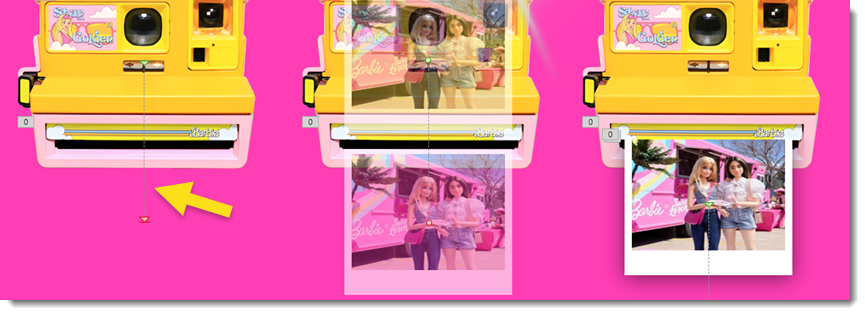
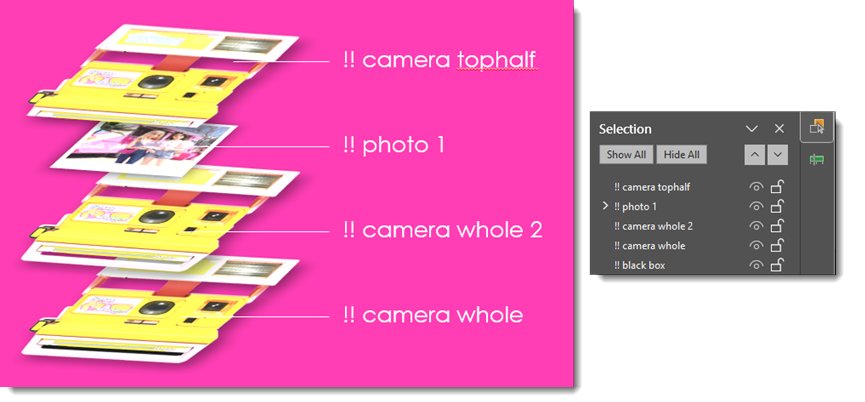
To create the illusion of a flash and photo ejecting from the camera, we needed to gather the image components and, in some cases, make some specific modifications. For the photo to look like it is coming out of the camera, we needed 2 layers of the camera image, with the bottom layer being the full camera and the top layer cropped right to where the photo will spit out. 

Making the Magic with Morph  

The star of the show? PowerPoint’s Morph transition. We used Morph to animate the photo “printing” out of the camera.

The trick was placing the camera on Slide 1 with a slightly squished photo, hiding under the first camera layer. Then, as the slide animates, the photo comes out of the camera on a motion path, making it appear as if it’s animating out of the camera at the correct angle (this is why we squished the photo).  

Then on Slide 2, with the photo already visible, we let Morph do the interpolation and stretch the photo to its normal un-squished size as it moves into position with the other two photos joining it. The illusion was smooth and seamless as you see here. 

However, this part of the animation was problematic at first – our camera was popping on top of our photo for a brief moment during the morph animation, which clearly looked wrong. With a few extra layers and proper labeling in the selection pane, we essentially added a duplicate camera image underneath the photo and animated it to appear as the other camera layer disappeared.

To further play into this camera moment, we used the flash burst asset created earlier and animated it to quickly appear and then disappear using simple fade-in and disappear-out animations timed to the sequence.  

The Final Touch 

To tie it all together, we made sure the colors, timing, and movement all aligned with our favorite doll’s playful and stylish brand. The end result? A moment of animated delight that felt right at home in this fabulously fun and pink world. 

– Christie and the TLC Creative Services design team 

By |2026-01-09T11:06:03-08:00December 8th, 2025|PowerPoint, Tutorial|
Go to Top