Software/Add-Ins

How To Correctly Capitalize Each Word

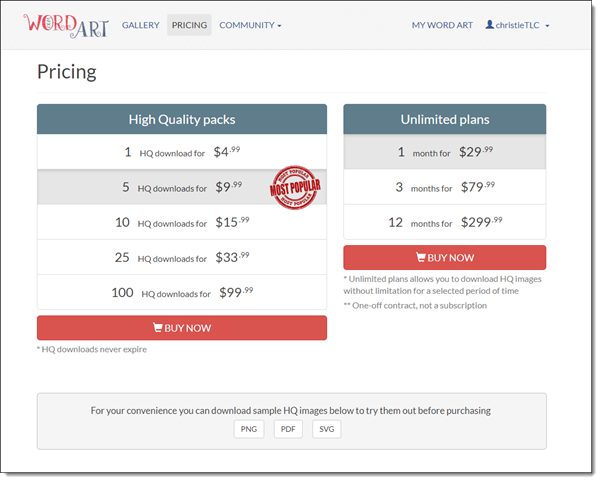
Capitalize My Title is an online app that applies the professional typesetting rules to title capitalization. You paste in a sentence and get back the same sentence updated to each word capitalized based on Title Case, AP/APA/Chicago/MLA style, UPPERCASE, lowercase, and more.

The top tabs select which typography rules to follow (I recommend APA or Chicago as these are the most common/universal)

The bottom set of tabs is the selection of Capitalization option.
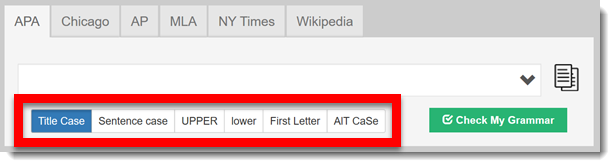
  • Title Case
  • Sentence Case
  • UPPER
  • Lower
  • First Letter
  • AIT CaSe

“Title Case” is the option I recommend using, as this is where many do not know the rules and ultimately have slides with content that is not aligned to the professional typesetting standards. A good rule of thumb is to capitalize words that are more than 3 letters long, unless it is the word at the beginning of a sentence, and unless that word falls into one of the many special instance rules.

1. Manually type or paste text into app. Text is automatically updated based on the top tab option and bottom tab option. 

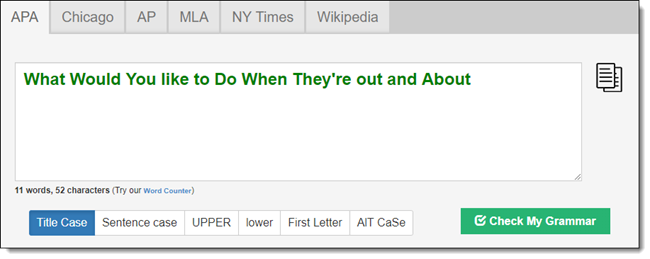
Note: tabs can be changed and see if any of the different rules or titling options change the results. As example: on this sample sentence I would capitalize “Out” but the official rules do not…

Tips for PowerPoint text

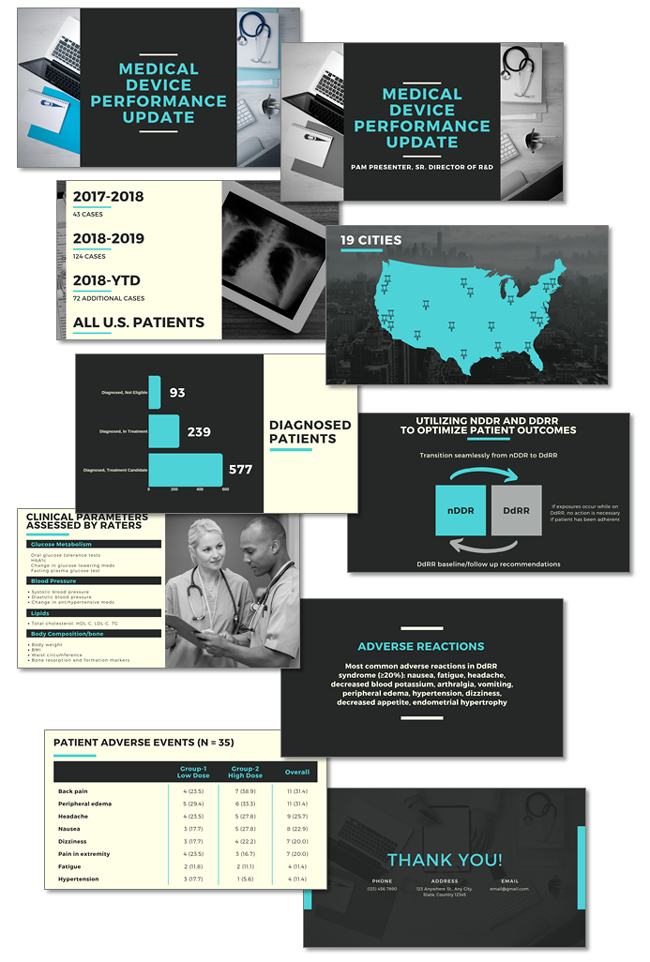
(From Christie on the TLC Creative design team) The first item I check on any presentation is going through all my titles to ensure consistencies. A helpful tip for medical presentation is to look for any disease, medical terms, drug names, etc. that should never be capitalized. Because the web app will not recognize these words, after I go through all slide titles using the “Capitalize My Title” website, I do a quick review to double check the specialty words are capitalized correctly as it was intended since the 

Troy @ TLC

By |2019-06-24T09:53:30-07:00August 8th, 2019|Software/Add-Ins|

Skype For Businss Official Retirement Date Set

Well, after the previous post, this is timely, although not eminently soon.

I just received an email from Microsoft announcing Skype for Business is officially being retired and we must move to Teams. The good news is, it is almost 2 years away (July 31, 2021)! I am hopeful that the Microsoft Teams interface will be streamlined (eg. to not take up nearly an entire monitor) before we are forced to switch over.

Troy @ TLC

By |2019-07-31T14:58:28-07:00August 2nd, 2019|Software/Add-Ins|

Windows Emoji Keyboard

Microsoft Windows added a very cool emoji keyboard, or at least a dialog to point and select emoji’s. To open, click the Windows Key and the period key.

Click any emoji and it will be added to virtually any app text box selected (😎🤷‍♂️👍, see I just added three emoji’s to this blog post – but being over the age of 35 I have no idea what I just said…). 

There are 3 tabs; Emoji (full color), Kaomoji (traditional ASCII emoji’s), and Symbols (well, symbol characters)

Troy @ TLC

By |2019-07-24T16:52:12-07:00July 30th, 2019|PowerPoint, Software/Add-Ins|

Stylized WordCloud Generator by wordart.com

WordArt.com is an online app that creates unique stylized word art.

Think of a word cloud, a common presentation request, but created in the shape of an image. The site offers a variety of customization tools ranging from custom fonts and specific colors to a wide range of art images to create the word cloud in.

This is not an entirely no cost site, but PNG and JPEG files are free to download. PDFs and scalable SVGs are available as part of the $4 to  $299.99 plans.

For our presentation needs, the sites free options are perfect. You do need to create an account to access. 

1. After logging in click the “create” button.
2. The next window is the workspace. On the left is the customizing area to add text and styling. The first tab “words”, is where to Add, remove, reorder and import words.


3. At any point to review the art, simply click the “Visualize” tab to generate the finished work.

4. The shapes tab is where you can pick any shape provided as well as upload your own
(.png and .jpg, not vector formats).

5. A variety of fonts are readily available to use, as well as the option to add a custom font under the “Add font” button.

6. Under the layout tab, are different text orientations

7. The Style tab is where you can customize the colors of the text and the background colors. NOTE it is especially important to remember to click the “Make Transparent” button before saving the art as a PNG, otherwise when exporting as a PNG it will retain the white background.

8. After all customization, click the “Visualize” button to generate the word cloud. You can click the button several times to get a different result.

9. Under the download tab are several options. 2 free standard PNG and JPEG options. The HQ options have payment options.

Troy @ TLC

By |2019-07-09T12:28:44-07:00July 18th, 2019|Software/Add-Ins|

Lorem Ipsum Generator (by Websiteplanet)

The Websiteplanet Lorem Ipsum generator is easy to use and quickly creates standard Lorum Ipsum text.

Lorem Ipsum text is a long standing print layout tool and is a good tool to use for any PowerPoint designer. As example: when creating a template, we generally supply sample slides with lorem ipsum text filling text placeholders so slides can be viewed with a quick simulation of real-world content.

The options can create any number of words, sentences, paragraphs or lines. Set the parameters and click GENERATE. The website instantly creates the text, which can be copy/pasted directly into slide text placeholders.  

Troy @ TLC

By |2019-07-09T12:28:16-07:00July 12th, 2019|Software/Add-Ins|

Mixkit – FREE and Professional Videos for Your Next Presentation

Mikkit a site by Envato has video footage that is free to download. No account or other log in is required, just search and download.

We found the collection is fairly small. Categories range from abstract and animation to transport and lifestyle.

All content is under the MixKit license. Our take on the licensing is it permits you to download, copy, modify, distribute, publicly perform and broadcast the Items. Rights are non-exclusive, worldwide, sub-licensable and attribution is not required (complete user terms are here).

Video files are: 1920×1080, .mp4 file format. 

[KGVID]https://thepowerpointblog.com/wp-content/uploads/2019/07/unnamed-file.mp4[/KGVID]

Troy @ TLC

By |2020-04-20T20:22:20-07:00July 10th, 2019|Software/Add-Ins|

How Long Will It Take to Say That?

When developing a presentation, factoring in the talk time is essential. Many of our presentation design projects are based on a talk script. We will run the script through an app that gives us an estimate of how long it will take for that amount of text to be spoken.

One free online tool for this is “Words to Time“. It has some great features to get a better talk time estimate;  number of words and reading speed.

It is very fast and easy to convert words to an estimated time. They offer a simple conversion chart for quick reference as well.

As an example, we converted Abraham Lincoln’ Getty Berg Address.

Lincoln’s speech was a small 267 words in total. Using the average reading speed (approx. 130 WMP) Words to Time estimated Lincoln’s speech to be about 2 minutes. According to the history, this is completely accurate! (Source: https://www.americaslibrary.gov/jb/civil/jb_civil_gettysbg_1.html)

Troy @ TLC


By |2019-07-01T13:20:05-07:00July 4th, 2019|Software/Add-Ins|

Canva Presentation Animation Explained

Canva adds notices that if the account is upgraded to a “Pro” account, animation features are added. But the animation is not what you expect. Yes, the content on each slide has entrance effects applied. No, you cannot control the animation effects in any granularity. 

When logged in to your Canva account and have a presentation open, in the top right of the editable deck, there is a drop down button with ANIMATION as an option.

There are seven animation options; Fade, Pan, Block, Rise, Breathe, Slide, Instant. The critical thing to understand is the animation style chosen applies to EVERY object on EVERY slide. There is no granular control over what objects animate (everything does) and no selecting different animation styles, or no animation, for specific slides. There is also no customization of the animation duration/speed or ability to add on-click animations to elements on a slide. 

The best way I can describe Canva’s presentation animation is it is a combination transition effect that applies an auto entrance to all elements on a slide.

The other critical item to understand about Canva’s presentation animation is an animated presentation is only available when exported as a .mp4 (or .gif). If an edit is made to the presentation, it needs to be exported again to add the animation.

In exporting our sample presentation to view the various animation styling we found a bug that altered the content of our bar chart (if this was PowerPoint I would submit a bug report to the Dev Team). The axis in the presentation itself looks correct but when exported as an mp4 the X axis label text becomes stacked (leaving the data to be interpreted as wrong).

Here is the demo presentation used for testing animation:

FADE Animation

[KGVID]https://thepowerpointblog.com/wp-content/uploads/2019/06/unnamed-file-2.mp4[/KGVID]

BLOCK Animation

[KGVID]https://thepowerpointblog.com/wp-content/uploads/2019/06/unnamed-file.mp4[/KGVID]

RISE Animation

[KGVID]https://thepowerpointblog.com/wp-content/uploads/2019/06/unnamed-file-3.mp4[/KGVID]

Troy @ TLC


By |2019-10-28T10:09:50-07:00June 28th, 2019|Software/Add-Ins|

Canva Presentations by the TLC Creative Design Team

Today I am posting Canva presentations developed by several of the TLC Creative design team, along with their likes and dislikes of working with Canva. The key takeaway is Canva is a capable presentation creation platform and presentation design is not so much about the application used, but how visual design is applied to the content. The below presentations are all unique in visual styling despite everyone working from the same content outline. Reading through the likes & dislikes, the focus is on design limitations Canva currently has (compared to PowerPoint, which has 20 years of refining the application), which require more design time to manually format content to create the desired effect.

Presentations developed by the TLC Creative design team, all entirely in Canva Presentation:

Amber: 

Christie:

Jake: 

Sara:

The Good and Bad the TLC Creative design team noted while working on this project:

The Good:

1. Nice selection of ready-made templates

2. Good library of assets, making it easy to drag and drop for your presentation with a lot of free options

3. Web-based, can access designs from any web browser

4. User friendly for first-time use with an intuitive interface

5. Translates to a website seamlessly

6. Can share your slides as a template

7. Great, preset text styling options

8. Exports nearly perfectly to PowerPoint (no animations, poor backend Master Slide & Layouts, but slide level is very good)

9. Animation tool animates all elements on slide with one click (easy to use, nice visual effect, good for non-designers. Beyond the simple 1-click setup animation customization is a negative – not an option)

10. Free version is good enough to use, enough features to not have to go to premium


The Bad:

1. If there is no internet you can’t access and no offline app version

2. No table formatting options

3. Cannot animate individual elements

4. Cannot copy and paste elements from slide to slide in same position

5. The line width can’t be manually set 

6. No color picker/eye dropper tool

7. Template does not control font of added text boxes. Every new text box uses the Canva default font

8. Cannot change multiple text box font sizes or font color in one action, have to do each text box separately

9. Cannot have more than 1 font size per text box

10. Limited object grouping

11. No quick ribbon for tools

12. Cannot customize chart styling or separate actions for axis’s (chart styling and options are very limited!)

13. Cannot add text inside shape, must stack separate text box on top of a shape (ugh!)

14. Adding a new page, or changing a layout (which has problems too), does not open to that template, leaving the user to hunt through the template options to find the template (tip: remember the categorie and name of the template selected!)

15. Cannot customize animation per slide, or animation on a slide

16. Master layout place holders are skewed

17. Minimal set of formatting tools

18. Presentation features seem geared more to image/visual heavy presentations rather than data/copy oriented ones

19. Even with premium not all assets are included

20. No image/asset search filter to show just the images included with the plan (do not want to search through 1,000’s of pay images)


Troy @ TLC

By |2019-06-27T08:46:06-07:00June 26th, 2019|Software/Add-Ins|
Go to Top