New Presentation Podcast Episode!

Listen, and join the conversation, as Troy, Nolan and Sandy share their 13 bold presentation predictions for 2023! Listen here.
Listen, and join the conversation, as Troy, Nolan and Sandy share their 13 bold presentation predictions for 2023! Listen here.
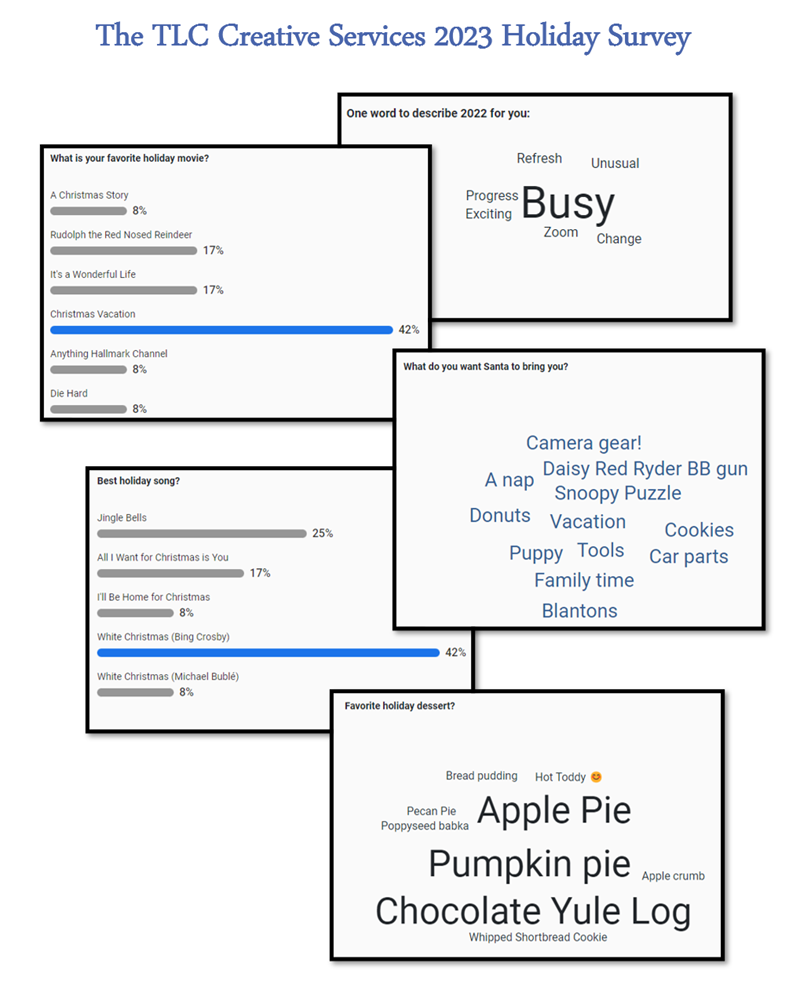
Those on the TLC Creative Christmas was designed in-house (thank you Lori!). In addition to fun, creative design and holiday message, we included a 5-question online survey. Here are the results received to date, Happy Holidays!
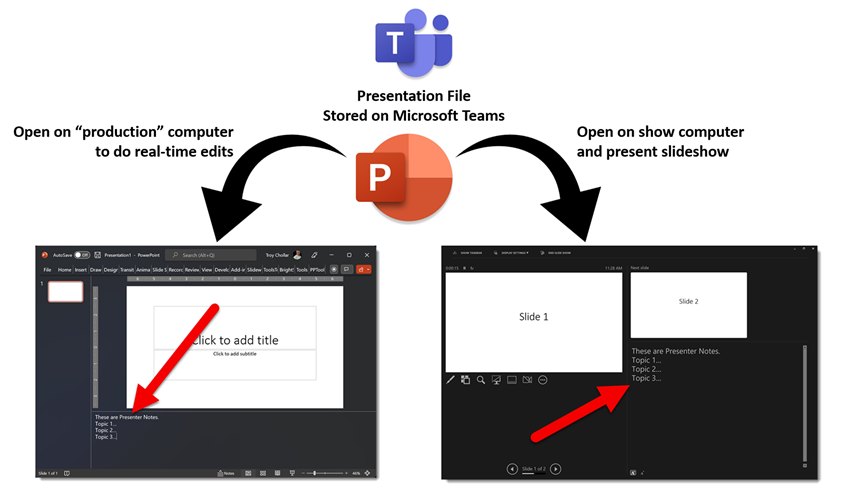
As a follow up to the previous blog post (Edit Presenter Notes Live While Presenting!), I have been leveraging Microsoft Teams real-time collaboration (which I find an amazing tool!) for updating presenter notes for quite a while. The process is very easy, assuming you are running Office 365 and have a Microsoft Teams account. The presentation file is uploaded to Microsoft Teams. I open the PowerPoint file using the OPEN > OPEN IN APP, so desktop PowerPoint is used (vs. Teams or PowerPoint for Web). The SAME presentation is opened on the show computer (the computer running the slide show) and on my production computer. The only limitation is the internet connection speed (which is a constant concern while working in a hotel ballroom!). My goal is to NOT touch the show computer, I like it to just present – never lose focus on the slide show, never escape out of slide show.
I make edits on my production/design computer, and they show up on the presentation computer – including presenter notes!
Troy @ TLC
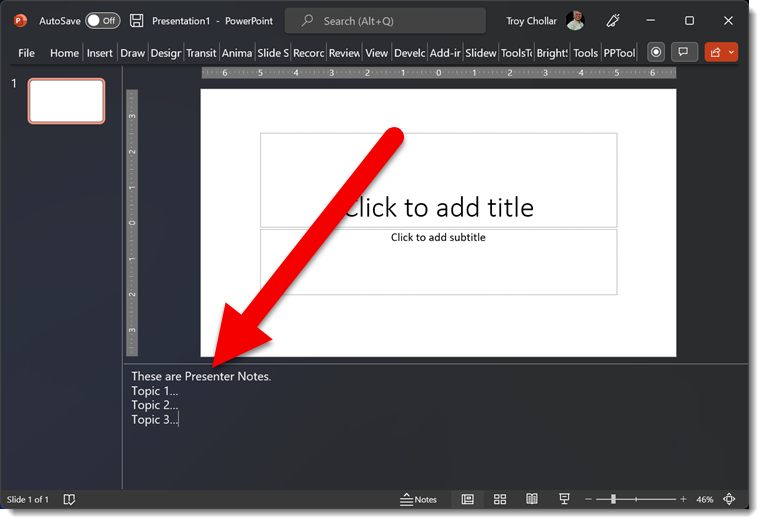
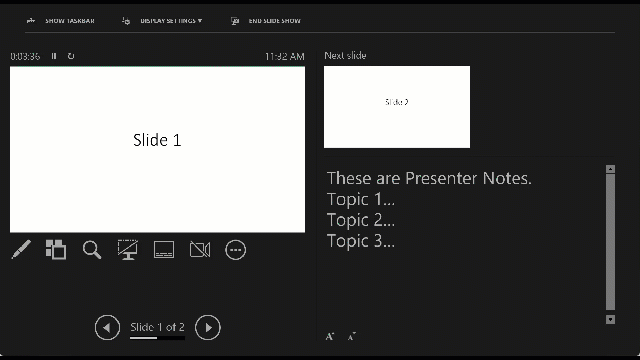
The ability to edit presenter notes, while presenting, is now available on both Windows and Mac desktop apps! In edit view, presenter notes are added, and edited here:
And when presenting, those notes display here in Presenter View:
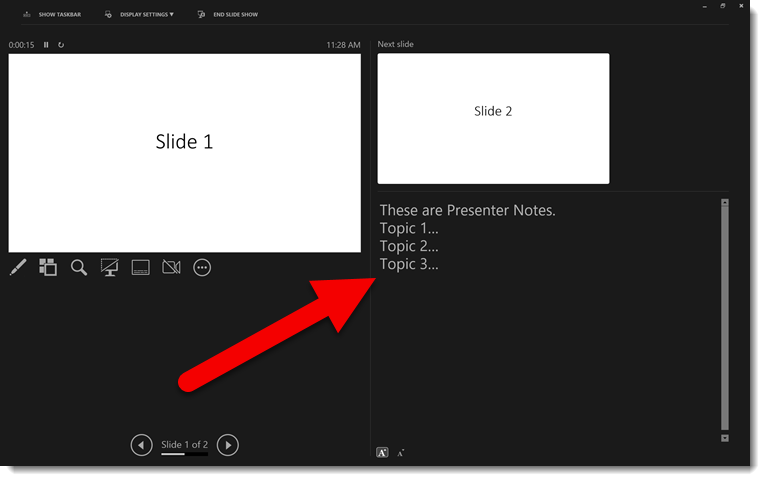
What is new is the ability to in Presenter View click into the Presenter Notes area. The notes area gets a white outline, indicating the focus is there. While the notes area is the focus, the presenter notes can be modified!

This is great for all presenters and a great addition to the functionality of PowerPoint!
Troy @ TLC
Slidewise, v1.8, has a new amazing feature – a slide transition audit! The dev team at Neuxpower was super responsive when I suggested a slide transition audit. And the final release is better than my simple description and request! Here is a quick look at the feature:
Open a presentation (that is a local file, no support for Teams/network files – yet). If running version 1.8 or higher, a new icon is available in the nav bar.![]()
The Transitions tab shows an audit of the presentation showing what transition is set for each slide, the duration of the transition, and if an auto advance has been set. On this example presentation I can within moments identify:
![]()
The default view is displaying in slide order. But the information can be filtered to sort by transition type (eg. see all of the FADESMOOTHLY transitions grouped, the MORPH transitions grouped, etc.), duration or auto transition.
But wait there is more!! This is not just a super helpful, consolidated list of all slide transitions. Click any specific slide (highlighted in green in below image), that slide is selected and updates to that slide can be made on the Transitions tab.
![]()
The Slidewise add-in website is here.
Troy @ TLC
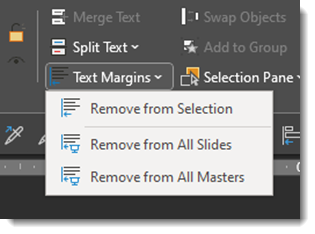
Here is something I do dozens, if not hundreds of times per day. Select a text box > open the Format Shape pane > find the inner margin settings.
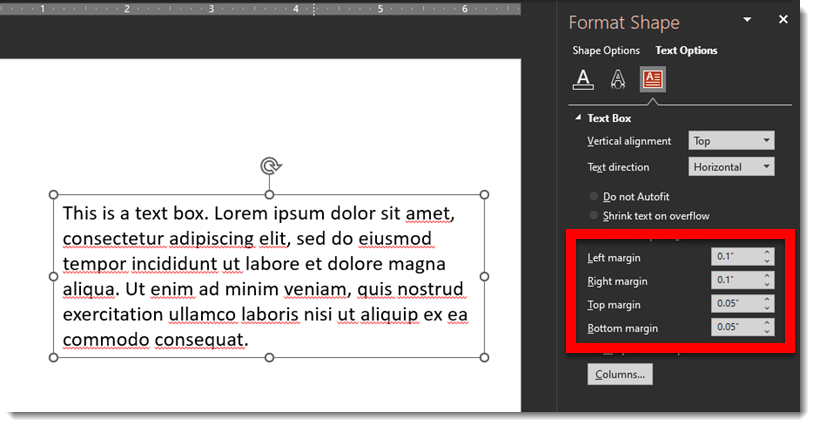
Then change all to zero’s

Recently I added this amazing icon to my QAT
It is the “Remove (inner margins) from Selection” feature now in Brightslide.
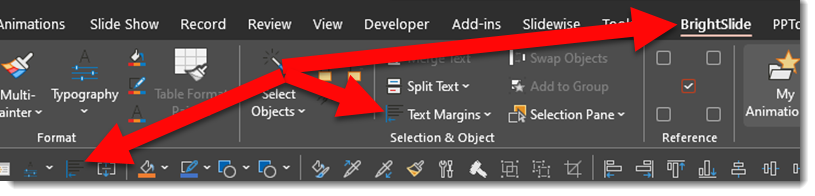
The Brightslide “Text Margins” has 3 options for removing inner margins; from selected shape (this is the one added to my QAT), from every text box on every slide (wow!) or from all Master Layouts (which means any text box associated with a master placeholder will have the inner margins set to zero, but all individual text boxes on slides not connected to a master layout will remain as set).
And the Brightslide PowerPoint add-in suite is FREE from the super people at BrightCarbon!
Troy @ TLC
For a recent project (can we all say “pharma deck”) I needed a medication/pill icon.
But on this recent project I created option 4, which is really spending some additional time on Option 3 and making it great! Here are a few of my full editable, resizable, recolorable, ready to use “pill” PowerPoint shapes.
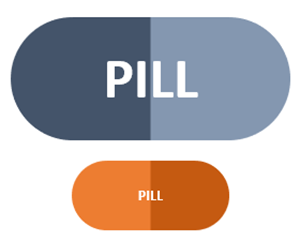
The pill shape is simply a rounded rectangle PowerPoint shape with the rounded corner adjuster moved inward to create fully rounded ends to the rectangle.
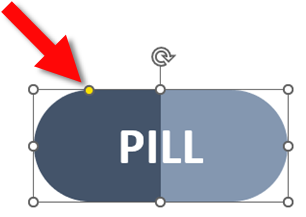
It is also a 2 color gradient, with 4 color stops.
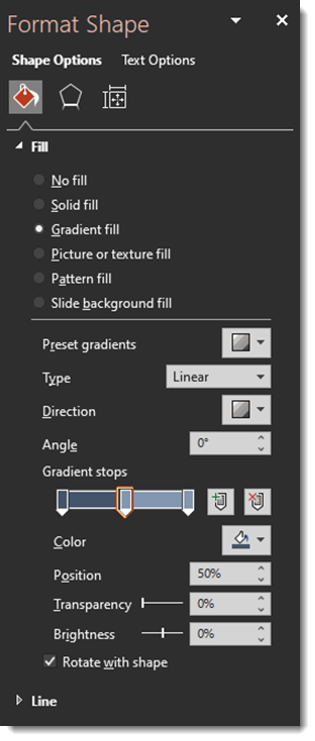
The tricky part is manually entering the middle color stop positions vs. click-and-drag. Set both to 50%, which eliminates any gradient soft edge and completes the 2 color pill icon.

For my presentation, I also moved away from a flat icon styling to a slight 3D bevel look by using PowerPoints 3D shape option.

Download the PowerPoint Pill Shape on a slide HERE
Troy @ TLC
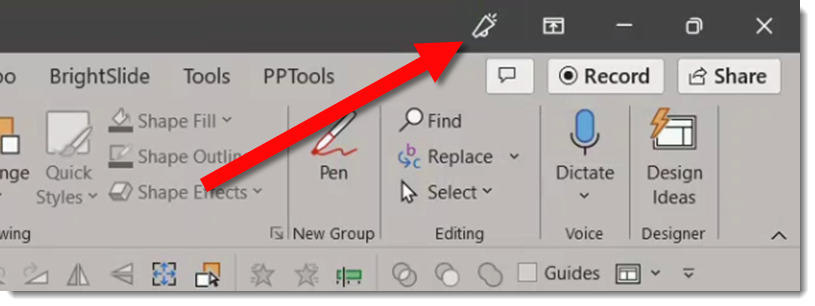
I just worked with another designer that noted that their Office had not yet updated to the new “Windows Refresh” – the updated app styling. Sure enough, PowerPoint on their computer had the “rectangle” interface still.

The solution, at this time because the “refresh” has rolled out to all Office 365 accounts now, is to click the “Upcoming Features” megaphone icon.
Scroll down the Coming Soon content, find the “Try the Experience” toggle, turn it on, and restart PowerPoint.
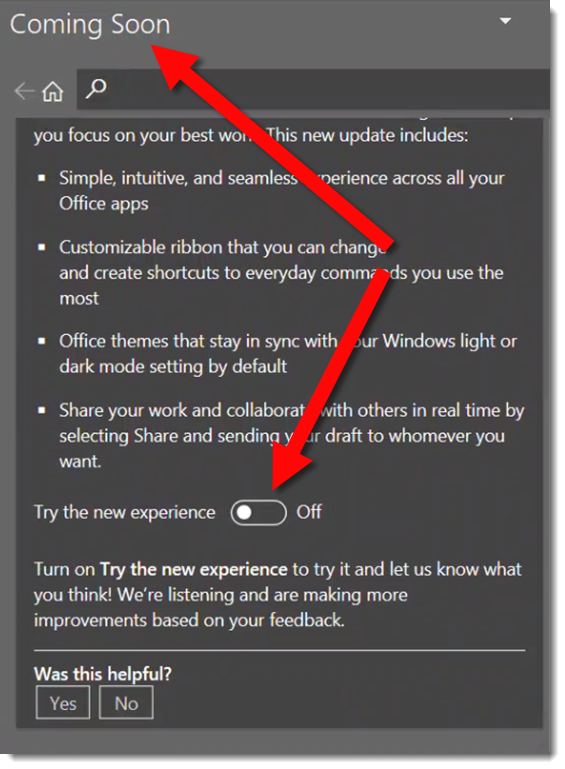
The app interface for all Microsoft Office should now be on the most recent, “rounded corner” interface 😊

Troy @ TLC
With creative use of PowerPoint shapes and gradients 3D objects can be created directly in PowerPoint! Note: these are 2D shapes with a 3D appearance, not true 3D models.

For the final blog post in this PowerPoint gradients series, is a step-by-step process for creating this 3D sphere.
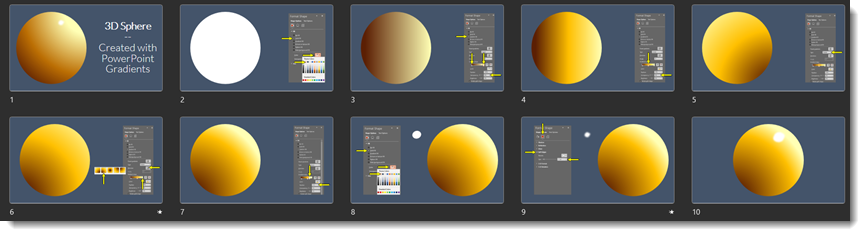
Download the step-by-step slides here.
Troy @ TLC