The PowerPoint® Blog

I work with PowerPoint on a daily basis and I am very honored to be a Microsoft PowerPoint MVP. We have a talented team of presentation designers at TLC Creative Services and ThePowerPointBlog is our area to highlight PowerPoint tips, tricks, examples and tutorials. Enjoy! Troy Chollar

GenNext Media Video

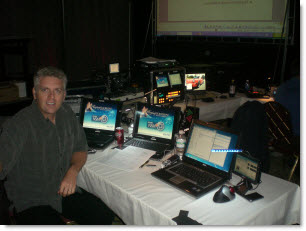
Although I mostly highlight PowerPoint related projects, I do a number of video projects each month. Here is one that was fun and an interesting topic (Social Media). Plus it is easy to highlight as the video is posted online (vs. being used at a meeting or distributed on DVD).

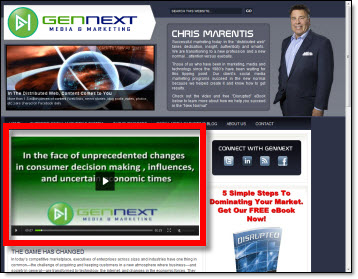
Here is the GenNext Media homepage, which highlights the introduction video I storyboarded from website content and eBooks (used PPT for storyboard phase) and then developed in a video editor (I use Vegas Pro).

– Troy @ TLC

By |2016-09-16T09:15:19-07:00December 14th, 2009|Portfolio|

Check Your Internet Connection with SpeedTest.net

This is a newly discovered website for me that is pretty nifty – speedtest.net

Here is the full webpage:

The first thing it does is check your IP address and pin point you on the U.S. map. Then it locates a close server in its network to run a speed test. Here it shows me in San Diego (my office):

Click the ‘Begin Test’ button at the top and see what your connection speed is – both download and upload. Here I am pretty close to what my service is (20/5):

– Troy @ TLC

By |2016-09-16T09:15:47-07:00December 12th, 2009|Resource/Misc|

More Options in Format Shape Dialog (for PPT 2010)

I had a few emails from the Nov. 30 post “#13 Gradients” about the additional items now in the Format Shape dialog. Yep, the options available in this dialog has increased! There are literally dozens of improvements that I did not cover in my top 15 and I look forward to spending the 2nd half of 2010 (after Office 2010 is released to retail) with in-depth posts.

Here is the dialog from the previous post:

When you open the Format Shape dialog some of the currently available features get a full details pane like Reflection and Glow & Soft Edges.

Some features have more options available. “Picture” from PPT 2007 gets expanded to Picture Corrections and Picture Color.

And there are new dialogs such as Crop (see Nov. ## post), Artistic Effects (very cool stuff that probably should have been in my Top 15 list) and more with Size, Position, etc.

– Troy @ TLC

By |2016-09-16T09:16:08-07:00December 10th, 2009|Tutorial|

#15 – Presentation Info (in BackStage)

Lots of attention seems to have been given to the administrative functions of PowerPoint (print, save, etc.). Everything is now clustered in the ‘backoffice’ and there is lots to talk about. But one item I like is the ease of finding the details about the presentation you are working on.

Simply go to the backoffice and info.

The right side window gives all of the presentation vitals, which were almost all available in previous versions – if you knew where to look.

1. Path to file
2. Thumbnail of presentation
3. All vital statistics of presentation (ranging from # slides to author information)

– Troy @ TLC

By |2016-09-16T09:16:59-07:00December 6th, 2009|Tutorial|

#14 – Customizable Ribbon

One item that really kept me from moving to PPT 2007 was the inability to customize the Ribbon. The QAT was the best offering and I have made good use of it. With PPT 2010 the main Ribbon becomes customizable!

When you look in the PowerPoint options, next to ‘Quick Access Toolbar’ is a new item “Customize Ribbon” – Yeah!

When open it uses the same interface as the QAT customization dialog.

But it has an easy to see drill down navigation that goes from Tab to Section to Button. Here I have gone into the Insert tab and added a new section.

The new section can easily be renamed, which I have called “Page”

Within my new ‘Page’ section I have added the ‘New Slide’ button (funny how the Insert tab does not have ‘insert new slide’ on it…).

I then moved the position of the Section to be the first item – or far left on the Ribbon.

Here is my custom Ribbon. The Insert tab has the ‘New Slide’ button on it – right where I would expect it to be.

– Troy @ TLC

By |2016-09-16T09:17:23-07:00December 4th, 2009|Tutorial|

#13 New and Improved Gradient Tool

Gradients in PPT 2007 made so many great things possible (eg. not having to go out to Photoshop). But the User Interface was not very user friendly (okay it scares most people in my training classes). Now PPT 2010 gives the gradient fill tool a GREAT User Interface!

Everything works the same, uses the same dialog boxes, accessed the same, etc.

Everything new is found in the Gradient Stops dialog. Here is my sample gradient with 4 stops:

The drop-down menu approach of PPT 2007 is replaced with a visual bar that shows each stop and is a live preview of the gradient. To change attributes of any stop, just click on the stop “arrow” – easy!

The Stop Position slider is gone as it is now integrated into the gradient bar. The Transparency slider remains and works the same. What is new is the Brightness slider. Here is my sample gradient with Stop 3’s Brightness at 100% – white:

Here is the same gradient with Stop 3’s Brightness at -100% – black:

0% is the true color with various tints created as the Brightness slider is used. I am not certain how much I will use this feature, but it’s there.

The real improvement is the Gradient Bar with its integrated Stops and live preview, something I will be using a lot!

– Troy @ TLC

By |2016-09-16T09:17:40-07:00November 30th, 2009|PowerPoint, Tutorial|

#12 – Sections

For organizing content, multiple-topic or multiple-speaker presentations the new SECTIONS feature is fantastic! Basically it is an improved way of organizing slides when viewed in the slide sorter (also seen in the thumbnail pane).

Here is my sample presentation – 28 slides.

On the home tab the Sections menu a section can easily be added.

Here is the presentation divided into 3 sections.

I collapsed the first two sections so only the last section (slides 20-28) is visible.

Same setup, but I collapsed the third section and expanded the second.

Sections can easily be renamed (eg. topic, speaker, etc.)

The sections also are seen and usable in the thumbnails. This is the same view as above, with the 1st and 2nd sections collapsed and the 3rd section visible.

Note: collapsed sections still view in slide show. The sections are only for organization and do not affect what is seen during a slide show.

– Troy @ TLC

By |2016-09-16T09:18:01-07:00November 28th, 2009|PowerPoint, Tutorial|

#11 – Remove Background Tool

I spend a lot of time in Photoshop preping images for presentations. But I may be able to spend a bit more time in PowerPoint thanks to this new tool. Tucker, one of the Microsoft developers described the way this really great new tool works is the “magic coding”. That’s a good enough description for me as it actually works better than Photoshop’s ‘magic wand’ tool.

1. Insert an image you want to remove the background on – typically I would open the file in PhotoShop, drop out the background, save the image as a .png with transparency, and then insert into PowerPoint. Here the image looks great, but I want the template background to show through, which is not white.

2. With image selected go to the format(tab) >> Background Removal Tool

3. The tool takes it guess at what is not wanted (purple mask)

4. Modify the selection with the + and – tools

5. Here is the image with all of the include image(+) and remove image(-) markers.

6. End up with a great image that allows the background to show!

The effect is not permanent, the background can be further modified at any time. The background remeval can be reset back to the original image too.

– Troy @ TLC

By |2016-09-16T09:18:43-07:00November 24th, 2009|PowerPoint, Tutorial|
Go to Top