Text boxes in PowerPoint are like mini-word documents. Each one has its own margins, tabs and formatting.
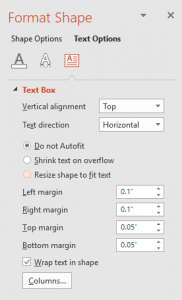
The text box formatting options (margins, tabs, line spacing, etc.) for each text box can be modified in the Format Shape dialog. Select a text box > FORMAT > open the FORMAT SHAPE pane > TEXT OPTIONS > TEXT BOX. Or right-click any text box and select FORMAT TEXT EFFECTS > TEXT BOX.
Just one example of where modifying a text boxes internal margins can help the visual layout is when a design needs the text to flush align with other objects, vertically and/or horizontally, the text box margins interfere with the results.
For this example, it is making the 3 objects, 2 boxes and 1 text box, all with the ALIGN LEFT tool, vs. manually adjusting the position of the text box so the text inside it is visually aligned with the objects above it.
The left edge of all three align, but visually the text is indented, but they are actually aligned to the left edge.

Instead of manually moving the text box left to visually align the text with the two boxes, adjust the text box margins – set the left margin to zero.
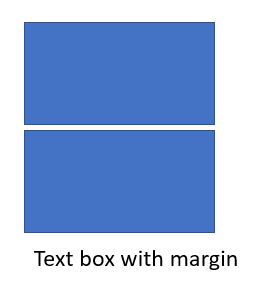
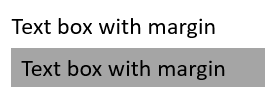
To illustrate, here is are two text boxes. They have identical formatting, but the lower one has a solid fill to show the text margin. The top text box has a zero left margin. The bottom text box has the default .1″ inset margin pushing the text away from the true left edge.
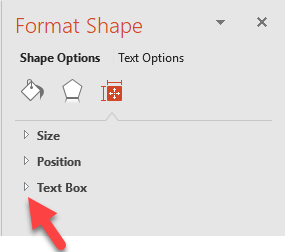
To make the text align to the left edge, go to the Format Tab and click on the small arrow under the text portion for the FORMAT SHAPE menu.
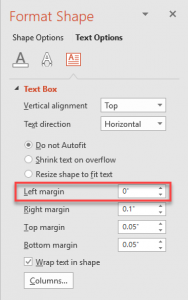
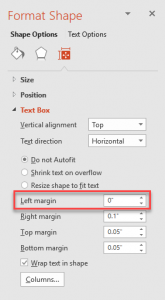
Select TEXT BOX in the left column and on the right in the INTERNAL MARGIN section change the LEFT to “O”.
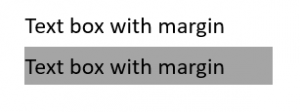
The text now aligns flush to the left edge.
At TLC Creative we are constantly working with text box internal margin settings to create visual layouts. It is easier if each text box is visualized as a mini-Word document with it’s own settings.
Troy @ TLC